Posted on

Enfoque en ciertos tipos de cerveza: Dry Irish Stout

[Este artículo apareció en la edición de Marzo/Abril 2017 de la revista Zymurgy]

Por Amahl Turczyn

Varios escritores sobre cervezas han opinado acerca de las historias entrelazadas de las cervezas negras porter y stout. Algunos sostienen que la “stout” simplemente hacía referencia a cualquier cerveza fuerte; otros sugieren que es igual de posible que la stout haya existido como un estilo propio en paralelo con la porter ya desde fines del siglo XVII. En lo que los historiadores sí están de acuerdo es que Guinness fue fundada en Dublín por Arthur Guinness cuando alquiló una cervecería en St. James’s Gate, y que la empresa que fundó fue la responsable directa de que la dry stout haya llegado eventualmente a todo el mundo.

Varios factores contribuyeron al éxito de Guinness. Uno era la proximidad de la cervecería al Grand Canal de Dublín, que era perfecto para transportar barriles de cerveza y recibir suministros para fabricar cerveza. Los cereales cultivados en el centro de Irlanda también eran accesibles y fácilmente obtenibles. Otra ventaja era una fuente constante de excelente agua para cerveza, la cual en esa época también provenía del canal.

El mercado dio un giro favorable para la empresa en 1777. Guinness había estado produciendo porter para competir con la porter importada que se fabricaba en Londres, pero debido a los impuestos especiales existentes, los cerveceros de Dublín estaban sujetos a impuestos mucho mayores. En 1777, esos impuestos se levantaron y disminuyó la importación de porters londinenses, lo que le permitió a Guinness ver mayores ingresos y ampliar el negocio. A partir de entonces, la empresa pudo comenzar a exportar su propia porter, con cuentas en lugares tan distantes como las Indias Occidentales. Michael J. Lewis escribe en Stout que la cerveza exportada al Caribe en esa época fue probablemente el origen de lo que algún día sería la Guinness Foreign Extra Stout.

El último factor, y quizás el más importante, que contribuyó al éxito de la compañía fue la perspicacia comercial de sus fundadores. Una tradición de gestión inteligente y una visión de gran alcance para la expansión, iniciada por el fundador Arthur Guinness, fue retomada por tres de sus hijos después de su muerte en 1803. Para el año 1890, la cervecería de St. James’s Gate en Dublín era la más grande en su tipo y utilizaba equipos mecánicos sofisticados para fabricar cerveza a gran escala con el fin de responder a la demanda. Las exportaciones también aumentaron, y la stout de la cervecería llegó hasta el continente americano, África y Australia hacia fines del siglo XIX.

El término integración vertical es conocido por muchas empresas grandes, modernas y exitosas, incluyendo cervecerías como New Belgium y Oskar Blues, pero Guinness fue una de las primeras grandes fábricas de cerveza en utilizar la estrategia: tomar posesión de la cadena de suministro de materia prima para fabricar cerveza hasta llegar a ser propietarios de los pubs que vendían el producto terminado era prácticamente una garantía de éxito. No sería una sorpresa que la familia Guinness tuviera amigos en el gobierno que les garantizaran una legislación fiscal y comercial favorable en cuanto a la venta de cerveza.

Guinness evolucionó a través de muchas variaciones en su fórmula a lo largo de los años, a menudo dictada por los avances en el procesamiento de materiales. La malta black patent malt, un producto introducido por Daniel Wheeler en 1819, permitió a los fabricantes de cerveza dejar de utilizar la malta marrón y ámbar, y solamente usar malta clara con la nueva malta negra. Guinness reformuló lo que se convertiría en su ilustremente exportable Extra Stout utilizando black patent en 1821. Otra evolución tuvo lugar a principios de la década de 1930 cuando la cebada tostada más barata reemplazó la patent malt, y luego nuevamente en la década de 1950 cuando la empresa comenzó a utilizar una proporción de cebada triturada.

Stout de barril al estilo Dublín

Receta de Amahl Turczyn

  • Volumen del batch: 20,82 litros (5,5 galones estadounidenses)
  • Densidad inicial: 1,041 (10,3 grados Plato)
  • Densidad final: 1,009 (2,3 grados Plato)
  • Amargor: 43 IBU
  • Color: 31 según el SRM
  • Alcohol: 4,2 % según el volumen

MALTAS:

  • 2,49 kg (5,5 lb) de malta clara británica
  • 1,02 kg (2,25 lb) de cebada triturada
  • 0,45 kg (1 lb) de cebada tostada británica de 500° L

LÚPULOS:

  • 49 g (1,75 oz) de East Kent Goldings a los 60 min (30 IBU)
  • 14 g (0,5 oz) de Challenger a los 60 min (15 IBU)

LEVADURA:

  • Levadura Wyeast 1084 o White Labs WLP004 Irish ale (starter de 1 litro)

AGUA:

Agua de ósmosis inversa (OI) tratada con 0,5 g/l (2 g/gal) de sulfato de calcio

NOTAS DE FABRICACIÓN:

Macera la cebada clara y la triturada a 64° C (148° F) y déjala reposar durante una hora. Remoja la cebada tostada molida en un recipiente aparte con 2 L (2 qt) de agua a 68° C (155° F). Agrega agua caliente o hirviendo para aumentar la temperatura a 76 °C (168 °F) y deja reposar durante 10 minutos. Después de recircular el mosto para darle claridad, comienza a pasar al hervidor. En este punto, añade la cebada tostada junto con el agua de remojo al macerador y haz el lavado continuo a 80° C (176° F). Cuando la densidad del mosto se aproxime a 1,008 (2 grados Plato), detén el lavado. Si es necesario, cubre el hervidor con agua de ósmosis inversa. Hiérvelo durante 90 minutos y agrega el lúpulo a intervalos fijos. Enfríalo hasta 19° C (67° F) y oxigena. Agrega un fuerte starter de levadura y fermenta a 20 °C (68° F). Para maximizar la atenuación, asegúrate de que la densidad específica se haya estabilizado en 1,009 o (2,3 grados Plato) antes de transferir.

VERSIÓN DE MACERACIÓN PARCIAL:

Reduce la cebada triturada a 0,9 kg (2 lb) y la malta clara a 1,36 kg (3 lb). Macera todo junto a 66° C (150° F) durante una hora. Remoja la cebada tostada molida en un recipiente aparte con 2 L (2 qt) de agua a 68° C (155° F). Escurre y enjuaga los granos del remojo y macerado, y disuelve 0,9 kg (2 lb) de extracto de malta líquida clara dentro del mosto. Lava los granos a 80° C (176° F) hasta el volumen de hervor deseado con agua de OI, luego sigue como se indica arriba.

Si bien la marca de Guinness ha seguido siendo la más omnipresente de las Irish stouts, otros cerveceros irlandeses se destacaron en el mundo con este estilo. La fórmula actual de Guinness se basa en una gran proporción de cebada triturada sin maltear y cebada tostada, además de malta base clara, lo que produce una stout amarga y muy seca. Beamish y Murphy’s, ambas de Cork, tienen sus propias variaciones de este estilo.

Murphy’s utiliza una pequeña proporción de malta de chocolate además de malta tostada, con lúpulo Target en vez del énfasis de Guinness por el Goldings. La cerveza resultante es seca, pero no tan seca como el estándar de Dublín. Beamish reemplaza la cebada tostada enteramente a favor de la malta de chocolate y un poco de trigo malteado, y lúpulo Challenger, Goldings y Hersbrucker, para lograr una stout un poco más suave y cremosa. Desde la perspectiva de la elaboración de cerveza, hay que tener en cuenta que, al considerar la apariencia de la cerveza terminada, la malta de chocolate puede dar lugar a un color de espuma algo más oscuro que la cebada tostada, que produce una espuma casi blanca.

De las muchas variaciones, apuntaremos a una versión de barril de Dublín parecida a la Guinness. Veamos la materia prima, comenzando por el perfil del agua. Muchos estilos porter y stout requieren agua de elevada alcalinidad para equilibrar la acidez de los granos en el macerado. Sin embargo, para la stout seca, se prefiere un agua de baja alcalinidad y bajo contenido de minerales. Esto tiene que ver tanto con el proceso, en el cual la cebada tostada molida se remoja separada del macerado principal, como con el sabor ácido deseable que deriva del bajo pH de la cebada tostada. La nítida acidez final es una característica del perfil de sabor de la Dublin dry stout.

La fuente original de agua para la cervecería, al parecer, era muy suave y, de hecho, el experto en agua para cerveza Martin Brungard observa que la cervecería moderna utiliza la filtración por ósmosis inversa (OI) para mantener esta suavidad de las distintas fuentes de agua que se usan actualmente (ver: “Brewing Water Series: Ireland” de Brungard en la edición de Zymurgy de nov./dic. de 2012 para más información). Así que hay pocos motivos para tratar de reformular un perfil de agua de Dublín con sales minerales; el agua filtrada por OI debe ser suficiente o, si tu suministro local es bastante suave, eso debería andar bien.

La malta clara con alto poder diastático (como casi todas las maltas claras tienen actualmente) realmente es el único requisito para una dry stout. Es discutible si el sabor adicional y el carácter singular que se podría obtener al usar maltas Maris Otter, Optic, Pearl o Golden Promise se notaría en un estilo de gran amargor y sabor como este, si utilizáramos malta de origen británico exclusivamente en nombre de la autenticidad. Yo tiendo a preferir la malta clara domestica (americana) para la dry stout y he obtenido excelentes resultados.

La cebada tostada, sin embargo, es otro tema. Es posible que la cebada tostada domestica que está en el rango de 300° a 400° L no logre el color negro “adecuado” de 30 según el SRM. (El BJCP permite un rango de color de 25 a 40 según el SRM para este estilo). Busca una tostada de 500° L de gran calidad, específica para dry stout, a veces llamada “cebada negra” o “cebada stout”. En general suelo optar por una marca británica, pero las malteras de EE. UU. como Briess también fabrican una excelente cebada negra con el requisito de color de 500° L.

Se puede hacer una dry stout muy buena con lúpulo cultivado en EE. UU., pero como este estilo se basa muchísimo en la presencia del lúpulo, pienso que lo mejor sería optar por Target, Challenger, Goldings o una combinación de los tres, aunque en la receta solo se requieren adiciones tempranas. Se dice que Guinness agrega una pequeña cantidad de extracto de lúpulo a su cerveza terminada, así que tal vez haya una nota de lúpulo distintiva escondida en el aroma complejo de la cerveza.

La levadura para cerveza irlandesa es limpia y atenuante, pero puede agregar unos ésteres frutales a altas temperaturas. El bien documentado cronograma de fermentación de Guinness comienza a 17° C (63° F), pero luego se deja aumentar hasta 23 a 27° C (74 a 80° F), para garantizar una rápida fermentación de tres a cuatro días. Esto tiene sentido para una producción de gran volumen y alta rotación, pero a los cerveceros caseros, les advierto que el sabor frutal puede irse de las manos por encima de los 23° C (74° F). La mayoría de los laboratorios de levadura recomiendan no más de 22° C (72° F) para la cepa. Anecdóticamente, he descubierto que la cepa actúa fuerte y limpiamente a 20° C (68° F), así que eso es lo que recomiendo.

Para el macerado, son deseables las temperaturas que producirán un mosto altamente fermentable. Un macerado de 70 minutos a 64° C (148° F) era el procedimiento estándar en Guinness según Lewis, seguido de un aumento de temperatura y lavado a 80° C (176° F). Para nuestra receta, especialmente si usamos malta con mayor poder diastático, 60 minutos son suficientes, pero igual se recomienda el lavado a alta temperatura, ya que el alto porcentaje de cebada triturada puede volver gomoso el macerado con beta-glucanos. (Si tu sistema de fabricación de cerveza es propenso a que se atasque el macerado, lo mejor es tener unas cáscaras de arroz a mano por si acaso). Remojar la cebada tostada finamente molida por separado del macerado principal de malta clara y cebada triturada evita que el pH se vuelva demasiado bajo durante la conversión del almidón. Eso no quiere decir que no se pueda hacer una dry stout decente simplemente macerando todo junto, pero el remojo por separado produce un resultado final notablemente más suave y más integrado.

Agregar los granos tostados y el agua de infusión después de una hora de la conversión hará bajar el pH del macerado durante el lavado, pero para entonces la mayor parte de la acción enzimática habrá cesado, y el lavado simplemente servirá para enjuagar el sabor restante del tostado. Curiosamente, Lewis observa que la cervecería Park Royal Guinness con sede en Londres y la cervecería original St. James’s Gate de Dublín tenían procedimientos de macerado diferentes: en un punto Park Royal maceraba al menos una parte del grano tostado junto con la malta clara y la cebada triturada; St. James’s Gate utilizaba un remojo separado para el tostado ¡y agregaba el extracto resultante al mosto claro en el hervidor!

Uno pensaría que desde entonces se habrían aplicado estándares modernos sobre la consistencia del producto para encontrar algún tipo de consenso entre los procedimientos de ambos lugares, pero al agregar la cebada tostada más tarde en el macerado, estamos en algún punto entre los dos procedimientos. Para llevar el procedimiento de remojo al extremo, incluso se podría hacer un remojo en frío del tostado molido un par de días antes y luego agregar el extracto tostado después del hervor para un resultado aún más suave; este es un método común para usar café tostado en la cerveza, aunque esta sugerencia para la stout es puramente teórica.

Al envasar la dry stout, personalmente creo que guardar en barril es mejor que el embotellado, pero, sin duda, haz lo que puedas con los recursos que tengas. Guinness, y de hecho todas las dry stout, se han vuelto conocidas por el famoso “nitro pour” (mezcla de nitrógeno) mediante el cual una cerveza terminada con un carbonatado relativamente bajo es forzada a través de una placa perforada al momento de dispensar, produciendo cascadas de burbujas diminutas que suben a la superficie en forma de una rica capa de espuma fina y cremosa que con frecuencia dura hasta el fondo del vaso. Obviamente, un sistema dedicado de barril de nitrógeno, incluyendo la mezcla apropiada de gases y el grifo de la placa reductora, es la mejor manera de lograr este resultado hermoso y fácil de beber en el vaso, pero con un poco de práctica, hasta los cerveceros caseros que usan barriles Cornelius y con tapa cobra podrán lograr una buena aproximación.

Al carbonatar la stout hasta aproximadamente 4 gramos por litro (2 volúmenes) de CO2 y aplicar una presión superior (usando CO2 normal) de 172 a 207 kPa (25 a 30 libras por pulgada cuadrada), se puede utilizar el dispensador con tapa cobra como punto de restricción. Como cerveceros caseros, estamos acostumbrados a dispensar con el grifo completamente abierto para lograr un vaso de cerveza carbonatada relativamente libre de espuma. Pero simplemente apretando apenas la manija para forzar la stout a través de una abertura estrecha a alta presión, se puede imitar el vertido en cascada de la Irish stout. Si la carbonatación de la cerveza es demasiado alta, este método dará como resultado un vaso de espuma; si es demasiado bajo, no obtendrás casi nada de espuma (de tu cerveza sin gas). Pero si logras el equilibrio correcto ¡te sorprenderá el buen sabor y gusto de esa pinta de stout casera! Ah, y no te olvides de reducir la presión superior en el barril después de que termines de servir las pintas, de lo contrario carbonatarás de más la cerveza. Y entonces será pura espuma de todas formas. ¡Sláinte!

* * *

Amahl Turczyn es subredactor de Zymurgy.

Recursos:

  • Lewis, Michael J. Classic Beer Style Series: Stout. Brewers Publications, 1995.
  • Jackson, Michael. Michael Jackson’s Beer Companion, Duncan Baird Publishers, 1993.
  • Kemp, Florian. “The Evolution of Dry Stout,” All About Beer, 35, Edición 6, 17 de marzo de 2015.

The post Enfoque en ciertos tipos de cerveza: Dry Irish Stout appeared first on American Homebrewers Association.

Posted on

Fabricar cerveza a nivel local: Cómo ver ingredientes para la cerveza donde los demás ven malezas

[Este artículo apareció en la edición de Marzo/Abril 2017 de la revista Zymurgy]

Por Stan Hieronymus

Nota del redactor: Este artículo es una adaptación de Brewing Local: American-Grown Beer, de Stan Hieronymus, disponible en Brewers Publications.

Randy Mosher, autor de Radical Brewing y una persona acostumbrada a usar ingredientes inusuales para hacer cerveza, pasó varias horas intercambiando historias con el fundador de Scratch Brewing en el sur de Illinois. “Es sorprendente cómo ellos pueden mirar un árbol y ver una cerveza”, me dijo mientras el auto se alejaba del bosque que rodea la fábrica de cerveza.

Un par de meses antes, cada una de las cinco cervezas que los fundadores de Scratch habían servido en el Great American Beer Festival se habían saborizado con diferentes partes de árboles. Ellos no fueron los primeros en usar partes de árboles en la cerveza. Después de todo, la cerveza de abeto se remonta a los vikingos y, en el siglo XVIII, los miembros de la Marina británica tomaban cerveza de abeto para combatir el escorbuto (aunque los científicos han determinado que la vitamina C en las puntas de los abetos no sobrevive en la cerveza terminada).

En California, Brian Hunt de Moonlight Brewing se ha ganado una reputación por sus cervezas hechas con partes de árboles. “Me di cuenta de que tenía que hacer una cerveza con hierbas que tuviera sabor a cerveza, a fin de preparar el camino para que la gente hiciera cervezas sin lúpulo”, contó. Esa cerveza es Working for Tips, que viene elaborando cada año con puntas de secoya desde 2007. Hunt conocía la historia de la cerveza con abeto, pero debía encontrar otros árboles ya que los abetos no crecen en Santa Rosa.

“Mi intención no era hacer cervezas de árbol (desde entonces ha usado distintas variedades de otros árboles locales en diferentes cervezas), sino hacer una cerveza realmente buena, una cerveza relevante”, explica. “No trato de hacer estas cervezas por una cuestión de novedad. No soporto las cervezas que están hechas por la novedad. Cuando elijo un ingrediente, no es porque está de moda. Es porque brinda el sabor que yo quiero”.

Qué ingredientes utilizará a continuación es menos importante que el modo en que los utilizará. “Quiero probar haciendo distintas combinaciones de cosas. Es como si se tratara de aprender un idioma”, afirmó. “Lo que significa tener fluidez. Cuando estás aprendiendo un idioma, tienes que pensar cada palabra. Cuando tienes fluidez en un idioma, este fluye a través tuyo. Así que pienso en la secoya por sí sola, esta hierba por sí sola, el damasco por sí solo, pero, ¿cómo encaja todo eso?”

La Parte III de Brewing Local (que básicamente es un catálogo de posibles ingredientes) está organizada con este tipo de experiencias en mente. Los fabricantes han saborizado la cerveza con plantas, ya sean cultivadas o que crecían de forma silvestre, desde hace miles de años. Sin embargo, el botón de reinicio se oprimió cuando se empezaron a utilizar ingredientes que no cumplían con la Reinheitsgebot, la ley de pureza de la cerveza alemana que tiene 500 años de historia, y que especificaba que solamente se podía utilizar agua, cebada malteada, lúpulo y (posteriormente) levadura para fabricar cerveza.

Ahora bien, en lugar de simplemente considerar las cerezas como un posible ingrediente, un cervecero podría mirar el árbol entero y reconocer que los tallos del cerezo brindan un carácter similar a la cereza, algo diferente, o que la malta ahumada con cerezo añade un toque más diferente al sabor de la cereza, además de un tono rosado favorecedor. Lamentablemente, también es necesario recordar que el árbol produce sustancias químicas que se metabolizan en cianuro. Estas sustancias están más concentradas en las hojas marchitas o caídas.

Por esto, he creado una estructura y letreros que categorizan los ingredientes florales y fúngicos como granos, árboles, plantas, raíces, hongos y chiles. Los símbolos incluyen una advertencia sobre los ingredientes que pueden contener componentes que podrían enfermar a quien los tome, o algo peor. Se indican otros ingredientes que tengan sustancias similares que sean potencialmente perjudiciales. Los otros puntos básicos incluidos son los siguientes:

  • Si añade fermentables;
  • Si añade sabor, incluidos sabores frutales, florales, de umami, a nueces y más;
  • Si tiene un carácter equilibrado, especiado y amargo, similar al lúpulo;
  • Si crece de forma silvestre; y
  • Si se cultiva.

También se enumeran las partes principales de las plantas que son útiles para un fabricante de cerveza. A menudo, también se pueden utilizar más partes (como las hojas secas para dar amargor). Se mencionan los atributos destacados en cuanto al aroma y el sabor, pero estos varían según el momento en que se agregan los ingredientes y la cantidad utilizada.

En algunos casos se incluyen otros datos, como cuando las plantas tienen aceites esenciales similares al lúpulo. Se está investigando mucho en relación con la interacción de estos aceites y la levadura (junto con cientos de otros compuestos) y los compuestos únicos de olor que pueden producirse. No hay duda de que son relevantes para el aroma del lúpulo, y algunos estudios han demostrado que pueden producirse biotransformaciones similares con las plantas.

tuesday-beer-trivia

Amor de hortelano

  • (Galium aparine)
  • Uso: Hojas, tallos, semillas
  • Aroma/sabor: Herbal, café

Conocida con toda razón como “hierba pegajosa” debido a los pequeños ganchos que recubren la planta, pero también como “hierba de ganso” porque los gansos se alimentan con ella. Se ha utilizado con fines medicinales durante siglos, pero las investigaciones no respaldan la afirmación de que el amor de hortelano podría curar los bultos cancerosos. El amor de hortelano tiene un nivel de vitamina C extremadamente alto, pero este nutriente no sobrevive el proceso de fabricación de cerveza. Las hojas y tallos se pueden usar en la cerveza para agregar notas herbales, pero las semillas proporcionan el sabor más interesante. Técnicamente son frutos que se desarrollan a partir de las flores de la planta en semillas pequeñas que se dispersan mediante pelos con ganchos que se adhieren a los animales y la ropa. Secos y tostados, se han utilizado como sustitutos del café y le otorgan el mismo sabor a la cerveza. El amor de hortelano se parece mucho a la asperilla, que tiene un color verde oscuro y pelos pegajosos en las semillas. La asperilla contiene sustancias que pueden ser tóxicas en grandes dosis.

Diente de león

  • (Taraxacum officinale)
  • Uso: Todas las partes
  • Aroma/sabor: Terroso, café

Aunque cualquier servicio de jardinería que se respete suele tratar al diente de león como una maleza, algunas variedades se cultivan para el consumo. La nobleza victoriana lo consideraba un manjar y lo consumía en ensaladas y sándwiches. Los fabricantes de cerveza utilizan todas las partes de la planta, incluidas las flores (también utilizadas en el vino de diente de león), los tallos y las raíces, que por lo general son amargas. El cáliz (el “collar” verde que rodea la base de la flor) es muy amargo y suele quitarse cuando se utilizan las flores para hacer vino, té o jaleas. Las raíces tostadas pueden usarse para hacer café de diente de león. Cuando Tobias Schock, de Agrarian Ales en Oregón, tostó dientes de león en el horno para usarlos en una porter marrón, su hija decidió que olían como papas de chocolate. Una bebida suave hecha con diente de león y bardana sigue siendo popular en Inglaterra.

Nuestra madre la pradera

Receta cortesía de Right Proper Brewing, Washington, D.C.

Los habitantes de la ciudad tienen acceso a más ingredientes que crecen fuera de los jardines de lo que se dan cuenta. “Todas las casas vacías tienen flores de achicoria azul en este momento. Hay artemisa en todos los terrenos”, afirma Nathan Zeender. “Estos son los tipos de cerveza que a nuestra cultura diversa le gusta producir”, nos cuenta, hablando sobre las cervezas sin lúpulo, que ahora son denominadas simplemente Gruits por los fabricantes de cerveza estadounidenses. Su cariño por lo que crece a su alrededor es obvio. “No tengo la misma conexión con el lúpulo que con los árboles”, asegura. Esta cerveza tendrá un lado salvaje cuando  joven y, si se la deja añejar a temperatura de bodega después del envasado, se volverá cada vez más magra y aromática gracias l Brett. En cuatro a seis meses debería tener un carácter expresivo “salvaje” que debería funcionar bien con las hierbas.

Nota: ¡muchos ingredientes botánicos, incluido el ajenjo, son tóxicos en dosis altas! No utilizar más de las cantidades indicadas a continuación.

  • Volumen del batch: 18,9 litros (5 galones estadounidenses)
  • Densidad inicial: 1,037 (9,3 grados Plato)
  • Densidad final: 1,003 (0,8 grados Plato)
  • Amargor: 0 IBU
  • Color: 3 según el SRM
  • Alcohol: 4,5 % según el volumen

MALTAS:

  • 2,27 kg (5 lb) de malta Pilsner
  • 680 g (1,5 lb) de trigo malteado
  • 340 g (12 oz) de avena triturada

INGREDIENTES BOTÁNICOS:

  • 20 g (0,7 oz) de verbena azul a los 15 min
  • 10 g (0,4 oz) de ajenjo a los 15 min
  • 15 g (0,5 oz) de hisopo a los 5 min
  • 15 g (0,5 oz) de milenrama a los 5 min
  • 15 g (0,5 oz) de artemisa a los 5 min
  • 30 g (1,1 oz) de brezo a los 0 min

LEVADURA:

Una mezcla de French Saison y tu cepa favorita de Brett bruxellensis deberían formar un buen equipo para esta fermentación, usando un frasco de cada uno para un batch de 5,5 galones. La cepa French Saison va bien con los ingredientes botánicos y por lo general se fermenta en unos pocos días. La Brett no podrá competir al principio, pero luego se pondrá a trabajar metabolizando los azúcares más complejos que quedan relegados y producirá unos ésteres frutales agradables.

NOTAS DE FABRICACIÓN:

Maceración con una sola infusión a 68° C (155° F) durante una hora sin instrucciones especiales de lavado o tratamiento del agua. Queremos desarrollar dextrinas para que la Brettanomyces metabolice con el tiempo. Hervir durante 75 minutos. Utilizar la hoja y el tallo de la verbena y el ajenjo; la hoja de la milenrama, la artemisa y el hisopo y la flor del brezo. Enfriar a 21° C (70° F), agregar levadura y dejar que se levante hasta más de 20° C (80° F).

Asegúrate de que la gravedad específica esté por debajo de 1,005 antes de envasar ya que la Brettanomyces seguirá fermentando, secando y aromatizando la cerveza con el tiempo. Transferir una porción de la cerveza sobre 230–240 g/L (1 a 2 libras por galón) de uvas blancas para vino durante 3 meses sería un experimento interesante, que le dará un estilo de vermut seco. Colócalo en un barril o en botellas con 5 g/L (2,5 volúmenes) de CO2.

VERSIÓN DE MACERACIÓN PARCIAL:

Omitir la malta de trigo. Macerar 0,45 g (1 lb) de malta Pilsner con 340 g (12 oz) de avena a 68° C (155° F) durante una hora. Escurrir y enjuagar los granos y disolver 0,57 kg (1,25 lb) de jarabe de extracto de malta Pilsner y 1,36 kg (3 lb) de jarabe de extracto de malta de trigo en el mosto. Alcanzar el volumen de hervor deseado con agua de ósmosis inversa y seguir como se indica arriba.

Lavanda

  • (Lavandula angustifolia)
  • Uso: Flores
  • Aroma/sabores: Floral, especias, canela

Los aceites esenciales de la lavanda crean un aroma floral, fresco, herbáceo y a veces ligeramente frutado en la cerveza, que no necesariamente se asemeja a la flor en sí. Usado en exceso, el aroma puede ser jabonoso. Aunque muchos fabricantes de cerveza a menudo esperan hasta el final del hervor para agregar las flores, introducirlas durante el hervor cambia la impresión de perfume a canela y especias.

Base aromática: notas medias; contiene geraniol, linalol, cariofileno, limoneno y pineno.

Reina de los prados

  • (Filipendula ulmaria)
  • Uso: Flores
  • Sabores principales: Gaulteria, almendra

La flor silvestre se conoce por su sabor dulce de gaulteria y almendras y porque es rica en ácido salicílico. Aislar ese componente de la reina de los prados llevó a la creación de la aspirina. Se consideraba una hierba sagrada, utilizada tanto en rituales como en medicina, y se utilizaba para saborizar el aguamiel. La evidencia arqueológica indica que ya se utilizaba para darle sabor a la cerveza hace quizás 5.000 años, y todas las partes de la planta se pueden utilizar para la fabricación de cerveza. También es un ingrediente en diversas bebidas alcohólicas y añade una sutil nota de almendra a las mermeladas. También se conoce como mosto de miel, altareina, reina del prado, filipéndula y ulmaria. Nota: Una persona que no puede tomar aspirina tampoco debe consumir reina de los prados.

Milenrama

  • (Achillea millefolium)
  • Uso: Hojas, flores
  • Aroma/sabor: Pino, citrus

La planta tiene un gran pasado y muchos nombres, entre los que se encuentran los siguientes: hierba de las heridas, flor del soldado, hierba de Aquiles, colchón de pobre y en Suecia, field hop. Crece en todos lados y puede volverse una maleza invasora. Es una de las hierbas mencionadas con más frecuencia como un ingrediente esencial en la cerveza Gruit ale, conocida por sus poderes de conservante y su amargura. En la actualidad, los fabricantes de cerveza utilizan toda la planta dulce y especiada para los mismos fines. También se recolecta por sus aceites esenciales utilizados en aromaterapia. Aunque con frecuencia se agregan antes en el hervor para extraer el amargor, la incorporación de las flores (que contienen los aceites esenciales) al final del hervor produce aromas frutados y de pino.

Base de fragancia: notas altas; contiene limoneno y pineno.

Rebozuelo

  • (Cantharellus cibarius)

Estos hongos se encuentran casi exclusivamente de forma silvestre, tienen un color amarillo dorado a naranja brillante y son fáciles de encontrar. Tienen un sabor picante y parecido al damasco. Pueden encontrarse durante el verano y el otoño al este del Mississippi, de septiembre a febrero en la costa oeste y de mayo a junio en el sur. El rebozuelo forma relaciones simbióticas con las raíces del roble, pero de vez en cuando se encuentra alrededor del abeto y del pino.

No hay que confundirlo con el hongo “seta del olivo”, que es de color naranja brillante y crece al este de las Montañas Rocosas. La seta del olivo tiene tonos oliváceos entremezclados en el lugar donde crece, del sur al centro de California. Las setas del olivo pueden encontrarse en entornos urbanos en grandes grupos en la base de árboles, en tocones o en madera enterrada. Existen dos diferencias principales entre el rebozuelo y la seta del olivo. Esta última tiene laminillas marcadas y no bifurcadas que descienden por el tallo, mientras que el rebozuelo tiene bordes marcados parecidos a una laminilla en la punta del tallo. Cuando se pela la seta del olivo, su interior es de color anaranjado. En el rebozuelo, el interior del tallo es más claro que el exterior.

Cedro

  • (Cedrus)
  • Uso: Hojas tipo agujas
  • Aroma/sabor: Almizcle, terroso, cedro

Cuando Brian Hunt, de Moonlight Brewing, elabora cervezas con partes de un árbol (ha utilizado muchas variedades, incluso el cedro de incienso), piensa en términos del papel que desempeña la astringencia más que en el amargor. “Es un irritante, una hoja para la dulzura. Eso es lo que te da las ganas de tomar otra cerveza”, explica. También le interesa maximizar el aroma, así que agrega ramas aproximadamente 20 minutos antes de finalizar el hervor. “Espero hasta oler que se hierven y se convierten en vapor. Se han extraído dentro del líquido; ahora comienzo a perderlo. Apago el hervor”, me dice. Su decisión no se controla con un reloj. “Existen muchos factores. ¿Cómo es el hervor? La diferencia lo es todo”, asegura.

* * *

Stan Hieronymus es un colaborador frecuente de Zymurgy y es autor de Brewing Local, For the Love of Hops y Brew Like a Monk, todos disponibles en Brewers Publications.

The post Fabricar cerveza a nivel local: Cómo ver ingredientes para la cerveza donde los demás ven malezas appeared first on American Homebrewers Association.

Posted on

Agua: Identifica tus fuentes

[Este artículo apareció en la edición de Marzo/Abril 2017 de la revista Zymurgy]

Por Debbie Cerda

El agua es el ingrediente principal en una pinta de cerveza y representa más del 90 por ciento de su masa. Tiene una gran influencia sobre la calidad del producto final, pero muchos cerveceros caseros y cerveceros profesionales no dedican el tiempo suficiente para entender la información técnica básica en relación con el agua que fluye de nuestros grifos. No tiene sentido agregar sales y regular los iones si no conoces la naturaleza de tu fuente de agua.

El agua siempre está cambiando. Las condiciones naturales y las causadas por el ser humano afectan nuestra agua, no solo de manera estacional, sino incluso cada día y cada hora. El flujo de aguas pluviales y las condiciones de sequía afectan las fuentes de agua, y los procesos de tratamiento deben ser revisados para abordar estos cambios y asegurar que nuestra agua corriente cumpla con los estándares reglamentarios.

El agua que compone la mayor parte de tu cerveza no es un ingrediente estático cuidadosamente caracterizado por una sola tabla de perfiles de agua. Es un recurso en constante cambio cuyas fluctuaciones pueden saborearse en el vaso.

Fuentes de agua

El agua que llega a tu red puede provenir de una única fuente o de una combinación de varias fuentes. El agua subterránea proviene de pozos que sacan agua de los acuíferos, mientras que el agua superficial proviene de ríos, arroyos, riachuelos, lagos y embalses. Algunas aguas subterráneas, como el agua de los manantiales, pueden verse afectadas por las aguas superficiales y se conocen como aguas subterráneas bajo la influencia de las aguas superficiales (GUI o GWUDI, por sus siglas en inglés).

Las fuentes alternativas que se utilizan con frecuencia en combinación con las aguas superficiales y subterráneas pueden incluir la recolección de aguas pluviales designadas, la desalinización de agua subterránea salobre, e incluso la desalinización del agua de mar, gracias a las tecnologías innovadoras. Algunos sistemas hídricos incluso están participando en el almacenamiento y recuperación de acuíferos para asegurar una capacidad de agua adecuada.

El agua subterránea varía mucho, y su composición depende de la ubicación (geología) y el uso de la tierra. A medida que el agua desciende bajo tierra y erosiona las rocas, va recogiendo minerales. Las sustancias disueltas más comunes incluyen el sodio, calcio, magnesio, potasio, cloruro, bicarbonato y sulfato. Desde el punto de vista de la fabricación de cerveza, las sustancias que causan mayor preocupación incluyen las siguientes:

  • Hierro y manganeso (Fe y Mn2+, respectivamente) son de origen natural, pero se pueden aumentar mediante bacterias acumuladoras de hierro.
  • El cloruro (Cl) es especialmente agresivo para el acero inoxidable.
  • El calcio, el carbonato y el bicarbonato (Ca2+, CO32– y HCO3, respectivamente) son importantes para la fabricación de cerveza, pero pueden obstruir los tanques de agua caliente en altas concentraciones.
  • El sulfato (SO42–) acentúa el amargor del lúpulo, pero en grandes cantidades puede dar un aroma y un sabor semejante al azufre.
  • El total de sólidos disueltos (TSD) se consideran en conjunto como un contaminante secundario del agua. Estos son una combinación de material orgánico disuelto, además de sales comunes que incluyen el sodio, cloruro, calcio, magnesio, potasio, sulfatos y bicarbonatos. El TSD en el agua subterránea proviene en su mayoría de la erosión de la roca madre.
  • La dureza del agua entra en dos categorías. Dureza temporal se refiere a la cantidad de carbonato de calcio en el agua. Se denomina temporal debido a que el agua hirviendo hace que el carbonato de calcio se precipite fuera de la solución. Dureza permanente es indicadora de cloruros y sulfatos; el hervor no afecta estos iones.

(Puedes leer más acerca del impacto que tiene el cloruro, el sodio, el sulfato y otros iones de sabor en la fabricación de cerveza en el artículo de la AHA “Understanding Water for Homebrewing” (Entender el agua para la cerveza casera) en HomebrewersAssociation.org/how-to-brew/understanding-water-for-homebrewing.)

Las fuentes de agua superficial incluyen arroyos, ríos y lagos: el agua natural que permanece sobre el suelo y no penetra la superficie. A medida que el agua superficial se acumula dentro de una cuenca (el área donde cae el agua y se drena en una salida común), esta recoge contaminantes naturales y artificiales.

El agua superficial típicamente contiene grandes cantidades de materia orgánica natural (NOM, por sus siglas en inglés), sólidos totales disueltos (STD), carbono orgánico total (COT) y químicos orgánicos sintéticos (SOCs) producto de la contaminación. Estos contaminantes se eliminan durante el proceso de tratamiento de aguas superficiales mucho antes de que el agua llegue a tu hogar.

Muchos estados requieren que los sistemas públicos de agua que usan como fuente el agua superficial o subterránea bajo la influencia (GWUDI) deben monitorear y tratar el COT, la alcalinidad y el pH. El pH es una medida de la concentración de iones de hidrógeno y tiene un estándar federal secundario de 6,5 a 8,5. Los niveles inferiores a 7,0 (neutro) pueden ser corrosivos y degradar las tuberías y accesorios de plomo y cobre, mientras que un pH superior a 8,5 puede darle al agua una sensación resbaladiza y sabor a soda.

Los sistemas públicos de agua deben medir el pH y la alcalinidad porque afectan a la corrosión. El pH también determina la dosis de desinfectante necesaria para desactivar los microorganismos transmitidos por el agua. Y debido a que todas las aguas superficiales contienen bacterias (y posiblemente protozoos y virus), la desinfección es de tremenda importancia para nuestra agua para cerveza.

Homebrewing Water

La función de la desinfección

Imagina que vives en un lugar donde proliferan las enfermedades transmitidas por el agua. Tu fuente de agua local está contaminada, y las grandes inundaciones pueden ocasionar brotes de fiebre tifoidea cuando las aguas residuales y los contaminantes ingresan a tu suministro de agua. Miles de personas se enferman, muchos mueren y no hay personal capacitado en el manejo del agua para tratarla de manera efectiva y proteger la salud humana.

Ese era el estado del suministro de agua en Estados Unidos hace tan solo un siglo. Fue la introducción de los desinfectantes a principios del 1900 lo que redujo considerablemente la cantidad de brotes de enfermedades transmitidas por el agua. La primera utilización de cloro en el agua potable en Estados Unidos se realizó en la ciudad de Jersey, N.J. en 1908.

Los dos principales tipos de desinfección utilizados en Estados Unidos son la cloración y la cloraminación. La cloración se mide como “cloro libre” y, para muchos estados, la concentración mínima es de 0,2 mg/l en los puntos más lejanos del sistema de distribución. La cloramina, por otra parte, se mide como “cloro total”. Cuando se requiere cloraminación, la concentración debe ser de al menos 0,5 mg/l en el extremo más alejado del sistema. La concentración máxima permitida de cloro y de cloramina es de 4 mg/l, sobre la base de un promedio anual en un sistema de distribución.

El cloro forma subproductos de desinfección, incluyendo compuestos cancerígenos dañinos, cuando se combina con materia orgánica y/o bromuro a causa de intrusiones de agua salada. El cloro es un desinfectante excepcionalmente eficaz, pero la cloramina es más persistente, más estable y de mayor duración en todo el sistema de distribución para inhibir el crecimiento microbiano. Sin embargo, la cloramina es un oxidante más débil que puede causar problemas de sabor, color, olor y manchas.

El impacto más común de la cloramina en la fabricación de cerveza es la formación de clorofenoles, que ocurre cuando el cloro reacciona ante los fenoles en la cerveza. Los clorofenoles tienen un umbral de sabor muy bajo que les recuerda a quienes lo beben del sabor de un enjuague bucal antiséptico o a las vendas adhesivas de plástico. De hecho, una manera de sintonizar tu paladar con los clorofenoles es agregar Chloraseptic® a una cerveza de cuerpo y color ligeros (solo necesitas una pequeña cantidad).

Pero no toda las cloraminas necesariamente se convierten en clorofenoles, y puede quedar algún desinfectante residual. Estas cloraminas restantes conservan sus propiedades biocidas y pueden degradar la levadura. Además de promover fermentaciones nocivas, las células de levadura muertas y moribundas pueden causar una infinidad de sabores indeseables a jabón, a queso e incluso a rancio. Algunos cerveceros profesionales también han expresado su preocupación de que los restos de desinfectante pueden afectar la conversión de la malta, la utilización del lúpulo y la atenuación.

Mitos comunes acerca de la desinfección del agua y la fabricación de cerveza

Algunos rumores persistentes sobre el cloro y la cloramina siguen teniendo una amplia difusión, y ser un buen cervecero significa entender qué es verdad y qué no. Estos son algunos de los más comunes.

Mito: Toda el agua contiene desinfectante.

Verdad: Si bien la EPA establece un nivel residual máximo para los desinfectantes, no es necesario que toda el agua esté desinfectada. No obstante, muchos estados requieren cantidades residuales mínimas de desinfectante para proteger al público de las enfermedades transmitidas por el agua.

Mito: El cloro mata todos los patógenos al contacto.

Verdad: La tasa de desactivación de los patógenos depende de varios factores, incluida la concentración de cloro, el tiempo de contacto, la temperatura del agua, el pH e incluso el tipo de patógeno (bacterias, protozoos o virus). Las bacterias y los virus se desactivan fácilmente, pero la Giardia es más difícil de desactivar y requiere un mayor tiempo de contacto y/o mayores restos de desinfectante. El cloro no es muy efectivo para desactivar el Criptosporidium, que existe como un ovocito con una cáscara endurecida.

Mito: El tratamiento con cloro y con cloramina es el mismo.

Verdad: El cloro es más eficaz con un pH menor y con mayor temperatura. Sin embargo, una mayor temperatura también puede significar una mayor formación de subproductos de desinfección cancerígenos. La monocloramina es un desinfectante más estable y persistente que el cloro. El cloro es un oxidante más fuerte que la monocloramina, pero se disipa rápidamente debido a la demanda de desinfectante.

Mito: Todo el desinfectante se puede extraer mediante el hervor.

Verdad: Solamente el cloro se puede extraer mediante el hervor. La monocloramina no se hierve y debe ser eliminada mediante la incorporación de metabisulfito de potasio u otros agentes de descloraminación al agua para cerveza. La filtración por carbón también puede eliminar la monocloramina del agua, pero es importante tener un tiempo de contacto efectivo para reducir el residuo hasta un nivel insignificante. El tiempo de contacto depende del residuo inicial del desinfectante, el caudal y el tipo de medio de filtración.

Mito: Se puede saber la diferencia entre el tratamiento con cloro y con cloramina por el tono del agua.

Verdad: Un rumor reiterado afirma que el agua cloraminada tiene un tono azulado, mientras que el agua clorada aparece amarillenta. ¡Completamente falso! Tanto el cloro como la cloramina son incoloros. El color del agua puede indicar componentes tales como el hierro o el manganeso, o el coagulante utilizado en el proceso de tratamiento del agua (por ejemplo, azulado por el alumbre o amarillento por el sulfato férrico), pero el color no es un indicador del desinfectante.

Normas para el agua potable

La mayoría de los países desarrollados proporcionan agua a los consumidores a través de los suministros municipales de agua, que reciben agua de varias fuentes, mantienen los sistemas de distribución de agua y proporcionan resultados de las pruebas rutinarias y especiales a la agencia reguladora y al público. Estas actividades ayudan a los sistemas públicos de agua (PWS, por sus siglas en inglés) a garantizar que sus clientes reciban agua segura, asequible y de calidad.

El agua se procesa y se trata para cumplir las normas para el agua potable establecidas mediante la legislación federal de la Ley de Agua Potable (SDWA, por sus siglas en inglés) y sus enmiendas. Las primeras regulaciones nacionales sobre agua potable primaria (NPDWR, por sus siglas en inglés; conocidas como las “normas primarias”) fueron adoptadas en 1976 y son normas legalmente aplicables que se aplican a todos los sistemas públicos de agua en los Estados Unidos. Las normas primarias protegen la salud pública al limitar los niveles de contaminantes naturales y artificiales en el agua potable, denominados “contaminantes regulados”.  Los contaminantes primarios tienen efectos sobre la salud que pueden ser agudos o crónicos.

Las regulaciones nacionales sobre el agua potable secundaria (NSDWR, por sus siglas en inglés) se conocen como “normas secundarias” y son directrices federales no vinculantes que regulan 15 contaminantes que no constituyen un riesgo para la salud, pero que pueden causar otros efectos. Estos contaminantes son más relevantes para el proceso de fabricación de cerveza, y sus efectos incluyen:

  • Efectos cosméticos: decoloración de la piel o de los dientes (ejemplo: fluoruro secundario)
  • Efectos estéticos: como el sabor, olor o color
  • Efectos técnicos: corrosividad y manchas relacionadas con la corrosión (cloruro, cobre, hierro, manganeso, pH, sólidos disueltos totales, zinc)

La Agencia de Protección Ambiental (EPA) recomienda normas secundarias para los sistemas de agua, pero no exige que los sistemas las cumplan. Sin embargo, las agencias en muchos estados, incluyendo Texas y California, han elegido adoptarlas como normas ejecutables. Las agencias también son libres de adoptar sus propias normas, siempre y cuando no sean menos estrictas que las regulaciones federales.

Los estándares de agua potable pueden cambiar en función de los avances en tecnología y conocimientos científicos, así como en la aparición de problemas en la calidad del agua. Por ejemplo, en respuesta a los recientes problemas relacionados con el plomo y el cobre en Flint, Mich., varios estados, incluyendo Texas, están examinando de cerca las condiciones de calidad del agua que pueden afectar la corrosividad.

Las enmiendas a la SDWA han establecido la Regla de Monitoreo de Contaminantes no Regulados, que exigen la recolección de datos sobre contaminantes (incluidos los químicos y microbios) que se sospechan que están presentes en el agua potable pero que actualmente no tienen estándares sanitarios. Estas actividades de monitoreo ayudan a la EPA a evaluar los niveles de exposición dentro de la población y tomar decisiones reglamentarias para los contaminantes emergentes.

La SDWA es un conjunto de estatutos independiente de la Ley de Agua Limpia (CWA, por sus siglas en inglés), que garantiza la protección de la calidad de las aguas superficiales para promover “la protección y propagación de peces, crustáceos y vida silvestre y la recreación dentro y sobre el agua”, pero no se ocupa de las aguas subterráneas o la disponibilidad del agua.

While the mash is resting, heat enough water for your sparge to 170°F (76.7°F) in your secondary pot.For this recipe, you’ll need about 4.75-5.5 gallons (19-22 qt; 18-21 L) of sparge water to reach the target pre-boil volume.

Pre-boil volumes will vary depending on how much wort evaporates during the boil. It’s wise to heat more water than needed, just in case.

Tu derecho a conocer tu agua

La norma sobre el Reporte de Confianza al Consumidor (CCR, por sus siglas en inglés) se adoptó en 1998 como parte de las leyes sobre el “derecho a saber” y es una enmienda de la SDWA. La intención de la norma CCR era mejorar la protección de la salud pública al brindarles a los consumidores información importante sobre la calidad del agua potable, para que puedan tomar decisiones prácticas e informadas sobre los posibles riesgos para la salud relacionados con la calidad, tratamiento y manejo de su suministro de agua potable.

El CCR anual se conoce con más frecuencia “reporte de la calidad del agua potable” y debe ser facilitado por cada sistema público de agua. El reporte, que debe entregarse antes del 1 de julio de cada año, describe los resultados de la muestra de datos del año anterior. Sin embargo, si un sistema de agua está en un período de muestreo de monitoreo de rutina de tres años, como es el caso de la mayoría de los sistemas de aguas subterráneas, los datos pueden incluir muestreos de varios años anteriores. La falta de datos para un contaminante en particular no significa que no se haya muestreado, sino que estaba por debajo del límite de detección y, por lo tanto, no necesita ser informado.

El CCR de tu proveedor de agua contiene información exhaustiva sobre el agua corriente, incluyendo de dónde proviene y qué contiene. El reporte anual incluye cualquier detección de contaminantes que están identificados dentro de las Regulaciones nacionales sobre agua potable primaria (NPDWR) y que constituyen un riesgo agudo o crónico para la salud. Para apoyar la Norma de Notificación Pública de la EPA, el reporte también debe incluir cualquier violación de las normas de agua potable que no tengan un impacto directo sobre la salud humana.

Los sistemas públicos de agua están obligados a monitorear los contaminantes adicionales que no se consideran que representan un riesgo para la salud humana, pero que pueden tener un efecto estético incluyendo el sabor, olor y color, así como efectos cosméticos y técnicos. Estos estándares secundarios son de gran interés tanto para los cerveceros caseros como para los profesionales.

Hay mucha información útil en el reporte de la calidad del agua, pero es importante tener en cuenta que se trata solamente de una “instantánea” de la calidad del agua potable, y no necesariamente proporciona un perfil completo de la calidad del agua.

Cómo obtener la información que necesitas

Empieza por conocer a los administradores de cumplimiento ambiental y los ingenieros de control de procesos de tu sistema de agua. Los reportes de calidad del agua de rutina pueden encontrarse en línea, se pueden solicitar informalmente o se pueden obtener a través de una solicitud de información pública. Puedes hacer tu propio muestreo de proceso utilizando kits de prueba, incluyendo medidores de pH, que ofrecen una mayor precisión que las tiras reactivas, o puedes enviar muestras para que sean analizadas en un laboratorio de renombre como Ward Laboratories, White Labs y en instalaciones acreditadas por el Programa Nacional de Acreditación de Laboratorios Ambientales (NELAP, por sus siglas en inglés) con certificación de agua potable (DW, por sus siglas en inglés).

Sé consciente de los cambios en la fuente y los cambios en el tratamiento. Recuerde, eres el cliente, es tu derecho ser informado y es tu responsabilidad informar cualquier cambio detectado que genere preocupación. Tu cerveza te lo agradecerá.

* * *

Debbie Cerda es consultora de agua para sistemas de agua pequeños y públicos en Texas. Ha trabajado como operadora de aguas superficiales para la ciudad de Austin y como especialista en calidad del agua potable para el Estado de Texas. Trabaja para Jester King Brewery y desempeña funciones en el Comité Directivo de la AHA.

The post Agua: Identifica tus fuentes appeared first on American Homebrewers Association.

Posted on

Lúpulo para los triceratops: La Revolucionaria Evolución de mi ingrediente cervecero favorito

[Este artículo apareció en la edición de Marzo/Abril 2017 de la revista Zymurgy]

Por Andrew A. Farke, PhD

El lúpulo tiene su historia. La versión que solemos oír generalmente comienza cuando el lúpulo se empezó a añadir regularmente a las recetas de cerveza durante la Edad Media, y termina en los programas de cultivo actuales para lograr lúpulos de aroma intenso. Pero limitar la historia del lúpulo a su uso por parte de los seres humanos es como mirar los últimos 10 segundos de Star Wars. ¡Te pierdes la mayor parte de la trama!

Vamos a profundizar un poco. Vamos a profundizar mucho, de hecho, a través de 125 millones de años, para descubrir la historia real del lúpulo. Recorreremos juntos este viaje épico con mis compañeros paleontólogos, algunos de los cuales también son cerveceros caseros. Mientras comenzamos nuestro recorrido, tuve que preguntarles: ¿por qué es importante?

Kelli Trujillo, experta en fósiles jurásicos, cervecera casera y jurado del BJCP, respondió: “La historia prehistórica del lúpulo es una parte del lugar donde se encuentra el lúpulo en la actualidad; lo lejos que ha llegado tiene que ver con dónde comenzó en primer lugar”. Otro paleontólogo y cervecero casero, Joe Peterson, tiene ideas similares. “Es por eso que nos interesamos en la prehistoria de cualquier cosa que estudiamos. Entender estos orígenes nos ayuda a poner nuestras prácticas, culturas y biología en un contexto más amplio con nuestro planeta y su historia”.

Ramificándose

El lúpulo pertenece al género Humulus y es solo una pequeña ramita del árbol genealógico de la vida. Corresponde a los científicos averiguar los patrones de ramificación de ese árbol durante la evolución de la vida. La anatomía vegetal es nuestra primera línea de evidencia: las plantas más estrechamente relacionadas tienden a compartir rasgos similares en sus hojas, semillas y flores, que pueden usarse para identificar a los primos cercanos en el árbol genealógico. La segunda es la genética. Al igual que con los rasgos visibles, el código de ADN en las células es más similar en los organismos estrechamente relacionados que en los relacionados de forma lejana. Por último, los fósiles capturan los cambios en los organismos a lo largo del tiempo y documentan el momento y la ubicación de los orígenes del lúpulo.

Si retrocedemos lo suficiente, toda la vida en la tierra (el lúpulo y los seres humanos por igual) comparten una ascendencia común. Debido a que los primeros dos mil millones de años, más o menos, implican en su mayoría organismos unicelulares blandos, limitaremos nuestra discusión solo a un grupo de plantas recientemente evolucionadas, las angiospermas. También son conocidas como plantas con flores, por razones que esperamos que sean obvias. Ya deben conocer bastante bien la flor del lúpulo; es el “cono” que utilizamos en la elaboración de la cerveza. Las primeras angiospermas evolucionaron junto a los dinosaurios, y las flores fósiles indiscutiblemente más antiguas aparecieron hace 125 millones de años en China.

Los muchos subgrupos diferentes de angiospermas deben haberse separado de su antepasado común en esta época, pero no tenemos suficientes registros fósiles como para conocer los detalles específicos. La anatomía y el ADN completan los detalles. Resulta que el lúpulo es solo un miembro más de un grupo más grande de angiospermas llamado Cannabaceae (cannabáceas). Este sugerente nombre reconoce a otro miembro famoso del grupo: el Cannabis, también conocido como cáñamo, también conocido como marihuana. Pero sería demasiado sensacionalista ignorar a los miembros menos conocidos de las cannabáceas, como el almez. Esta amalgama aparentemente aleatoria de especies se identifica como una familia cercana a partir de los atributos heredados de su antepasado común: numerosos fragmentos compartidos de ADN, la forma del embrión contenido en sus semillas y otras características de las semillas y las flores.

La evidencia genética y anatómica demuestra aún más que el Cannabis es el pariente vivo más cercano de nuestro humilde lúpulo, Humulus. Más allá de muchísimo ADN compartido, las dos plantas también tienen un tipo de hoja aproximadamente similar, semillas y polen similares, e incluso flores similares a nivel microscópico. Algún proto-lúpulo/marijuana dio lugar a ambos tipos de plantas, pero ¿dónde y cuándo ocurrió esto? Si pudiéramos poner nuestras manos en el fósil de Humulus, esa sería una gran forma de resolver el enigma.

Stone-Faced IPA

Receta de los editores de Zymurgy

La mayoría de los lúpulos que utilizamos para fabricar cerveza son de la variedad Humulus lupulus var. lupulus, pero las cepas de H. lupulus var neomexicanus están ganando popularidad entre quienes están abiertos a la experimentación. Una cepa de H. lupulus var. neomexicanus, Medusa, ha aparecido en al menos dos cervezas comerciales: Harvest Wild Hop IPA de Sierra Nevada y Neomexicanus Native Pale Ale de Crazy Mountain Brewing Company. Y la variedad experimental HBC 438, apodada Ron México, se puso a disposición de los cerveceros caseros en 2014.

Stone-Faced IPA está elaborada en torno a Medusa, pero cualquier variedad de neomexicanus debería andar bien y podría ser más fácil de conseguir, en especial el HBC 438. Los monjes del Monasterio Benedictino de Cristo en el Desierto, en Nuevo Mexico (holyhops.biz) cultivan otras cinco variedades (Chama, Latir, Tierra, Amalia y Mintras), que se agotaron rápidamente anteriormente, pero cada vez más granjas dedican superficie a estas variedades exclusivamente norteamericanas.

Mantengan los ojos abiertos para encontrar el neomexicanus. Y cuando encuentren un poco, preparen un batch de Stone-Faced IPA.

  • Volumen del batch: 19 litros (5 galones estadounidenses)
  • Densidad inicial: 1,063 (15,4 grados Plato)
  • Densidad final: 1,012 (3 grados Plato)
  • Color: 7 según el SRM
  • Amargor: 52 IBU
  • Alcohol: 6,7 % según el volumen

MALTAS:

  • 5,44 kg (12 lb) de malta Pale Ale de 2 carreras
  • 113 g (4 oz) de malta caramelo de 40 grados Lovibond

LÚPULOS:

  • 28 g (1 oz) de lúpulo Magnum, 12 % de alfa ácidos a los 60 min
  • 28 g (1 oz) de lúpulo Medusa, 4,5 % de alfa ácidos a los 10 min
  • 28 g (1 oz) de lúpulo Medusa, 4,5 % de alfa ácidos a los 0 min
  • 28 g (1 oz) de lúpulo Medusa, 4,5 % de alfa ácidos en whirlpool a los 10 min
  • 28 g (1 oz) de lúpulo Medusa, 4,5 % de alfa ácidos, adición (dry-hop) a los 5 días

LEVADURA:

  • Wyeast 1056 American Ale, White Labs WLP001 California Ale o Safale US-05

ELEMENTOS ADICIONALES:

  • 1 tableta Whirlfloc añadida 10 minutos antes de finalizar el hervor

NOTAS DE FABRICACIÓN:

Macera 60 minutos a 67° C (152° F), extrae y lava. Recoge aproximadamente 24,6 l (6,5 galones) de mosto y hierve 60 minutos, agregando el lúpulo y las tabletas Whirlfloc según el cronograma indicado. Realiza el whirlpool (o remoja en whirlpool el lúpulo en el mosto caliente antes de enfriar) durante 10 minutos, luego enfría hasta 18° C (64° F) y añade la levadura. Fermenta durante 10 días o hasta que la densidad específica se estabilice aproximadamente en 1,012 (3 grados Plato). Transfiere al secundario y añade el dry-hop. Dejar que  acondicione el dry-hop durante 5 días antes de envasar a 5,2 g/L (2,6 volúmenes) de CO2.

VERSIÓN CON EXTRACTO DE MALTA:

Remoja la malta caramelo durante 30 minutos a 68° C (155° F), sustituye 4 kg (8,75 lb) de jarabe de extracto de malta clara de 2 carreras y continúa con el hervor como se indica arriba.

Banquete para dinosaurios

La Formación Hell Creek es más conocida porque sus dinosaurios; los triceratops y tiranosaurios fueron los últimos de su especie en acechar la antigua América del Norte occidental. Pero también tiene un excelente registro de plantas fósiles. En un único sitio de 67 millones de años de antigüedad en Dakota del Norte se encontraron numerosas hojas fósiles con una forma y un patrón de venación sospechosamente similar a los del lúpulo. La identificación como Humulus se ve reforzada por los estolones (los tallos horizontales que generan nuevas plantas) que acompañan algunas de las hojas (cualquier persona que cultive lúpulo está familiarizada con estos tallos horizontales que pueden cubrir rápidamente un pedazo de tierra). Los Humulus de Hell Creek crecían en parcelas abiertas cercanas a los ríos, donde las frecuentes inundaciones habrían alterado el suelo y dado lugar a plantas de rápido crecimiento como el lúpulo para cubrir la tierra y, quizás, treparse por los troncos de los árboles.

Es muy posible que los triceratops, cuyos huesos son bastante comunes en la Formación Hell Creek, hayan saboreado esos lúpulos. Incluso si los dinosaurios no buscaban específicamente el lúpulo como fuente de comida, algunos comían de manera bastante indiscriminada, lo que queda demostrado por sus grandes bocas, así como en los contenidos intestinales fosilizados y la caca fosilizada que contiene una mezcla de plantas mesozoicas. Como paleontólogo y cervecero casero, tenía que saber: ¿los dinosaurios influenciaron la evolución del lúpulo de algún modo? ¿Puedo darle las gracias a un triceratops por mi IPA?

Le hice esta pregunta a Ian Miller, un paleobotánico que se especializa en plantas fósiles del oeste de América del Norte. Ian especula que el amplio apetito de los dinosaurios gigantes podría haber ejercido bastante presión sobre el lúpulo y otras plantas. ¿Cómo podía enfrentarse a eso el lúpulo? “Tenían que crecer rápido, crecer por todos lados, regenerarse a partir de partes de plantas… ¡un comportamiento similar al de las malezas! El carácter de maleza que es el sello del [lúpulo y otras plantas con flores] se seleccionaría para un paisaje donde las plantas se consumen rápidamente”, me dice Ian. El saber que aún no hemos encontrado una planta de lúpulo fosilizada agarrada en las mandíbulas del cráneo de un triceratops o en los excrementos de un dinosaurio, puso énfasis en la naturaleza especulativa de este escenario. Pero definitivamente es una idea para masticar (¡y para beber!).

Lúpulo en movimiento

Aunque este primer registro fósil es escaso, nos dice mucho sobre los orígenes del lúpulo. Debido a que el lúpulo más antiguo conocido vivió en América del Norte, el primer Humulus probablemente evolucionó en este continente y se extendió a Europa y Asia desde allí. Utilizando ese registro fósil en conjunto con datos de las especies modernas, el botánico Jeffrey Boutain calcula que el Humulus y el Cannabis separaron sus caminos evolutivos hace aproximadamente 87 millones de años (más o menos algunos millones de años).

Los grandes dinosaurios (con la excepción de sus descendientes las aves) y muchos otros organismos se extinguieron hace 66 millones de año, debido en gran parte al impacto masivo de un asteroide en lo que es ahora México. Ian Miller considera que la supervivencia del lúpulo durante esa catástrofe es bastante increíble. “Esta planta sobrevivió el impacto de un meteorito, la onda de choque, una tormenta de fuego, el pulso térmico, la lluvia ácida… y después los efectos del invierno nuclear. Esta planta maravillosa que hoy conocemos y amamos logró sobrevivir a todo eso, cuando el 60 por ciento de las plantas en América del Norte se habían extinguido”.

Nuestro siguiente lúpulo fósil aparece en rocas de 35 millones de años en Colorado, en el Monumento Nacional de Florissant Fossil Beds. Estos lúpulos, que recibieron el nombre de Humulus florissantella, crecieron entre los ancestros de los caballos actuales, además de animales extintos parecidos a los rinocerontes y a las ovejas. Las semillas fósiles de Siberia occidental, de aproximadamente 10 millones de años de antigüedad, documentan el lúpulo conocido más antiguo de Asia. Hace 3 millones de años, aproximadamente, tenemos lúpulos fósiles en Alemania. Pero a pesar de todo nuestro interés en el lúpulo, el registro fósil es un tanto escaso.

La genética completa nuestros conocimientos sobre las especies vivas de lúpulos actuales (o subespecies, o variedades, según a qué botánico se le pregunte). Usando la tasa de mutaciones genéticas como una especie de reloj, la rama con la especie de lúpulo cervecero actual (Humulus lupulus) probablemente se originó en Asia y se separó de sus parientes (como el lúpulo silvestre Humulus scandens) hace 44 millones de años o hace “tan solo” 6 millones de años. La escasez del registro fósil (y, algo sorprendente, la escasez de datos sobre el lúpulo silvestre actual en las colecciones de los museos) contribuye a esta incertidumbre. ¡Es momento de que los botánicos y paleobotánicos recolecten más muestras y hagan más investigaciones!

how-to-store-hops

Conservación en frío

La diversificación de las especies modernas de lúpulo fue seguida por otro gran evento mundial: la Edad de Hielo. La mayor parte de las latitudes del norte estaban enterradas bajo gruesas capas de hielo, haciendo que la tierra fuera inhabitable para el lúpulo o para cualquier otra planta. ¿A dónde estuvo durante este tiempo?

El registro fósil más detallado del lúpulo durante la Edad del Hielo proviene de un lugar sorprendente: el polen. El polen contiene el gameto masculino de una planta (un nombre bonito para el “espermatozoide”), rodeado por una cubierta protectora. Muchos de nosotros estamos familiarizados con el lado alergénico del polen, especialmente cuando el aire está lleno de esas cosas durante la temporada de apareamiento de la planta. Sin embargo, esa abundancia es una bendición para los paleontólogos, porque los granos de polen son duraderos y se fosilizan con bastante facilidad. Un poco de sedimento lacustre antiguo podría contener miles de fósiles de polen individuales provenientes de decenas de plantas diferentes. En muchos casos, el polen puede cotejarse con su tipo de planta, lo que permite a los investigadores rastrear el surgimiento, caída y distribución de una planta en un área.

Como ejemplo del polen del lúpulo en acción, los científicos tomaron muestras de antiguos lechos de lago polacos de 480.000 a 620.000 años de antigüedad (justo en el medio de la Edad de Hielo, cuando el Homo erectus todavía andaba sobre el planeta). El lúpulo actual en esa región prefiere los climas relativamente templados. Así, los cambios en la abundancia de polen de Humulus a través del tiempo rastrean el modo en que la planta ingresó y se retiró de una zona durante los intervalos de calor y de frío.

Dentro de América del Norte, el lúpulo nativo (incluido el elogiado neomexicanus, considerado distintamente como su propia especie de Humulus o una subespecie/variedad de Humulus lupulus) sufrió un duro golpe durante la Edad de Hielo. Aunque el lúpulo “silvestre” actual se puede encontrar al norte hasta Saskatchewan, las capas de hielo gruesas lo habrían excluido de esa región hasta aproximadamente 10.000 años atrás. Los que estaban en la zona sudoeste de Estados Unidos esquivaron ese golpe de hielo, y por eso tienen un patrimonio genético profundo y diverso. Este patrimonio ahora está siendo investigado por cultivadores de lúpulo que buscan el carácter único de sabor y aroma encerrado en el código genético neomexicanus. Además, las variedades de lúpulo nativo a menudo son resistentes a las plagas y pestes que afectan a las variedades cultivadas. Por lo tanto, la diversidad del lúpulo nativo, que evolucionó en respuesta a una variedad de cambios en el medio ambiente, podría garantizar el éxito continuado de la horticultura del lúpulo. Al estudiar las respuestas pasadas del lúpulo nativo al cambio climático en los registros fósiles, los botánicos conservacionistas también pueden ayudar a predecir dónde puede sobrevivir mejor esa biblioteca genética de plantas silvestres frente al cambio climático futuro y otros impactos humanos, y dónde hay que intensificar los esfuerzos de conservación.

No hagas cerveza con lúpulo viejo

Alyson Brink, paleontólogo y cervecero casero, plantea una importante pregunta final: ¿podríamos haber fabricado cerveza con lúpulo de la época de los dinosaurios? “Pienso en el lúpulo ancestral que crecía junto a los mamíferos pequeños del Cretácico Superior [durante la época del triceratops]. ¿El aroma a pino del lúpulo fresco les habrá resultado tan atractivo como la Citra IPA increíblemente aromática lo es para mí? Lamentablemente, hasta ahora no se encontró ningún cono de lúpulo fósil. Sin embargo, las especies vivas de lúpulos actuales sugieren que los lúpulos aromáticos ricos en ácidos alfa son un desarrollo evolutivo reciente.

Los primos lúpulos silvestres (H. scandens y H. yunnanensis) de la línea que incluye el lúpulo para cerveza no son aromáticos y tienen un mínimo contenido de ácidos alfa; en otras palabras, no son de lo más útiles para fabricar cerveza. Esto sugiere que el antiguo Humulus, incluyendo el que existía junto con el triceratops, también habría sido un fracaso para el hervidor y la adición después de enfriar el mosto. Por mucho que me gustaría visitar el Mesozoico, no sería un buen lugar para instalar una cervecería.

¡Qué viaje! Nuestra humilde planta de lúpulo fue comida de los dinosaurios, soportó extinciones globales y llevó el registro de las fluctuaciones de las capas gigantes de hielo en todo el hemisferio norte. Y ahora, gracias a la relación con los fabricantes de cerveza, el lúpulo se extiende aún más y tiene un futuro más grande que nunca antes. Cada trago de tu cerveza casera vuelve a contar la historia.

* * *

Andy Farke es paleontólogo y cervecero casero, y reside en Claremont, Calif. Escribe un blog acerca de sus aventuras en la fabricación de cerveza en andybrews.com.

The post Lúpulo para los triceratops: La Revolucionaria Evolución de mi ingrediente cervecero favorito appeared first on American Homebrewers Association.

Posted on

How to Make Sake at Home

by Amahl Turczyn

Making authentic sake might seem intimidating for those who have never tried it before, but the process is really no more complex than brewing all-grain beer. The hardest part is timing, planning, and doing everything in the proper order. If you are handy with scheduling, it should not be a problem; my preference is to write out the whole process on a calendar, detailing amounts, times, and temperatures during the entire five-week process.

Google Calendar is great for this purpose; you can add an entry for each step (e.g. Day 6: 6am—stir shubo mash; 6pm—prepare for hatsuzoe) with detailed instructions to follow within each entry. Each stage involves measuring and then chilling or freezing a portion of water; measuring and soaking a portion of koji; and finally, washing, soaking, steaming, chilling, and adding a portion of rice. At each stage, you add progressively larger additions of these three primary ingredients: water, koji, and steamed rice. We’ll look at process specifics later, but for now, let’s take a look at each ingredient in turn.

Ingredients

Water

Water for sake has a fairly specific profile, which is best built from a distilled or reverse-osmosis (RO) filtered base. Some of the key nutrients for the yeast include those found in ordinary wine yeast nutrient, but others are a little more difficult to track down. Magnesium sulfate is one of these; it’s rarely used in brewing beer, but it’s very important in sake. Fortunately it’s easy to find, and is better known as Epsom salt. Only a pinch is needed. Another necessary salt is potassium chloride. This is a little harder to find, but it’s one of the ingredients in a specific brand of salt substitute: Morton’s. Again, very little is required, but its presence in sake brewing water is necessary for yeast fermentation.

Yeast

Speaking of yeast, one of the most commonly used sake yeasts in the world is fortunately available from Wyeast. It’s called Sake #9, but the Wyeast designation is WY4134. Add a note to your calendar plan to give yourself enough time for the smack pack to inflate—usually two or three days, depending upon the freshness of the pack. You want it almost fully inflated when you add it to your “seed mash” or shubo.

Koji

Sake Ingredients (for 5–6 gal)

  • Wyeast 4134 Sake yeast
  • 30 lb. (13.6 kg) polished sake rice or short grain table rice (Kokuho Rose works well)
  • 7.5 lb. (3.4 kg) koji rice
  • 11.5 mL 88% lactic acid (available from any good homebrew shop)
  • 0.4 oz. (12 g) wine yeast nutrient
  • 0.07 oz. (2 g) Epsom salt
  • 0.74 oz. (21 g) Morton Salt Substitute (only this brand!)
  • 6 gallons (23 L) reverse osmosis or distilled water
  • Bentonite or Sparkolloid clarifying agents (optional)
  • Silicone antifoam (optional)

What is koji? It’s rice that has been covered with mold. Not very appealing by the sound of it, but this is a special type of mold—Aspergillus orzyae—that contributes the enzymes necessary to turn starch into sugar. Rice doesn’t have the same naturally occurring amylase found in barley malt. That’s where koji comes in. The mold is first grown on cooked rice in a warm, humid environment. One of the best sources for koji is SakeOne in Forest Grove, Oregon. Their koji is grown on rice, which is then dried, packaged in convenient 40-ounce bags, and sold through FH Steinbart in Portland, Oregon. About the only alternative source is Cold Mountain koji, which is available through some grocery chains. When the koji is mixed with water, steamed rice, and yeast, the mold creates sugar from starches in the steamed rice, even as the yeast creates alcohol from the sugar. This “parallel fermentation” allows the yeast to metabolize sugars and produce ethanol gradually, boosting its tolerance and allowing it to reach astounding concentrations of alcohol.

Rice

Depending upon the degree of polish the rice has, sake fermentations can be as high as 22 percent ABV. Polishing the rice before it is steamed results in cleaner, smoother sake, but it is lower in alcohol, usually a maximum of 18 percent ABV. Rice used by the big sake breweries is always polished, sometimes down to 50 percent of the original, husked rice kernel. Table rice, by comparison, is rarely polished more than 10 percent. Because of the extra bran oils surrounding the core of the kernel, fermentation proceeds further, but the resulting sake has a harsher taste. It’s a bit like trub in the brewing world: a little will help your yeast, but too much will degrade the quality of the finished product.

Rice grown and polished specifically for making sake is difficult to find outside of Japan. There are a few sources for California-grown rice that has been polished specifically for sake making, including SakeOne, again sold to the public via FH Steinbart. However, you can still make very good sake with table rice. I’ve had the best luck with California short-grain rice and rice specifically grown for sushi. Kukoho Rose makes good sake, and it will ferment out to above 20% ABV. I’ve found that sourcing this rice through a big-box store like Costco can make sake-making very cost effective.

Other Ingredients

Other ingredients necessary for the recipe and method below are fairly easy to come by, though they may not all be available from your local homebrew shop. You will need 88% lactic acid (liquid), wine yeast nutrient, sanitizer, Bentonite or Sparkolloid (wine clarifying agents), and, as mentioned above, Epsom salt and Morton Salt Substitute—these last two can usually be found at the grocery store. You may also find a silicone antifoam product like Fermcap S to come in handy; shortly after the last addition of steamed rice, koji, and water, you have the full volume of fermenting sake, and it can a create prodigious amount of yeasty foam, even at a low, controlled temperature. Depending upon your fermenter setup, you may want to add the antifoam to control fobbing and overflow.

Why add acid? As with beer, a lower pH protects the ferment from competing bacteria and yeast. Japanese toji, the sake masters, realized this, and acidity has always been a part of making sake. Over time, a couple of different acidification methods have evolved. The more traditional yamahai moto method relies on lactic bacteria introduced by using your (clean, but not sanitized) hands to mix the rice. This can result in too much acidity, however, and it relies heavily on pasteurization toward the end of the process to limit the continued production of lactic acid. (Besides, there’s something kind of yeaughh about making any food product with human-sourced bugs. For example, I like the idea of chicha corn beer made with human saliva, but I’d really rather not taste it. Call me limited.)

A more modern method called sokujo moto is my preference, and the method we’ll be using. It doesn’t rely on bacteria, but rather on one initial addition of 88% lactic acid to the yeast starter. With this method, you don’t ever touch the mash with your hands, but instead stir it with utensils that can be pre-sanitized to avoid introducing bacteria. This also keeps total acidity lower, and avoids the heavy reliance on pasteurization (though pasteurization is still recommended to stabilize the finished product). It means you have to sanitize everything that comes in contact with your sake, just as you would when making beer.

Equipment

You will also need some specialized equipment. Some things you may already have on hand include

  • A 3-gallon stainless steel stockpot with lid to use for your yeast mash
  • A 5-gallon carboy to use as a secondary fermenter
  • Glass growlers for settling the lees
  • Transfer tubing
  • A brew kettle for bulk pasteurization
  • Ideally, a temperature-controlled chest freezer or fridge

But because the process differs from homebrewing in a few specific ways, it will be worth investing in some extra equipment just for sake making. The most important of these items is a large steamer. You will be steaming, not boiling your rice before it is added to the ferment. Why? I suspect there are a couple of reasons, but Fred Eckhardt, who quite literally wrote the book on sake-making in the U.S., was quite adamant about it. You cannot make sake with boiled rice! That means no rice cookers!

One reason is that boiling makes the rice too soft. You want to gelatinize the rice starches so that they are accessible by koji amylase, but you have to keep the parallel fermentation in balance. Too much starch too fast will throw off this balance, and you’ll get too much sugar too soon. The sugar needs to be converted from starch at roughly the same rate as the yeast can convert it to alcohol. Thus, the kernels of rice need to be cooked over, not in, boiling water. Steaming gelatinizes the rice grains, but keeps them firm and chewy, so they give up their starches slowly.

Also, boiled rice makes separation from the lees post-fermentation very difficult, as it results in a thick, gluey mass that sets up once it and any remaining yeast and koji settles after fermentation. Liquids have a very difficult time passing through this mass of solids, known as sake kasu, so separating wine from lees becomes even more difficult than it already is. The sturdier structure of steamed rice grains helps with this separation. But more on this aspect of the process later.

Steamers

Steamers are usually metal or bamboo and are most easily found in large Asian food stores. You’ll need one that will allow you to steam 15 pounds of rice in one session. You’ll also get more even steaming if you limit the number of tiers to no more than two, though it’s best to switch the tiers halfway through the one-hour steam. I use an aluminum steamer with perforations large enough to allow steam to pass through, but too small for a kernel of rice. Bamboo steamers can also work, as well as metal steamers with larger perforations, but you will need to line them with a single layer of cheesecloth.

Fermenter

You will also need a large (30-gallon) fermentation vessel. I have found that a food-grade plastic storage bin from a restaurant supply store works great for this purpose. It’s like a medium-sized plastic trash bin and is a perfect fit for a temperature-controlled chest freezer. The handles allow you to wrestle it out, partially filled with sake and kasu, when it’s time to rack to secondary. You can also sanitize it with a foaming acid sanitizer. Just make sure it’s only used for sake, and try to keep it clean and scratch-free when it’s not in use.

Miscellaneous Equipment

Useful but not necessary are food-grade plastic rectangular storage bins. These are used as intermediary vessels to mix steaming hot rice and the chilled, measured water addition before it’s added to the main fermenter.

You’ll also need a mixing spoon (stainless is my preference, so I can sanitize it easily) and a longer-handled spoon to stir the ferment. This can be a brew spoon if you are confident you can sanitize it before use. It needs to be long enough to reach to the bottom of your fermenter for thorough stirring.

Ice cube trays are a bonus, but you can freeze your water additions in stainless steel bowls; even a partial, overnight freeze will work fine. You just need to chill down your fresh-steamed rice quickly, so that it can be added to the fermenter at the correct temperature.

Finally, a sturdy nylon mesh bag, preferably one that will fit a 5-gallon bucket, is useful for straining the finished wine from the settled sediment (kasu). For this batch size, the mass of kasu is considerable, so you may need help tying it off and suspending it at the correct height; I’ve used a small aluminum ladder to hang the bag of lees in my garage for several hours, but you can also use several small bags if one large one is unmanageable.

Equipment

  • Temperature-controlled chest freezer (optional but highly recommended!)
  • Large steamer (big enough to steam 15 lb. of rice!)
  • 23-gallon plastic hot food pan (for stirring hot rice)
  • Quick-read thermometer
  • Long-handled, stainless steel spoon
  • 3-gallon stainless steel stockpot with lid (for yeast mash)
  • Food-grade 30-gallon plastic trashcan or food storage bin with lid (fermentation vessel)
  • Ice cube trays (optional) and freezer
  • Accurate scale (everything is measured in metric weight units for this recipe)
  • Thermometer
  • 5-gallon carboy
  • Transfer tubing
  • Brown glass growlers
  • Brew kettle for pasteurizing a carboy or keg
  • 5-gallon-sized nylon mesh bag (for separation of lees)
  • Clean 5-gallon bucket (for separation of lees)

Sake

Process

Once you have collected the equipment and ingredients for your batch, you can begin planning out the process and building your timeline or calendar. The first week is relatively simple. You’ll be building up and fermenting your yeast starter, as you would with brewing. You’ll mix water with nutrients, koji, and a bit of steamed rice with the yeast; that “seed mash,” called shubo, will then ferment for several days to build up the yeast. Most of the real work for you takes place during the second week. That’s when you double the volume of your starter three times; these additions of water, koji, and rice are called, in order, hatsuzoe, nakazoe, and tomezoe.

Koji always goes in the night before you process rice; for odori, you add it to the shubo yeast mash. Once the rice and water is added the next day, the whole mash is transferred to your main fermenter. At the same time koji is measured and added the night before, the water addition is measured, with part of it going into the freezer. This is so that when you finish steaming the rice the next morning, you can mix in ice water to bring the hot rice down to at 70° F (21° C) or cooler before adding it to your active yeast. With the third doubling, you’ll be processing 15 lbs (6.8 kg) of rice: washing, soaking, draining, steaming, then mixing with ice water.

Let’s take a look at each one of these. Know in advance that soaking, draining, and steaming will each take an hour, so you are looking at 4 hours of work for each rice addition.

Washing

To wash rice for the table, it’s recommended that you rinse three times in cold water, dumping the turbid, white water with each rinse. With sake, the rice needs to be cleaner: that wash water should run clear. Using a large bin for washing can be effective, and scrubbing the rice between your hands can also hasten the process. For larger amounts, I’ve found that using one of the large aluminum steamer trays and the sink sprayer also helps.

Soaking

Once the rice is clean and free of dust or talc, scrape it carefully into a large bowl and cover with a couple of inches of cold water. If you are extra cautious, or happen to have tap water with any amount of iron in it, use filtered water for soaking. Rice will absorb quite a bit of this water as it soaks, and that’s what you want: the absorbed water is what gelatinizes rice starches during steaming.

Draining

Use a colander or a cheesecloth-lined steamer tray to drain the rice. While it’s draining, you can prepare your steamer and bringthe water to a boil.

Steaming

Using no more than two trays above your boiling water, steam the rice. I start timing when I can see steam escaping from the lid over the rice. Make sure you check your steamer after 30 minutes to rotate the trays top to bottom and check on the water level below; you definitely don’t want it to run dry.

Cooling and Mixing

While the rice steams, remove your ice and water, and clean your mixing vessel, quick-read thermometer, and spoon. Large chunks of ice are best broken up into pieces. (Ice cube trays really help with this but are not strictly necessary.) Dump the hot rice directly from the steamer into the mixing bin, then add your ice water. As you stir, breaking down chunks of steamed rice and lowering/evening the temperature of the mixture, have your thermometer ready to take readings. Once past 70° F you can bring the bin out to your fermenter and add the rice mixture, though continued cooling to 60° F or lower is preferable if you can manage it. If chunks of ice remain in the mixture, don’t worry, it will melt, and should not adversely affect the main ferment. Colder is always better. Make sure you stir the main mash to integrate each addition and equalize the temperature.

Temperature Control

Sake yeast ferments well at lower temperatures, much like lager yeast, but the seed mash or shubo should ferment at 70° F (21° C) to maximize cell growth. After a week of this, lower the shubo mash temperature to 55° F (13° C). Once the doubling additions begin, your sanitized, main fermenter should be placed in a temperature-controlled chest freezer so that you can lower the temp with each addition. The first addition (hatsuzoe) will equalize around 65° F (18° C) once the yeast mash is added, and should be lowered slowly to 55° F (13° C) during fermentation. (This “primary” fermentation stage is now called the odori, or dancing ferment, and you will get some delicious bready, fruity aromatics as it bubbles away.) The middle addition (nakazoe) will equalize close to 60° F (16° C), and should be lowered to 50° F (10° C) during fermentation. The final addition (tomezoe) will equalize close to 55° F (13° C) and should be lowered to 45° F (° C) during fermentation. From there, your main ferment can proceed at 45° F (7° C). If for whatever reason this is impractical, you can conduct fermentation at a higher temperature—as high as 55° F (13° C) —but at no time should the main ferment exceed 65° F (18° C).

Stirring

As fermentation takes place, be it in the seed mash or the main ferment, stirring is critical. You will have to stir every 12 hours. As with the steamed vs. boiled rice question, the reason behind this has to do with keeping the fermentation in balance. Agitation keeps starches in contact with enzymes and the resulting sugars in contact with yeast. The rice, koji, and yeast mixture is slowly broken down from semisolid to mostly liquid during fermentation, so regular stirring is necessary, at least initially, to evacuate CO2, and hasten the breakdown of solids.

Once you are done with the three doubling additions, all the ingredients are in the fermenter, and it’s time to cool everything way down and let the yeast do their thing. This is the main ferment, or moromi, and it will last at least one week, depending upon fermentation temperature. With temperature control and a cold ferment, which is ideal, the main ferment can take up to two weeks. The final yodan stage is the adjustment stage where water is added to bring the ~20% ABV final product from full strength (genshu) sake down to an easier-drinking 15-16% ABV by diluting with water. We’ll look at each one of these in turn as we go through the process schedule.

Fermentation Schedule

The schedule will look something like this.

Day 1

Inoculate smack pack of Wyeast 4134

Day 2 (or when smack pack is almost fully inflated)

Prepare water:

  • 1,860 ml reverse osmosis or distilled water
  • 11.4 ml 88% lactic acid
  • 12 g wine yeast nutrient
  • 1.4 g Epsom salt
  • 21 g Morton’s Salt Substitute

Blend water to dissolve solids. Remove 360 ml of this mixture, cover and freeze overnight. Cover the remaining 1500 ml and keep at room temperature overnight.

Day 3

Measure and prepare 1,020 g rice by washing, soaking, and draining it as above. While you are waiting for it to soak one hour and drain one hour, add the contents of the inflated yeast pack to the 1,500 ml prepared water, working with maximum sanitation. Measure and add 345 g koji to the yeast and water mixture. Cover and let stand at room temperature. Meanwhile, steam the rice, checking it partway through to make sure you have enough boiling water for the full one-hour boil. Have your mixing tray, spoon, stockpot with lid, thermometer (all sanitized), and 360 ml ice ready. As soon as the rice is done, pour it into the tray, stir in the ice, and break up any chunks; you should soon have a 70° F (21° C) or cooler mass of rice of uniform consistency. Blend the cooled rice with the yeast, water, and koji mixture in the sanitized stockpot, cover, and leave at room temperature.

Day 3.5

12 hours after blending the shubo mash, sanitize your steel spoon and stir the mash gently for about five minutes. You will need to repeat this every 12 hours (twice daily) for three more days.

Days 4, 4.5, 5, 5.5 & 6

Stir the shubo mash as above, every 12 hours. After the third day of fermentation at room temperature, you can then leave the yeast mash alone until you are ready to begin the main ferment. Depending upon your calendar, you may want to wait a full 7 days, so you can start the main ferment on a weekend; that’s fine. Assuming this is your plan, Day 6.5 will be the night before you steam rice for the first main addition.

Day 6.5: Hatsuzoe prep

The night before you start the main ferment, you’ll need to measure out 675 g koji and add it to your shubo yeast mash along with 1,065 ml RO water. Now is the time to have your temperature-controlled chest freezer empty and ready, and your sanitized, plastic main fermenter, with lid, lowered into it. Set the temperature to 59° F (15° C) and place the covered stockpot with the yeast mash in it. Now, measure out 885 ml and freeze it for the next morning’s steamed rice.

Day 7: Hatsuzoe

In the morning, measure and prepare 1,710 g rice by washing, soaking, and draining it as above. While you are waiting for it to soak one hour and drain one hour, lower the chest freezer with the main fermenter in it to 55° F (13° C). When the washed and soaked rice is fully drained, steam it, checking it mid-steam to swap trays top to bottom and to make sure you have enough boiling water for the full one-hour boil. Have your mixing tray, spoon, stockpot with lid, thermometer, (all sanitized) and 885 ml ice ready. As soon as the rice is done, pour it into the tray, stir in the ice, and break up any chunks; you should soon have a 65° F (18° C) or lower mass of rice, of uniform consistency. A lower temperature is better—try to get it to 60° F (16° C) if possible. This will put less stress on your yeast. Blend the cooled rice into the main ferment thoroughly. Cover.

Day 7.5

12 hours after you’ve added your first main rice addition; stir the contents of the fermenter thoroughly with a sanitized brew spoon. Make sure you reach all the way to the bottom of the fermenting rice mixture. Repeat at 12-hour intervals for a total of 48 hours.

Day 8

Stir the main ferment as above.

Day 8.5: Nakazoe prep

Now you will prepare for the second main rice addition. Measure out 1,020 g of koji and 3.6 L RO water and add both to the main fermenter. Stir thoroughly as you have been doing every 12 hours. Measure 2,610 ml of additional RO water and freeze it for your rice steaming tomorrow morning. At this point, your chest freezer should still be set to 55° F (13° C) and hopefully your active (“dancing,” or odori) ferment shouldn’t be much warmer than 59° F (15° C).

Day 9: Nakazoe

In the morning, measure and prepare 4.08 kg rice by washing, soaking, and draining it as above. While you are waiting for it to soak one hour and drain one hour, lower the chest freezer with the main fermenter in it to 48° F (9° C). When the washed and soaked rice is fully drained, steam it, checking it mid-steam to swap trays top to bottom and to make sure you have enough boiling water for the full one-hour boil. Have your mixing tray, spoon, stockpot with lid, thermometer, (all sanitized) and 2,610 ml ice ready. As soon as the rice is done, pour it into the tray, stir in the ice, and break up any chunks; you should soon have a 60° F (16° C) or lower mass of rice, of uniform consistency. A lower temperature is better—try to get it to 50° F (10° C) if possible. This will put less stress on your yeast. Blend the cooled rice into the main ferment thoroughly. Cover.

Day 9.5: Tomezoe prep

Now you will prepare for the third and final main rice addition. Measure out 1,362 g (or whatever is left) of koji and 12.9 L RO water, and add both to the main fermenter. Stir thoroughly as you have been doing every 12 hours. Measure 2,610 ml of additional RO water (yes, this is the same volume you froze for the previous addition) and freeze it for your rice steaming tomorrow morning. Lower your chest freezer to 50° F (10° C) and hopefully your ferment shouldn’t be much warmer than 55° F (13° C).

Day 10: Tomezoe

This is the big one. In the morning, measure and prepare 6.8 kg (yup, that’s 15 lbs) rice by washing, soaking, and draining it as above. While you are waiting for it to soak one hour and drain one hour, lower the chest freezer with the main fermenter in it to 45° F (7° C). When the washed and soaked rice is fully drained, steam it, checking it mid-steam to swap trays top to bottom and to make sure you have enough boiling water for the full one-hour boil. Check the rice to make sure it is steaming evenly; with this large a volume, you may want to stir the rice in the trays at the midway point when you swap them, just to make sure everything is cooking (gelatinizing) as it should. Have your mixing tray, spoon, stockpot with lid, thermometer (all sanitized), and 2,610 ml ice ready. As soon as the rice is done, pour it into the tray, stir in the ice, and break up any chunks; you should eventually have a 55° F (13° C) or lower mass of rice, of uniform consistency. A lower temperature is better—try to get it as close to 45° F (7° C) as possible, but don’t worry if it’s warmer than that—the large fermentation volume will bring the new addition down to the proper temperature quickly. Blend thoroughly. Take a deep breath of the delicious, estery aromas—banana, melon, black walnut—rising from your fermenter. If the fermenting volume looks as though it might foam up beyond your fermenter’s capacity, you might consider adding a small amount (3 ml) of silicone antifoam, sanitized in 10–15 ml boiling water to keep it under control. Cover.

Days 10.5, 11, 11.5

From here, your only task will be to stir the main ferment every 12 hours for the first two days (48 hours) of fermentation. Keep the temperature set to 45° F (7° C) or as near as you can manage. Make sure your sanitized brew spoon is long enough to reach all the way to the bottom of the fermenter. At the lower end of the temperature range, which may be as high as 60° F (16° C) though this is not recommended, fermentation can take up to two weeks. At higher temperatures, it can be over in a week. Begin taking gravity readings of the sake after about 6 days. Once the sake begins to approach 1.000 specific gravity (see yodan stage below) you can begin to consider racking.

Day 18 to 24: Water adjustment (yodan)

Depending on whether you used highly polished sake rice or table rice, the strength of your uncut, full-strength (genshu) sake will vary a bit. Polished rice will give you a final strength of around 18% ABV, while table rice will be around 20–22% ABV. This will also vary with how dry you’d like it. If you like sweeter sake, rack the sake sooner—at 1.003 specific gravity—which equates to -4.3 SMV (Sake Meter Value) on the sake sweetness scale, if you are familiar with authentic, high-quality bottled sake. If you prefer a drier product, wait a little longer, until the sake has attenuated to 0.995 specific gravity (+5.8 SMV). Personally, (and much to Fred’s horror) I prefer bone-dry, genshu sake of +15 SMV so I wait until it reaches 0.990 before racking and clarifying. It takes more time, as the yeast is understandably exhausted by this time, but with table rice, it is definitely capable of reaching this level of dryness.

But if you’d rather not have genshu sake, and would like to target a more conventional strength, then regardless of how sweet your finished sake is, you’ll want to add water to bring the ABV down to 15 to 18%. Be careful about adding too much water—it’s much like adding salt, in that you can’t undo it. For this batch size, an addition of 2.3 to 2.6 L of boiled, chilled water will put you in the 16.5% ABV range. Why boiled? Because at this stage you will need to be very careful about oxygen uptake. As with finished beer, your alcoholic beverage now is very susceptible to oxidation, and oxygen will add cheesy flavors and aromas to sake. It can also color it an unattractive yellow. Your sake, if made with table rice, will already have more color than most store-bought brands made with polished rice, especially if you choose to go the genshu route. But please take every precaution to keep oxygen out, and if you choose to dilute your sake, that means removing as much oxygen from the water addition as possible; so boil it a good 15 minutes, then chill it before adding.

Adding this DO (de-oxygenated) water addition prior to racking allows whatever yeast are still on duty to scavenge and metabolize any remaining traces of oxygen and hopefully leave you with a largely oxygen-free final product.

Racking and Separation of Lees

After two full weeks of primary fermentation (and if you’ve added water, wait another three days), your sake will be ready to rack. Have a brew buddy help you lift the primary fermenter up out of, and onto your chest freezer. Use a sanitized siphon hose to rack as much liquid as you can off the top of the fermenter and into a sanitized 5-gallon bucket lined with your sanitized nylon mesh bag. Again, be mindful of oxygen during this process. As an added precaution, I usually dose the receiving bucket with a blanket of CO2, and try to limit splashing the wine as much as possible. The sake will be milky white, and there may be solids suspended in it that will eventually clog your transfer hose. That is normal; your nylon mesh bag will catch the solids. Get as much liquid as you can, then use your transfer hose to rack that liquid from outside of your nylon mesh bag to a sanitized, CO2-blanketed, 5-gallon carboy.

The solids from the fermenter can now be transferred to the mesh-lined bucket. Once all the solids are in the nylon bag, it can be gathered and tied at the top, then lifted gently to allow liquid trapped in the kasu to drain into the bucket; that liquid can then be racked into the carboy. You should be able to fill the carboy to the very neck, and still have around a gallon of wine left over if you let the bag drip for several hours or overnight. Add a stopper and air lock to the carboy and place it back into the chest fridge at 45° F (7° C) to settle. It may ferment a bit more, since you will have released some starches and sugars during the racking and pressing of the lees; that’s fine, as the yeast may be able to scavenge any accidentally introduced oxygen as well.

The remaining wine that drips into the bucket can be bottled up into one or more glass growlers (brown glass if possible, as your sake is susceptible to light at this stage, as well as oxygen). Use stoppers and airlocks for all secondary containers, and try to fill them up to the neck with wine. Eventually, after a full night of your bag of kasu draining, the dripping will slow. It is possible to use a wine press at this stage to squeeze every last drop of wine from the kasu. Check the carboy and growlers in your chest fridge periodically to monitor clarity. Sparkolloid or Bentonite can be used as fining agents to speed up this process, which can take up to two weeks. Once it has reached your preferred level of clarity (and you may want to rack it off the lees into separate sanitized and blanketed carboys) the clear wine can then be pasteurized and packaged.

And don’t throw away that kasu! It’s great as a marinade for fish and chicken, it can be baked into bread dough for a super-crispy crust (and it makes an amazing pizza crust), or it can be used to make traditional Japanese pickles…the culinary uses are endless. Just do an online search for sake kasu recipes. Bagged kasu keeps just fine in the freezer or fridge.

Pasteurization and Packaging

I use the term “pasteurization” loosely—Japanese sake masters (toji) discovered long before Louis Pasteur’s time that heating their finished sake for a brief period before packaging it preserved its quality. The enzymes in the koji are deactivated, yeast metabolism is halted, and any live bacteria residing in the beverage is shut down. The process basically stabilizes the wine so that it can be kept for several months at room temperature. Of course, if you have the fridge space, you don’t have to pasteurize at all, but you’ll have to keep this unpasteurized wine at 33 to 40° F (1 to 4° C) until it is consumed. This “fresh” sake is called nama, and is often referred to as “draft sake.”

If you choose to bottle and heat-stabilize your sake, it can be pasteurized right in the bottle by using your trusty stockpot on the stove. Fill the stockpot half full with water, put in as many bottles of sake as will fit in the bath, and slowly heat the water to 140° F (60° C). Make sure the water outside comes up to the level of the wine in the bottles. Sanitize a thermometer and stick it in one of the bottles to monitor wine temperature; when the wine reaches 140° F (60° C), you may remove the bottles, cap them and allow them to cool, repeating the process with more bottles as necessary. Make sure the caps you use are boiled to sanitize them. Ordinary bottle caps are fine; oxygen-scavenging caps are better. Please don’t use real wood corks, as they will taint the delicate flavor of the sake—artificial corks should be OK.

If you like the idea of draft sake, you can rack your clear wine to a 5-gallon keg, which can then be pasteurized in bulk, if you have a large enough kettle—I use my brew kettle for this purpose. Of course, if you are kegging your sake, you can keep it as nama, as long as it remains refrigerated. For an extra (though wholly non-traditional) twist on genshu sake, you can even force-carbonate the cold wine and serve it sparkling, or bottle it from the keg using a counter-pressure filler. Most sparkling sakes that are refermented in the bottle have to be diluted to around 12% ABV for that refermentation to take place. (Fresh yeast and dextrose will need to be added at bottling if you want to try your hand at sparkling sake.) Bottling force-carbonated sake from the keg, however, circumvents that restriction. There is something beautifully Champagne-like about a chilled, highly sparkling, 20%-ABV, sediment-free, bottled genshu! It definitely adds a spritzy dryness to the beverage, but I find it quite to my taste, and you might as well.


Amahl Turczyn is Associate Editor for Zymurgy magazine.

Sources and Resources

  • Most of this information comes from Fred Eckhardt’s “New Sake Recipe,” which can be found in .pdf format at http://www.designerinlight.com/eckhardt-sake.pdf.
  • His original book, Sake (USA) is a bit harder to find, but outlines the yamahai moto method in glorious detail.
  • Another great resource, especially if you want to try your hand at making your own koji rice, is http://www.taylor-madeak.org/.

The post How to Make Sake at Home appeared first on American Homebrewers Association.

Posted on

Hefeweizen: The German Session Beer

Session beers are all the rage right now. Imperial stouts and double IPAs have their place, to be sure, but craft beer consumers are increasingly demanding more flavor from less alcohol. (Look for Jennifer Talley’s Brewers Publications title Session Beers, available September 2017.) In response, homebrewers and commercial brewers are conjuring up some wonderful new styles even as they revisit established ones.

Session IPA is perhaps the most visible member of the new guard, but for my money, there are few more satisfying session beers than Bavarian wheat beer, also known as hefeweizen, weissbier, and weizenbier. Yes, the style’s typical 5 to 5.5% alcohol by volume (ABV) places it slightly beyond what many consider session territory, but if you’re seeking big flavor and bigger refreshment on a hot summer’s day, it’s hard to beat this southern German classic.

History

Humans have included wheat in beer for as long as we’ve been brewing. In fact, its popularity as a brewing grain was one of the factors that prompted the original Reinheitsgebot declaration of 1516. Sixteenth-century Europe experienced what historians have called a price revolution, a period of inflation that saw prices increase across the board. Keeping wheat and rye out of the brewhouse ensured that there was enough to go around for baking bread, a nutritionally superior, more energy-dense product.

But there was an important exception. The House of Degenberg in Schwarzach—about 80 miles (129 km) northeast of Munich—retained a royal privilege to brew wheat beer, even though it technically violated the Reinheitsgebot. In exchange for payments to Duke Wilhelm IV (co-author of the 1516 decree) the Degenbergers were allowed to continue brewing wheat beer, thus ensuring their loyalty to the Bavarian duchy.

In 1602, the Degenberg line ended without an heir, and the wheat beer privilege transferred to Maximilian I, Wilhelm’s grandson. Thus began a state monopoly on wheat beer brewing that earned the House of Wittelsbach a great deal of money for the next 270 years. Only in 1872 did the Wittelsbachs sell their royal privilege to Georg Schneider, whose brewery in Kelheim continues today as G. Schneider & Sohn, producers of the highly regarded Schneider Weisse and Aventinus Weizenbock.

Weizen homebrew recipe brew beer

Style Profile

Hefeweizen is a delight for the senses. By law, authentic Bavarian examples must be brewed with at least 50 percent wheat malt, though 60 to 70 percent is more common. The large fraction of wheat in the grist contributes a bready flavor with a soft, pillowy mouthfeel and a medium-full body. Hop bitterness is just enough to offset malt sweetness, and there are virtually no hop flavors or aromas.

It’s the yeast that really makes this style. Bavarian weissbier strains create powerful esters and phenols that deliver the signature banana, clove, and bubblegum characteristics. The beer is served unfiltered with plenty of yeast in suspension (though German examples are frequently bottled with a lager strain). And pronounced effervescence in excess of 3 volumes (6 g/L) of carbon dioxide, coupled with wheat’s high protein content, creates a thick, fluffy head that looks downright alluring when the beer is poured into its special vase-shaped glassware.

Here’s what the Brewers Association has to say about this distinctive beer style:

South German-Style Hefeweizens are straw to amber. Because yeast is present appearance may appropriately be very cloudy. The aroma of a German Hefeweizen is decidedly fruity and phenolic. The phenolic characteristics are often described as clove-like, nutmeg-like, mildly smoke-like or even vanilla-like. Banana-like ester aroma should be present at low to medium-high levels. Hop aroma is not perceived to very low. Malt sweetness is very low to medium-low. Hop flavor is not perceived to very low. Hop bitterness is very low. These beers are made with at least 50 percent malted wheat. No diacetyl should be perceived. The flavor of a Weissbier with yeast is decidedly fruity and phenolic. The phenolic characteristics are often described as clove-like, nutmeg-like, mildly smoke-like or even vanilla-like. Banana-like ester flavor should be present at low to medium-high levels. Hefeweizen is very highly carbonated. Body is medium to full. These beers are typically roused during pouring and because yeast is present, the beer will have yeast flavor and a characteristically fuller mouthfeel. During competition, entries will be roused unless instructed otherwise by the entering brewer.

  • Original Gravity: 1.047 – 1.056 (11.7 – 13.8° P)
  • Final Gravity: 1.008 – 1.016 (2.1 – 4.1° P)
  • Alcohol by Volume: 4.9 – 5.6%
  • Bitterness: 10 – 15 IBU
  • Color: 3 – 9 SRM (6 – 18 EBC)

Homebrewing Hefeweizen

German Wheat Beer Recipes

Now that you’re ready to brew your own German wheat beer, check out our tried-and-true homebrew recipes.

El Hefe*

Barb’s Hefe*

ZAITH Weizen

England-Weizen*

*Denotes a recipe that has earned gold in the final round the National Homebrew Competition (NHC). Browse through all of our NHC gold medal homebrew recipes.

Developing a hefeweizen recipe is straightforward, and it’s a lovely beginner style. Aim for an original gravity around 1.050 (12.3° P), or a couple of ticks on either side, using a grist of anywhere from 50 to 70 percent malted wheat. The remainder can be Pilsner malt, or use light Munich malt for a little extra bready character. Some acidulated malt may be called for to get the mash pH into the sweet spot. Extract brewers can simply use liquid or dried wheat malt extract, which is usually 65 percent wheat and 35 percent pale malt. Steeping a bit of dextrin malt can add fresh malt character.

Tettnang hops are intimately associated with this beer style, but any noble (or noble-ish) variety will do. You only need a bittering charge to the tune of 12 IBU or so, and truth be told, you can achieve that with just about any hop you happen to have on hand. Stay away from hops that deliver a harsh bitterness, though. We’re after a soft, inviting sort of bitter.

The mash can be as simple as a single infusion at 150° F (66° C), but a traditional decoction mash with rests in the mid to upper 140s °F (mid 60s °C) and the upper 150s to low 160s °F (low 70s °C) can promote a more attenuative wort with enhanced malt character. An optional mash rest at 110° F (43° C) promotes the development of ferulic acid, which hefeweizen yeast later converts to 4-vinyl guaiacol, the compound responsible for the style’s signature clove character. Once you’ve collected your wort, an hour’s boil with a single hop addition at the beginning is all that’s needed.

Fermentation temperature is fairly forgiving, and great hefeweizen can be made just about anywhere in the 60 to 66° F (16 to 19° C) range, but a relatively cool fermentation around 62 to 64° F (17 to 18° C) tends to produce the best results. This is a beer style that benefits greatly from an open fermentation, so if your sanitation is good, consider simply covering your bucket or carboy with loose sanitized foil. If you’re unsure, just use your usual sealed fermentation protocol, but leave plenty of headspace and use a blowoff tube. Hefeweizen yeast is aggressive!

When fermentation is complete, package and enjoy your hefeweizen as soon as possible. It’s meant to be consumed young, and it’s entirely possible to go from grain to glass in two weeks if you keg your beer. Aim for 3 to 3.5 volumes (6 to 7 g/L) of carbon dioxide, but beware—this level of carbonation can cause many “normal” beer bottles to explode. If you bottle, use a thicker glass that can handle the elevated pressure, or go with plastic PET bottles to be totally safe.

For more great information on Bavarian weissbier, check out Eric Warner’s definitive German Wheat Beer and Stan Hieronymus’s Brewing with Wheat, both available from Brewers Publications.

* * *

Dave Carpenter is editor-in-chief of Zymurgy magazine.

The post Hefeweizen: The German Session Beer appeared first on American Homebrewers Association.
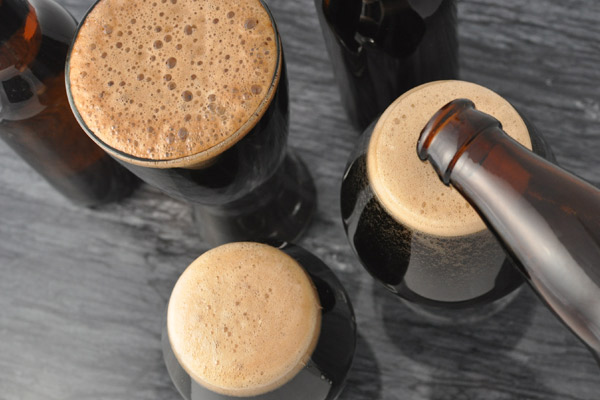
Posted on

The Effect of Gelatin on Beer Clarity

This homebrew experiment was originally published on Brulosophy.com.

* * *

Some people seem to take pride in the fact their homebrew is hazy, usually alluding to the idea that the haze contributes greatly to the overall character of the beer, that it’s something all homebrewers should be proud of, as it symbolizes it was made by hand.

I’m not one of these people. At all.

One reason I don’t prefer hazy beer is that I enjoy sleeping next to my wife, though only slightly less important is the fact bright beer always tastes better to me. Even styles that allow for some cloudiness, like Saison, I still tend to prefer once they’ve dropped clear. I accept that my eyes may be biasing my taste buds. I have a feeling the sentiment that hazy beer is good comes solely from the reality that producing crystal clear beer can be a pain in the ass requiring either a filtering contraption or more time than most of us are interested in giving.

Brewers have developed numerous strategies for battling this annoying issue such as protein rests and using kettle finings like Irish Moss/Whirlfloc. My typical process includes the latter as a matter of course, even so, I still occasionally produce annoyingly hazy beer. I often use highly flocculant yeasts, cold crash, leave about an inch of beer in the carboy post racking, and wait a few days before tapping carbonated kegs in an attempt to pull clear beer from my taps. This usually does the trick, though as I’m sure many can relate, there are instances where a beer simply refuses to drop clear even after weeks in a cool environment. The culprit here is often chill haze, which very simply put, occurs when proteins in the beer come together as the temperature decreases, thereby increasing the opacity of the liquid; if you’ve ever let a hazy beer warm up and noticed it became very clear, you’ve experienced chill haze.

A couple years ago, I started hearing about brewers who routinely used gelatin to fine their beer, many swore it worked like magic, while others noticed little impact at all. I was intrigued, but too lazy to try it out for myself, as the large majority of my beers would clear up within 1-2 weeks of being kegged. It wasn’t until a few buddies and I brewed the same beer using the same exact recipe using our usual methods that I was inspired to try gelatin for myself. Brad, one of the five participants in the Brewer’s Thumbprint xBmt, was the only brewer to use gelatin to fine and his beer came out with commercial clarity, all the others were hazy as hell. I hit the web and discovered that while gelatin did seem to help with beer clarity, some folks complained it also reduced hop character in their beers, arguing that the aromatic oils were pulled out of suspension along with the haze producing compounds. It was time for me to put it to the test!

Purpose

To investigate the qualitative differences between a beer fined with gelatin and one receiving no post-boil fining.

Method

I’d been wanting to make a hoppy Pale Ale mashed low and fermented with WLP002 for awhile, I figured this was as good a time as ever.

Hoppy American Pale Ale Recipe

  • Batch Size: 11 gallons
  • Original Gravity: 1.055
  • Final Gravity: 1.014
  • Alcohol by Volume (ABV): 5.4%
  • Bitterness (IBU): 41
  • Color (SRM): 5

Grist

  • 11.25 lbs German Pils
  • 4.25 lbs Northwest Pale Malt
  • 2.0 lbs Gambrinus Vienna Malt
  • 1.0 lbs Gambrinus Honey Malt
  • 1.0 lbs White Wheat Malt

Hops

  • 11 IBU Galaxy @ FWH (9g)
  • 25g Galaxy @ 25 minutes
  • 14g CTZ @ 5 minutes
  • 30g CTZ @ flameout w/ 15 minute steep
  • 30g Galaxy @ flameout w/ 15 minute steep
  • 18g Mosaic @ flameout w/ 15 minute steep
  • 56g Galaxy @ dry hop for 5 days
  • 40g CTZ @ dry hop for 5 days
  • 38g Mosaic @ dry hop for 5 days

Yeast

  • 1.0 pkg WLP002 English Ale Yeast

Process

  • Mash at 148° F for 60 minutes. Boil for 60 minutes. Ferment at 65°F for 3 days before ramping up to 72˚F

Notes

The wort was produced using my typical 10 gallon batch sparge routine.

brulosophy-gelatin

The boil happened, hops were added, the wort was chilled quickly with my JaDeD Hydra IC, carboys were filled and placed in my fermentation chamber, the yeast was pitched, and The Black Box was set to control the temperature to 65°F in order to suppress ester formation. After about 5 days, the krausen began to fall, fermentation activity was slowing, and I was nearing my target FG- it was time to dry hop.

A couple days later, I pulled hydrometer samples from both beers and confirmed they had reached FG.

Brulosophy-gelatin

Up until this point, both beers had been treated exactly the same, it wouldn’t be like this for long. Prior to starting this xBmt, I’d read a few different ways people fine with gelatin, many seemed to prefer using it in the keg while others advocated for racking the beer to a secondary carboy and adding the gelatin to that. I chose a slightly different method, one that required very little in the way of changing my normal routine.

Step 1: Cold crash beer until it is below 50°F. I turned my regulator down one night and it was at 45°F the next morning.

Step 2: Make gelatin solution. I followed my friend Brad’s method of combining 1/2 tsp Knox Unflavored Gelatin with 1/4 cup cool water then microwaving it in short (7 second) bursts until it reached 145-150°F, stirring with the end of a thermometer between each burst.

brulosophy-gelatin

Step 3: Add gelatin solution to primary.

brolosophy-gelatin

That’s all I did. I let the beers continue crashing to 32°F, which they were at by that evening, then let them sit an additional 32 hours or so. Packaging time came and both carboys were moved to a table, this is when I noticed an interesting difference in the appearance of the trub layer.

brulosophy-clarity

Left: No Gelatin | Right: Gelatin

I’m not sure if it was caused by the gelatin or not, but I’ve never seen such a chunky layer of trub. I wondered if this might have been caused by the coagulating effect of the gelatin. Each beer was kegged using my standard procedure, at this point they both looked very similar.

The full kegs were placed in my keezer and left alone to carbonate for… errr… I was too excited to see if the gelatin worked and pulled some samples after only a day in the keg.

Okay, I’ve been thinking about how to approach writing about this next part. I usually try to save any discussion of differences for the results section, but since the primary reason people use gelatin is for clarity, any pics would reveal that difference before the results are presented, assuming it worked. Well…

It worked. It worked real good. It worked so good I almost couldn’t believe it.

brulosophy-clarity

Both beers after a day in the keg, guess which was fined with gelatin

brulosophy-gelatin

Another shot after a single day in the keg

I let the beers sit in the keezer for another 5 days before sharing them with tasting panel participants, mainly to allow them to finish carbonating, but I also wanted to give the batch that wasn’t fined with gelatin a fighting chance. The time definitely helped one of the beers…

brulosophy-gelatin

The difference in appearance only became more stark, with the gelatin fined beer dropping as bright as any commercially filtered beer I’ve seen, while the non-gelatin beer was super hazy, hazier than most beers I make, something I attribute to the 2 oz dry hop charge. They didn’t even look like the same beer, how would they compare in terms of aroma, flavor, and mouthfeel?

Results

In total, twelve people participated in the tasting panel, all were blind to the nature of the xBmt. To reduce the chances of bias due to the obvious differences in appearance, I opted to provide samples in scientifically engineered opaque polystyrene vessels. Each taster was presented with 3 samples, 2 non-gelatin and 1 fined with gelatin, then asked to identify which one was different than the others. The participants who accurately selected the different beer were asked to complete another more detailed survey comparing only the 2 different beers, still unaware of the difference between them.

Given the number of participants in this xBmt, 8 (p<0.05) would have had to accurately select the different beer in order to conclude that gelatin had a significant effect on the overall character of the beer. Of the 12 people on the tasting panel, only 5 accurately selected the gelatin-fined beer as being different than the others. While slightly more than chance (4 or 33%), not even half of the experienced panel of tasters were capable of distinguishing differences in aroma, flavor, or mouthfeel between the beers.

Despite insignificant results from the triangle test, I thought some readers may find the information from the second survey, taken by the 5 participants who were accurate on the first survey, at least somewhat interesting.

Aroma

Three tasters preferred the aroma of the beer with no gelatin while the other 2 preferred the gelatin-fined beer; similarly, 3 tasters thought the aroma of the no gelatin beers was somewhat similar to the gelatin-fined beer, while the others perceived them as being not at all similar.

Flavor

Four tasters preferred the flavor of the no gelatin beer while the other taster perceived no detectable differences; in terms of similarity, 2 reported the beers were not at all similar, 2 thought they were somewhat similar, and 1 felt they were exactly the same.

Mouthfeel

Three tasters chose the no gelatin beer as having better mouthfeel white the others preferred the gelatin-fined beer; 3 tasters believed there to be some similarity between the beers, while the other 2 experienced them as being exactly the same.

Overall, the beer that was not fined with gelatin was preferred by 3 tasters and the gelatin-fined beer was preferred by 2 tasters. When asked to guess which beer was fined with gelatin, again from an opaque cup, 2 tasters chose correctly, 2 chose the no gelatin beer, and 1 selected no detectable differences.

My Impressions: First off, I really enjoyed this beer, the 002 imparted great malt character but not enough to drown out all the hops. I absolutely will be fermenting more American styles with this strain! As far as comparing the beers, I do believe I noticed some very slight differences between them. My experience, which was absolutely biased, matches that of the folks who claim fining with gelatin slightly reduces hop character, as the no-gelatin batch did seem to have the subtlest bit more hop aroma and perhaps a touch more body. But here’s the kicker:

I totally preferred the beer that was fined with gelatin!

Not only did I perceive the hop character as being mostly intact, but I experienced the beer as more crisp and refined, like a great commercial quality beer. Plus, it looked gorgeous!

Discussion

I’ve used gelatin in all of the beers I’ve made since analyzing this data, it has worked amazingly well, clearing beers up within a day or so of being packaged. While anecdotal experience may differ, the results of this particular xBmt seem to indicate that fining with gelatin does not significantly impact the aroma, flavor, or mouthfeel of beer. And it’s f**king cheap! I paid $10 for enough gelatin to fine over 100 batches of homebrew, as each packet is good for about 3.5 carboys worth of beer. If you’re looking to end your haze problems, this may be just the solution!

Something some of you may find important: gelatin is non-vegetarian, so if you are or you brew for someone who is, consider using another fining product such as Biofine Clear or Polyclar.

Have you had a similar or perhaps totally different experience fining with gelatin? Are you a gelatin scientist who can shed some light on this interesting subject? Care to share your opinions as to how this exBEERiment could have been better by using techniques most of us don’t understand? That’s what the comments sections is for! I appreciate any and all feedback, so please do not hesitate to leave your honest thoughts. Cheers!

The post The Effect of Gelatin on Beer Clarity appeared first on American Homebrewers Association.

Posted on

The Effect of Post-Boil/Whirlpool Hop Additions on Bitterness in Beer

There is no doubt that the explosion in popularity of IPA has changed the landscape for craft beer producers and consumers, as well as homebrewers.  Between the evolution of the style to fit the wants of the drinking public, the many stylistic offshoots of IPA that have become commonly available, and the increasing quality of flavor and aromatics that many brewers seem to be achieving, it is no wonder that exploration of ingredients and techniques for brewing IPA is at an all-time high.

Many of the best IPAs are made with generous additions of hops both late in the boil and post-boil, or in the whirlpool.  There is even a technique that has spawned off of this thinking called hop bursting, where massive additions of flavor and aroma hops are used to obtain bitterness, in addition to huge amounts of hop character in both flavor and aromatics.

Mitch Steele, formerly of Stone Brewing Company, has been one of the foremost experts on this technique, and has discussed it in numerous forums, including his book, IPA: Brewing Techniques, Recipes and the Evolution of India Pale Ale, presentations at the National Homebrewers Conference and in an article in the November/December 2013 edition of Zymurgy magazine.  In that article, in reference to whirlpool hop additions, Steele stated, “Many brewers neglect to consider the bitterness obtained from this addition, but it can be substantial, depending on the volume of hops added.”1

When reviewing the means in which many homebrewers measure the bitterness in their beers, the bitterness obtained from a post-boil/whirlpool hop addition is often not considered, in part due to the available means for calculating estimated IBUs.  While there are multiple ways to estimate the IBUs in a finished beer, the Tinseth and Rager formulas are the most widely used.  The Rager formula, which was introduced in Zymurgy magazine in 1990, does give a 5% utilization yield to hops added post-boil.  The Tinseth formula on the other hand, gives no IBU contribution for a post-boil hop addition.2

After trying to brew a beer where I only added whirlpool hops and getting an ample amount of bitterness from that addition, I began to ask the question, “just how much utilization is obtained from post-boil additions, and how does the amount of time at certain temperatures affect that?”  There are many real world examples of IPAs that use a whirlpool addition to obtain most of their bitterness.  Adam Mills, the head brewer at Crankers Brewery in Big Rapids, MI detailed in a presentation at the 2014 National Homebrewers Conference how he obtains essentially all of the 65 IBUs in their Professor IPA from whirlpool additions3, and beers such as Stone’s Enjoy By Double IPAs are documented as relying significantly on a whirlpool addition for bitterness

Experiment Overview

Based on the questions posed above, the conducted experiment aimed to measure the effect of different post-boil hopping techniques and their effect on calculated and perceived bitterness, as well as hop aroma and flavor.

The experiment began with a series of 10 different batches with the same wort being made in roughly 1 gallon quantities, using carefully measured and consistent ingredients, each utilizing a different post-boil hopping technique, with variances on time and temperature being the only intended independent  variables.  The finished beers were fermented in the same size containers, using the same yeast, and in the same location.  After fermentation was complete and the beers were bottled, they were sent to the Bell’s Brewery analytical lab, where they were tested for measured IBUs.  In addition, the beers were served to a tasting panel made up of a group of “super tasters” from Bell’s Brewery, and included a collection of BJCP judges, certified Cicerones, and others with significant levels of sensory training and tasting experience.  These tasters took a sample of the beers which were made, and rated them on the basis of hop bitterness, aroma and flavor.

As mentioned, the ingredients were chosen primarily to ensure the beers were as consistent as possible, not necessarily because they would make the best beer for drinking.  The base chosen included the following ingredients:

  • Water – Distilled Water was used as a base with both 0.3g of gypsum and calcium chloride added to give the beer an appropriate level of calcium content. Exactly 1 gallon of water was used for each batch.
  • Malt – With consistency in mind, a wort with 95% Briess Pilsen DME, and 5% dextrose sugar was decided upon. The use of malt extract allowed for the ability to ensure each batch had the same wort composition, and made the project feasible from a time standpoint.  The starting OG of each wort was 1.057 (14 Plato).
  • Hops – Exactly 1 ounce of hop pellets (measured with a precision gram scale) were added to each batch in a single addition. The desire was to use a high-alpha dual-purpose hop was that would provide an ample amount of bitterness, but also lend a profile one would expect from a hoppy Pale Ale or IPA.  In this experiment, the choice was to use El Dorado hops packed in 1 ounce bags from BSG.  The hops had a listed Alpha Acid content of 14.9%.
  • Yeast –Safale US-05 dry yeast was used for fermentation. While there is a great deal of evidence that rehydration of dry yeast is best practice, exactly 3 grams of yeast was pitched directly into each fermenter to ensure each beer got the same amount of yeast.

As noted, the goal of consistency was not just limited to ingredients, but the process was intended to ensure this as well.  The process of brewing and fermenting the beers was as follows:

  • Boil – The DME was boiled for 15 minutes, on a stovetop. To ensure an even boil off rate, the exact same heat intensity from the burner was used in each beer.
  • Hop additions – Hops were added during different intervals based on which batch was being brewed. Hop pellets were added loose into the wort.  As noted earlier, 1oz of hops were added to a batch that was approximately 1 gallon in size.  Scaled up, this translates to an addition of approximately 1.9–2.0lbs/bbl.
  • Hop Stand – This was one of the variables that changed in each batch. Further discussion will follow on how the hop stand for each batch was treated.
  • Chilling – Chilling was conducted using a 20’ piece of ¼” ID copper coil fabricated into an immersion chiller. Groundwater from a kitchen faucet, with a temperature of 64° F, was used for chilling.
  • Wort Transfer – The wort was transferred into the 1 gallon glass fermenters by dumping the wort in using a funnel. Since each batch was left to settle out for roughly 30 minutes following cooling, the majority of the trub was left in the kettle.  This left total yield of roughly 0.8 gallons for each batch.
  • Yeast Pitching – As noted, 3 grams of yeast was pitched dry into each fermenter. The amount being pitch was weighed by setting the packet of yeast on a gram scale (after thorough sanitizing using Star-San), and slowly added in steps until 3 grams were pitched.
  • Aeration – The wort in each fermenter was aerated by vigorous shaking for 1 minute.
  • Fermentation – Each batch was fermented concurrently in a basement, in Michigan, during August 2015. Due to a heat wave late in the month that saw outside temperatures reach over 90° F, the fermentation area was warmer than normal, and actual wort temperatures during the bulk of fermentation (as measured by a temperature controller, with the probe taped to the side of one of the glass carboys under insulation) was conducted between 69°–72.5° F, which is on the warmer end of the recommended temperature range for the strain.
  • Bottling – Following a 3 week fermentation, the batches were racked into a bottling bucket using a mini-auto siphon. 17 grams of dextrose was added, mixed in with the beer, and bottled for natural carbonation.  The bottles were conditioned at room temperature, around 68°–72° F.

Because of the small batch nature of the experiment, equipment had to be customized to fit the process and ingredients being used.  Primary pieces of equipment used were:

  • Boil Kettle – A pair of 6 quart stainless steel kettles were used for brewing the 10 small batches.
  • Burner – A natural gas stovetop burner was used for boiling the wort.
  • Hop stand heat source – A small stove top burner (smaller than used to boil) on its lowest setting was used to hold temperature during the hop stand portion of the batches in the experiment in Set 1, as detailed below.
  • Range Supermechanical thermometer – The Range Supermechanical Thermometer, a smart thermometer that connects with iOS devices and includes the ability to export temperature data, was a key piece of this experiment, and allowed the temperatures in the kettle to be measured while the wort was in contact with the hops. Following each of the 10 batches, the data recorded was exported for further analysis.
  • Funnel – Used to aid in the wort transfer.
  • Fermenter – Fermentation was conducted in a 1 gallon glass carboy with a plastic screw-on lid with a hole designed for an airlock.
  • Bottling – Standard 12oz bottles were used for the finished beer, bottled using a standard 6 gallon bottling bucket.

Specific Analytical Measurements

The primary information measured in the experiment were the variables of temperature and bitterness, measured in International Bittering Units (IBUs).  Along with IBUs, other data was used to calculate an estimated utilization for each batch.  The method for measuring each of these variables is as follows:

  • Temperature – The temperature was measured using a Range Supermechanical smart thermometer, which works with any iOS device. The thermometer is capable of measuring to a tenth of a degree Fahrenheit, and can log temperature data up to one reading per second.  This data, which was recorded for each batch, was used to determine average actual temperature of each hop stand.
  • International Bittering Units (IBUs) – The IBU measurements were made with the assistance of the lab at Bell’s Brewery in Comstock, MI. Bell’s used the ASBC Beer-23A method of measuring IBUs, which is a test where the beer is chilled and centrifuged, then dosed with isooctane, a compound which absorbs bittering compounds, including, but not limited to, isohumulones, hulupones and humulinones.  This solution is then tested for the amount of light that is absorbed at 275nm, with the amount of absorption determining the level of bitterness in the sample.4
  • Utilization – The utilization estimate was calculated using the equation below, as published in Zymurgy’s special edition, “The Classic Guide to Hops.”2 Since the IBUs were known via testing, the utilization percentage was calculated using the other known variables.

equation-REF Project

The other variables used to solve the equation included:

  • Woz = 1
  • A% = 14.9%
  • Vgal = 1.0

The results of these measurements are included in the below charts summarizing the collected data.

Sensory Approach

For the sensory portion of the experiment, a panel of eight tasters from Bell’s Brewery tasted beers in two sets, which included two beers from Set 1, and three beers from Set 2.  For each set, the tasters were asked to rate which beer had the most and least aroma, flavor and bitterness.  The results are discussed in further detail below.

Comparison of Batches

The experiment was conducted with batches split into two sets.  The goal of the first set was to test the effect of temperature on bitterness, with the goal of the second set being to test the effect of contact time on bitterness.

Set 1 – Effect of temperature on bitterness of post-boil hop additions

In Set 1, which included four batches, the effect of the temperature of the wort was tested to determine what, if any, effect it had on the bitterness imparted in the beer.  For this set, a 30 minute hop stand was conducted at temperatures ranging from 180°–210° F.  After 30 minutes the batches were immediately cooled using an immersion chiller.  The temperatures were maintained by using direct heat to the kettle, in the form of a small burner on a gas stovetop, using the lowest setting.  The temperature was monitored manually based on the reading from the Range Thermometer, which was submerged in the center of the kettle.  When the temperature dropped a degree below the target temperature, heat was applied until it reached the target temperature.  The results of the lab analysis completed on each of these batches is listed below.

Batch Description Avg. Temp. during hop stand Lab Tested IBUs Estimated Utilization (%)
#1 30 Minute Hop stand held @ 210° F 210.0° F 48.6 4.36
#2 30 Minute Hop stand held @ 200° F 199.6° F 57.2 5.13
#3 30 Minute Hop stand held @ 190° F 189.7° F 50.7 4.54
#4 30 Minute Hop stand held @ 180° F 179.9° F 44.2 3.96

The most notable observation from the temperature data is the fact that it doesn’t follow a downward trajectory in a linear or exponential fashion.  Based on what we know about the isomerization of alpha acids, heat does play a factor, and isomerization does increase with temperature.  The anticipated result was that the IBUs in the finished beer would decrease as the temperature decreased, however, to what extent they would decrease was unknown.

What the results suggest, in which the IBUs actually increased in the 200° F and 190° F batches compared to the 210F batch, is that a variable in the equation created inconsistent results that do render this set of data somewhat inconclusive.  While it’s impossible to pinpoint the exact reason for the variances, the one variable that certainly was different batch to batch was the level of heat applied to the kettle to maintain temperature.  Because the wort was not moving except for a short manual whirlpool after the hops were added, and potentially because of the small batch size, it is possible that the temperature in the kettle may have varied from the center, where the temperature probe was measuring, to the sides of the pot, and especially near the bottom, where the kettle may have been materially hotter due to the direct heat being applied.  This merits a reevaluation of technique, which is discussed in greater detail in the conclusion.

Set 1 – Sensory Results

For Set 1, the two beers which had the highest temperature and lowest temperature hop stand were chosen for evaluation.  Despite the 30° F difference in temperature, the sensory evaluation was highly inconclusive.  This could be partly due to the fact that the bitterness levels were so similar, and doesn’t answer the question whether aroma and flavor compounds are retained more effectively at higher temperatures.

Batch Most Aroma Least Aroma   Most Flavor Least Flavor   Most Bitterness Least Bitterness
The numbers above represent how the eight tasters voted on specific elements of the beers that were ranked.
#1 4 4 4 4 5 3
#4 4 4 4 4 3 5

Set 2 – Effect of time on bitterness of post-boil hop additions

In Set 2, the focus shifted from testing the temperature of a hop stand, to testing how the amount of time would affect the level of bitterness imparted into the beer.  For this set, 6 beers were brewed, with varying lengths conducted for the hop stand.  One of the beers got no hop stand, but instead had an addition that was boiled for 10 minutes, to form a baseline to compare against for the beers which had hops added post-boil.

For this set, no heat was applied to the kettle during the hop stand.  However, to limit the thermal loss of the small 6 quart kettle being used, the pot was placed into a larger, 5 gallon pot filled with near boiling water immediately following the boil, and allowed to rest untouched until the immersion chiller was used to cool (for batches 7 – 10).

Batch Description Avg. Temp. during hop stand Lab Tested IBUs Utilization (%)
*Although Batch #6 did not receive a hop stand, the hops were still in contact with hot wort for a short period of time.  The temperature of the wort exceeded 200° F for 38 seconds, exceeded 180° F for an additional 24 seconds (62 seconds total), and dropped to 160° F 30 seconds later (92 seconds total)
#5 Hops Boiled for 10 Minutes N/A 48.1 4.31
#6 Flameout addition, immediate chill N/A* 28.9 2.59
#7 Flameout addition, 10 min. hop stand 205.5° F 39.9 3.58
#8 Flameout addition, 20 min. hop stand 204.6° F 44.1 3.95
#9 Flameout addition, 30 min. hop stand 201.7° F 50.0 4.48
#10 Flameout addition, 60 min. hop stand 193.7° F 56.4 5.05

Unlike Set 1, Set 2 did display a pattern that seems in line with the direction that would be expected for IBU levels between the different batches.  The 10 minute boil still produced a significant amount of IBUs, and while the 10 and 20 minute hop stands were lower in measured bitterness, the IBU contribution was still significant.  By 30 minutes, IBUs had increased over the 10 minute boil batch, and in the batch which received a 60 minute hop stand, IBUs rose even higher.

As the hop stands got longer, it does appear that there were diminishing returns on bitterness extraction, especially past the 10 minute mark.  With an increase of 4 IBUs from the 10 to 20 minute batch, 6 more from 20 to 30 and another 6 from 30 to 60 minutes, some combination of reduced temperature and the availability of alpha acids that were still available to be isomerized may have been factors that created a leveling off in the amount of bittering that could be generated over time.  This is reminiscent of the same effect when hops are boiled for longer periods of time, such as comparing IBUs in a 60 minute boil versus a 90 minute boil.

One interesting takeaway was the level of IBUs that were generated in Batch #6, which had hops added but then was chilled immediately with the immersion chiller.  While there was no hop stand on this batch, the hops were still in contact with hot wort for a short period of time, though the temperature was below 160° F within 92 second of the hops being added.  Despite this short contact time with hot wort, 29 IBUs were still created, which suggests that maybe isomerization of the alpha acids occurs very quickly.  The other possibility is that compounds other than iso-alpha acids are creating bitterness.  This possibility is discussed further in the conclusion.  In either scenario, more investigation would be needed to come to any conclusions.

With some assumptions, a theoretical utilization curve can be created using the data from Set 2 (See Figure 1).  It is important to note however this curve does make some assumptions about each hop stand batch and that the temperature was constant over time for each.  While not perfect, the average temperature data shown in the Addendum to this report does show consistency over 10 minute intervals within no more than 1-2 degrees difference in average temperature over similar time periods.  It is also important to understand this chart is a visual representation of the data collected in the experiment, and should not be relied upon as a predictable indicator of hop utilization for post-boil additions.  When the data is visualized, it does imply that bitterness is imparted very quickly, and levels off quickly as well, but still increases all the way to the 60 minute mark.  This is an interesting observation, however more testing would be needed to validate and explore the speed of isomerization, or the extraction of other bittering compounds, in regards to very short versus long hop stand rests.  An additional question this raises is if a brewer wants to obtain some bitterness at flameout, is it possible to get the quick hit of bitterness as seen in Batch #6, then very quickly chill to retain the volatile essential oils from the hops?  There are certainly multiple schools of thought on this.  For instance, award-winning homebrewer turned award-winning craft brewer Jamil Zainasheff writes on his webpage Mrmalty.com that “Sitting at near boiling will continue to isomerize the hop acids and drive off the volatile oils that good hop aroma and flavor depend upon.” 5 If significant amounts of bittering are generated very quickly, would this technique be favored?  Again, more research would be needed to draw any conclusions.

hop-chart

Figure 1 – Utilization % by time of hop stand (in minutes)

Set 2 – Sensory Results

For Set 2, three beers were chosen for evaluation.  With a larger sample, there were a few more differences noted.  Batch 7, which saw a 10 minute hop stand, was ranked as having the most aroma, most flavor, and least bitterness.  This aligns with the IBU testing conducted, but does it tell us that more aroma and flavor compound are retained by doing a shorter rest? It’s certainly possible, but outside the scope of this experiment.

Batch 5, which was boiled for 10 minutes with no hop stand, was ranked as having the least aroma, least flavor, and most bitterness.  Batch 9 was ranked a close second in bitterness, and had measured IBUs nearly the same as Batch 5, but did rank better in terms of aroma and flavor.

Batch Most Aroma Least Aroma   Most Flavor Least Flavor   Most Bitterness Least Bitterness
The numbers above represent how the eight tasters voted on specific elements of the beers that were ranked.
#5 1 4 2 5 4 3
#7 5 2 4 3 1 4
#9 2 2 2 0 3 1

Conclusion

The results of the experiment ranged from some level of inconclusiveness, to validating and providing perspective on some of what we already knew about the effect on bitterness for post-boil hop additions.

Evaluation of Results

The validating piece of the experiment was that post-boil hop additions do indeed generate significant amounts of bitterness, especially when compared to an aroma addition that is boiled for a short period of time.  The level of bittering does seem to accelerate quickly after the hops are added, leveling off over time despite still creating additional bitterness.  However, the experiment raised many questions that would require further research to answer.

  • Longer hop stands certainly lead to more bittering, but does aroma suffer because of it? The sensory results seem to imply that could be the case, but more intensive testing would be needed to validate that thought.
  • Recent research conducted in the Fermentation Science program at Oregon State University has found that bitterness can be caused by more than just iso-alpha acids. Specifically, bitterness can be caused by the existence of hulupones and humulinones in hops being extracted into the wort.6  Are these compounds a significant contributor to bitterness and IBU measurement when hops are added post-boil?  Could it be possible to extract bitterness from hops by adding them below the alpha acid isomerization range?  Furthermore, would doing so have benefits in retention of aroma and flavor compounds?

Evaluation of Methods

The methods chosen for the experiment were designed to allow for as many batches as possible, while aiming for consistency over them.  For the most part, I believe this was achieved, and the consistency of ingredients and methods from batch to batch was sound.  However, the direct heating of the kettle in Set 1 did seem to cause a variance in results, and did yield the data inconclusive.  Any future testing would be better suited with a different method for maintaining the temperature of the wort.

While the small batch method did allow many batches to be completed in a timely and cost effective manner, further testing would likely be better suited with a lesser number of batches brewed to larger volumes.  Because of the very small volume of each batch, any difference in variables was magnified, as was on display in the method of heating used in Set 1.  Even an increase in batch size to 3 – 5 gallons would certainly help create consistency in results.  By limiting the number of batches tested to five or less, and limiting the volume of each batch to 3–5 gallons, the beers could utilize a base, all-grain mashed wort that could be customized for the experiment.

Lastly, one area that did not receive primary focus was yeast and fermentation.  A simple method of pitching dry yeast directly into the fermenter and conducting fermentation at the ambient temperature of the room was used.  However, this resulted in a warmer than ideal fermentation temperature, and some yeast off-flavors were noted by a few members of the sensory panel.  Ideally, reducing the number of batches, and increasing their size slightly, would allow for a more controlled fermentation environment, including the use of a high viability liquid yeast culture with pitching rates designed specifically for the experiment.

Future Work

As noted, the experiment certainly provided some very useful data on the effect of post-boil hop additions on the bitterness of a beer.  However, there were certainly some interesting results that yielded some additional questions.  In part because of what was learned from the methods used in the experiment, and in part because of the data collected, a follow up experiment on the effect of bittering over a wider temperature range would likely yield useful data, and help answer some of the questions raised in this experiment.  To successfully complete such a follow up experiment, the equipment would likely need to be capable of keeping a highly consistent temperature over a period of 15–30 minutes, and ensure that the temperature was consistent throughout the kettle.  An electric brewing system consisting of an electric element for heating, a PID or temperature controller to maintain a consistent wort temperature, a pump for recirculation, and a whirlpool outlet to ensure the wort remained moving, allowing for even temperature distribution, would likely work well for such an experiment.  The goal of the follow up work would be to answer the questions posed earlier; what is the effect of a post-boil/whirlpool hop addition on the bitterness of the beer, even below alpha acid isomerization temperatures, and how does this affect hop aroma and flavor?

Acknowledgements

Many people volunteered their time and efforts in helping me complete this project and report.  Foremost, David Curtis of Bell’s Brewery played a pivotal role in procuring the resources within Bell’s to help with IBU testing, and in organizing a sensory panel.  David’s excellent presentation at the 2014 National Homebrewers Conference entitled “Putting Some Numbers on First Wort and Mash Hop additions” was in part what inspired me to propose this experiment to the AHA.  For his efforts in this project, I’m sincerely grateful.

I’d also like to thank Luke Chadwick and the rest of the team at the Bell’s Brewery lab for performing the IBU testing, and answering any follow up questions I had.  To the members of the sensory panel from Bell’s who participated in the experiment, many thanks for offering up your time and enthusiasm for that portion of the project.

Stan Hieronymus was also very gracious with his time and willingness to provide advice and resources all the way from when I was writing the proposal for this project through the completion of this report.  Stan is one of the most knowledgeable and genuinely nice people in the brewing world today, and I can’t thank him enough for the help he provided.

Last but not least, I’d like to thank Jeff Rankert of the Ann Arbor Brewers Guild, Ryan Hamilton of Pilot Malt House, and Phil Pierce of the Brewsquitos Homebrew Club for reading the initial version of this report and providing invaluable feedback.  All are great technical brewing minds, and Phil in particular has repeatedly helped me refine beer writing I’ve done in the past.

Works Cited

  1. Steele, Mitch. “Hop Bursting: Maximizing Hop Flavor and Aroma.” Zymurgy Magazine, November/December 2013: pages 20 – 26.
  2. Hall, Michael L., Ph.D. “What’s Your IBU?” Zymurgy Magazine, Special Edition, The Classic Guide to Hops, 1997: pages 54 – 67.
  3. Mills, Adam. “From Five Gallons to Fifteen Barrels” [PDF document]. Retrieved from American Homebrewers Association Web site: http://www.homebrewersassociation.org/how-to-brew/resources/conference-seminars/
  4. ASBC Methods of Analysis, Beer-23, Beer Bitterness. Retrieved from http://methods.asbcnet.org/summaries/beer-23.aspx
  5. J Zainasheff. “Whirlpool/Immersion Chiller”. Retrieved from http://www.mrmalty.com/chiller.php
  6. Algazzali, Victor A. (2015). The bitterness intensity of oxidized hop acids : humulinones and hulupones (Master’s Thesis). Retrieved from: http://www.worldcat.org/title/bitterness-intensity-of-oxidized-hop-acids-humulinones-and-hulupones/oclc/893912673

* * *

Nick Rodammer, member of the Brewsquitos Homebrewing Club, is a homebrewer and AHA member from Michigan.

The post The Effect of Post-Boil/Whirlpool Hop Additions on Bitterness in Beer appeared first on American Homebrewers Association.
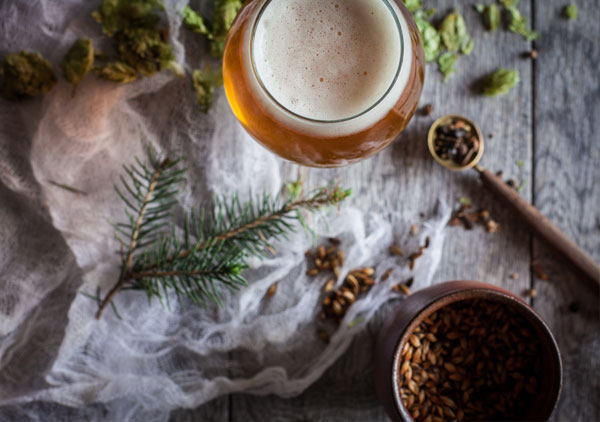
Posted on

Access Your Digital AHA Member Card with Brew Guru App

Don’t be like George Costanza! Give your wallet a break and access your American Homebrewers Association (AHA) membership card from your phone.

That’s right, Android and iOS smartphone users have instant access to their member card with the Brew Guru app. Now you’ll never miss out on an AHA Member Deal because you forgot your card.

Here’s how to access your digital membership card:

  1. Download the Brew Guru app from the Google Play or Apple App stores. (note: the app is currently only available to residents of the USA. International accessibility will be available soon)
  2. Login with your HomebrewersAssociation.org username and password, or start a Free Trial if you are new to the AHA.
  3. After logging in, click the menu icon at the bottom left of the dashboard (figure 1).
  4. Select the profile icon at on the bottom right of the menu (figure 2).
  5. Scroll down and click the VIEW MEMBERSHIP CARD button (figure 3). Click on the magnifying class for a full-screen membership card.

brew_guru_digital_card_1

Figure 1: Access the menu by clicking the ‘Menu Icon’ on the bottom left of your dashboard. Figure 2: From the dashboard, access your profile information by clicking the ‘Profile Icon’ on the bottom right of your screen.

brew_guru_digital_card_2

Figure 3: From your profile, click ‘VIEW MEMBERSHIP CARD’. Figure 4: Show your digital membership card to redeem AHA Member Deals!

The post Access Your Digital AHA Member Card with Brew Guru App appeared first on American Homebrewers Association.

Posted on

The Impact of Flaked Oats on New England IPA

This homebrew experiment was originally published on Brulosophy.com.

* * *

Flaked oats are an unmalted grain that have had their starches gelatinized by pressure and heat during the flaking process, meaning they can be used without a cereal mash, which can’t be said for non-flaked grains like steel cut oats. The creaminess flaked oats purportedly imparts in a beer stems from the high beta glucan content, a gum produced during the malting process by the breakdown of hemicellulosic cell walls. Traditionally, brewers using grists consisting of high amounts of such adjuncts would employ a beta glucan mash rest at 104°F/40°C, during which beta glucanese enzymes work to dissolve the beta glucans thereby making for an easier lauter.

Up until a couple years ago, if I’d been asked what styles of beer benefit from flaked oats, my response would have been limited to Stouts and Porters, in which oats might make up 10% of the girst. That’s certainly not the case these days, as utilizing relatively high amounts of flaked oats has become a popular way to add a soft, elegant mouthfeel to New England style Pale Ales and IPAs, an inclusion also said to contribute to this style’s notably hazy appearance and sought after “juicy” character.

As a lover of clear beer, I’d avoided brewing one of these NE-style abominations due my belief their haze was a function of yeast in suspension or otherwise shoddy brewing process. However, a couple experiences during Homebrew Con 2016 forced me to question these opinions, the first one being our collaborative xBmt with Ed Coffey from Ales Of The Riverwards. His HopWards Pale Ale was delicious, and the fact the gelatin fined sample retained a similar level of haze as the non-fined sample seemed to indicate yeast wasn’t the culprit. And then, during club night, a reader of Brülosophy was kind enough to share many popular commercial examples of NEIPA, none of which had what I typically expect from a beer with yeast in suspension. My focus then shifted to the other novel aspects of the style, such as the heavy use of flaked oats. Is it really a necessary component, or does the character it is presumed to impart come from something else?

Purpose

To evaluate the differences between a NE-Style IPA made with flaked oats and the same beer made without flaked oats but an otherwise similar recipe.

Methods

Since this was my first time brewing this style and I wanted to avoid as much bullsh*t criticism as possible, I relied on Ed’s HopWards recipe as the main inspiration for my recipe, making some changes in the hops based on what I had available at the time. BeerSmith calculations showed that swapping 18% of the Maris Otter grist with flaked oats had no impact on OG, which meant each batch would be of similar weight despite differing constitution.

Hazy Daze NE-Style IPA Recipe

Recipe Details

Batch Size Boil Time IBU SRM Est. OG Est. FG ABV
5.5 gal 60 min 60.1 IBUs 4.2 SRM 1.057 1.013 5.8 %

Fermentables

Name Amount %
Pale Malt, Maris Otter 10.125 lbs 81.82
Oats, Flaked 2.25 lbs 18.18

Hops

Name Amount Time Use Form Alpha %
Columbus/Tomahawk/Zeus (CTZ) 11 g 60 min Boil Pellet 13.1
Centennial 30 g 15 min Boil Pellet 9.9
Centennial 30 g 5 min Boil Pellet 9.9
Citra 30 g 5 min Boil Pellet 13.4
Galaxy 30 g 5 min Boil Pellet 15
Citra 60 g 3 days Dry Hop Pellet 13.4
Centennial 30 g 3 days Dry Hop Pellet 9.9
Galaxy 30 g 3 days Dry Hop Pellet 15

Yeast

Name Lab Attenuation Temperature
London Ale III (1318) Wyeast Labs 73% 64°F – 74°F

Notes

Water Profile: Ca 135 | Mg 1 | Na 10 | SO4 71 | Cl 186

In keeping with popular approaches to brewing this style, I chose to use a yeast strain that many have come to identify as quintessential, Wyeast 1318 London Ale III, and built a single large starter using 2 packs the morning prior to brewing.

Later that day, after the sun had set, my assistant accompanied me to the garage to help prepare for the following morning’s brew day, starting with measuring out and milling the slightly different amounts of Maris Otter.

brulosophy-new-england-ipa

I then weighed out the flaked oats and tossed them on top of the milled grain.

Left: Oats. Right: NOats

Left: Oats. Right: NOats

Since these would both be 5 gallon batches, I opted to use the no sparge method and collected the full volume of brewing liquor for each into separate kettles. The chemistry of the water used to make “proper” examples of NEIPA is often said to be far richer in chloride than sulfate, and so using Bru’n Water, I adjusted each batch to a sulfate to chloride ratio of about 0.38 (71:186). Around noon the next day, I began heating the strike water for the oats batch first then, 20 minutes later, doing the same for the batch with no oats, lamely referred to as “NOats” henceforth.

When the temperature of the water was slightly higher than suggested, it was transferred to a mash tun and allowed to preheat for a few minutes before I incorporated the grains, both batches ultimately settling at my target mash temperature.

Both batches were mashed for 60 minutes and stirred briefly every 20 minutes throughout. I took the time to measure out hop additions as the mashes rested.

06_oatsVSnoats_oatsMASHnoats

Once the mashes were complete, I performed a vorlauf then began collecting the sweet wort, noticing what seemed to be a subtle and unsurprising difference in color.

08_oatsVSnoats_oatsRUNOFFnoats

Left: Oats | Right: NOats

Hops were added at the listed times during separate 60 minute boils.

Replacing hop stands with later kettle kettle additions meant the wort was chilled immediately at flameout, quickly dropping to about 72°F/22°C.

10_oatsVSnoats_chilling

A hydrometer measurement at this point revealed a slight difference in OG, with the Oats wort clocking in a little lower than the NOats wort.

11_oatsVSnoats_oatsOGnoats

Left: Oats 1.056 OG | Right: NOats 1.058 OG

Separate 6 gallon PET carboys were filled with equal amounts of wort from either batch then placed in a temperature regulated chamber to finish chilling. While waiting, I stole some yeast from the starter to reserve for future use then split the rest evenly between two smaller flasks in preparation to be pitched. It took about 4 hours for the carboys of wort to stabilize at my target fermentation temperature of 67°F/19°C, at which point the yeast was pitched. Both beers had developed healthy kräusens and were bubbling like mad 18 hours later.

12_oatsVSnoats_ferm1day

18 hours post-pitch

Yet another unique aspect of brewing NEIPA is adding dry hop additions during active fermentation, a step purported by some to be the cause of the so-called “juicy” hop character due to a process referred to as biotransformation. Because of this, I added the dry hop charges 2 days after pitching yeast, when it seemed the kräusen had peaked, about 4 days sooner than I would have for a West Coast IPA.

13_oatsVSnoats_biotransDHday2

Dry hop additions added 2 days post-pitch

As fermentation finished up over the following few days, I was met with a glorious aroma every time I opened the chamber, which while nice, left me wondering if any would remain in the finished beer. Activity was all but absent a week post-pitch so I took an initial hydrometer measurement that I compared to a second measurement 3 days later, the lack of change confirming fermentation was indeed complete.

14_oatsVSnoats_oatsFGnoats

Left: Oats 1.010 FG | Right: NOats 1.010 FG

I dropped the temperature on the chamber to 32°F/0°C and let the beers cold crash overnight, forgoing my standard gelatin fining in order to preserve whatever it is some fear is lost by fining. I returned the following evening to keg the cold beers.

15_oatsVSnoats_kegging

While I’d originally planned to add a charge hops in the keg as well and actually did suspend them in the kegged beer, I quickly learned the fishing line I used disallowed the o-ring on the keg to seal when pressure was applied. Dammit! After removing and tossing over 8 oz/227 g of sopping Galaxy, Citra, and Centennial, I burst carbonated the beers by applying 45 psi of CO2 to each keg. After 18 hours, I reduced the gas to 14 psi where it remained for 3 days until I began serving it to participants. Perfectly carbonated, nice white head with fantastic retention, and hazy as hell. Whatever I did right felt so wrong.

16_oatsVSnoats_oatsGLASSESnoats

Left: Pats | Right: NOats

Results

A total of 19 people of varying levels of experience participated in this xBmt. Each participant was served 1 sample of the Oats IPA and 2 samples of the NOats IPA then asked to identify the sample that was unique. Given the sample size, 11 tasters (p<0.05) would have had to correctly identify the Oats beer as being different in order to reach statistical significance. A total of 6 tasters (p=0.65) accurately identified the unique sample, indicating participants in this xBmt were unable to reliably distinguish a NE-style IPA made with 18% flaked oats in the grist from one made without any flaked oats but an otherwise similar recipe.

This xBmt was discussed live on The Brewing Network’s 11/21/2016 episode of The Session. Adding the data of the 4 blind co-hosts who evaluated the beers, only 1 of which correctly identified the Oats sample as being unique, brings the total number of participants to 23 with 12 (p<0.05) expected correct responses in order to reach statistical significance and 7  (p=0.69) actual correct responses. Ultimately, the performance of this set of participants roughly approximates the larger dataset’s inability to reliably distinguish between the Oats and NOats beers.

My Impressions: Despite all the sh*t I’ve talked on hazy IPA over the last few years, I was pretty excited to brew one for myself and especially curious about the impact of flaked oats. As far as my ability to distinguish between these beers goes, I could reliably tell them apart based on appearance alone, as the Oats batch had a lighter color that, to me, made it look more juice-like and less murky than the NOats beer. Other than that, I couldn’t do it. I didn’t necessarily expect them to taste and smell different, which they didn’t, but what really got me is how remarkably similar they were in terms of mouthfeel, both possessing what I could see being described as soft or even creamy with a luscious body that I always presumed came from flaked oats.

I feel I owe it to my hazy IPA loving friends to share that this was probably the best IPA I’ve ever made. Yeah, I know, it almost hurts to say it. I enjoyed it so much that I started drinking pints before data collection and worried I might not have enough if I didn’t practice some moderation. Citrus and tropical fruit stole the show with whispers of earthy dankness I believe came from the Galaxy. So, so good. At least for the first 10 days after kegging. At the time of writing this, the beers had been on tap for exactly 4 weeks and were certainly showing their age, though not to the point of being undrinkable.

Discussion

Hazy New England/Northeastern IPA has permeated the craft beer world and, ugly as it may be to some, is almost certainly here to stay. In addition to its unconventional appearance, NEIPA is lauded for its soft mouthfeel and creamy texture, which many believe to be a function of the high percentage of flaked oats in the grist. However, participants’ inability to reliably distinguish a version of NEIPA made with 18% flaked oats from one made without flaked oats sort of throws a wrench in this theory. I’ve used varying amounts of flaked oats numerous times in the past in styles ranging from American Amber to Imperial Stout and I’ve never had an issue with clarity. Since both beers in this xBmt were similarly hazy and neither dropped clearer than the other over time, I’m beginning to question whether flaked oats really does contribute to haze as much as I’ve been led to believe.

So, what is the cause of haze in NEIPA? And what about the creamy, “juicy” character so quintessential to this style? While yeast in suspension is certainly a possibility, I’m doubtful because, for one, I’ve tasted yeasty beers many times and don’t enjoy them, plus I’ve yet to have gastrointestinal issues after drinking multiple pints of my xBmt beers. Since all we’re left with is speculation at this point, I find myself leaning toward a couple other explanations. Water chemistry being as imporant as it is, it seems pretty obvious the proportionately high chloride levels used to produce NEIPA is responsible for some of the uniqueness, though it may not be a main cause of haze. What I’m most interested in exploring further, a topic that has received little focus up until recently, is the impact of biotransformation that occurs from the interaction of yeast with hops added during active fermentation.

One thing I’m convinced of is that flaked oats and perhaps other similar grains do have an impact on the appearance of the finished beer, just not necessarily the haziness. To me, the NOats IPA’s darker color gave it a murky appearance reminiscent of dirty dish water, while the version made with oats had more of an orange hue that I found much more appealing. It’s because of this that I will continue to use flaked oats in future batches of NEIPA.

As is often the case, these results have left me with more questions than answers, a good thing for the curious like me. In addition to its impact on NEIPA, I can’t help but wonder what effect flaked oats actually has on styles where it more traditionally makes up a portion of the grist. Could it be that our perception of Oatmeal Stout as possessing a silky mouthfeel and creamy texture is driven more by expectation than reality? I don’t know, but I look forward to trying to figure it out!

If you have experience brewing with flaked oats in NEIPA or any other style, we’d love to hear from you! Please feel free to share your thoughts in the comments section below.

The post The Impact of Flaked Oats on New England IPA appeared first on American Homebrewers Association.