This homebrew experiment was originally published on Brulosophy.com.
I brewed my first IPA in May of 2003, it was the third batch I made at home using extract and steeping grains. Since then, what I used to think of as typical IPA characteristics have evolved quite a bit. IPA used to be all about packing as much bitterness into a pint as possible, often relying on relatively massive bittering additions using pine-forward hops like Chinook and CTZ, and usually adding a hefty dose of Caramel malt. As craft beer began to grow, tastes swayed more toward the fruitier hops such as Simcoe, Centennial, and Amarillo, and brewers began using more hops later in the process while also moving toward simpler grists that produced a dryer beer. Using such novel techniques as hop-bursting and hop stands, some engaged in experimentation that ultimately led to various “new” styles of IPA including Black, Red, White, Belgian, Triple, Quadruple, Session… you get the idea.
And then, of course, there’s New England IPA (NEIPA), which by my recollection is the latest in the long line of this iterative evolution, a style that stands in near direct contrast to the IPA of my earlier days of brewing. Rather than bitter, piney, crisp, and clear, the best (or most popular) versions of NEIPA are characterized by their low bitterness, “juicy” fruit aromas and flavors, soft and creamy mouthfeel, and perhaps most notably, a hazy appearance. In order to make such a beer, brewers rely on a conglomeration of methods including the use of a good portion of flaked oats and biotransformation dry hopping. Furthermore, while the idea that oxidation expedites the loss of hop character in IPA is nothing new, many brewers of NEIPA also take somewhat extreme measures to reduce their beer’s contact with oxygen.
Over the last year, I’ve tried my hand at making NEIPA a few times, some of which were rather good and others that almost made me quit the style. The few I’ve liked pretty much mirrored the commercial examples I enjoy in that they maintained a light orange hue reminiscent of fruit juice and had a simple bready malt character. The homebrew and commercial versions of NEIPA I’ve been less than pleased with have all taken on a darker appearance that’s accompanied by an odd caramel-like character that leaves the beer tasting more like a piece of hard candy than a refreshing IPA. What causes this?
Most NEIPA recipes I’ve seen have grain bills absent of malts known to impart much color, and my personal experience proves this darkening can occur even with the simplest of grists. The go-to reason cited by many is oxidation, which I was skeptical of given the results of our xBmts on intentional oxidation at kegging. Following those xBmts, I received feedback from folks positing NEIPA is more sensitive to oxidation for various reasons and that a follow-up xBmt ought to investigate the effect of reducing oxygen exposure on the cold-side when making this style. Challenge accepted!
Purpose
To evaluate the differences between a New England IPA transferred to a CO2 purged keg and the same beer transferred to a non-purged keg.
Methods
All out of Maris Otter, I concocted a blend of pale and Munich malts that I hoped would be somewhat similar then used a rather large portion of flaked oats to make up the rest of the grist.
Hazel New England IPA
Homebrew Recipe Details
| Batch Size | Boil Time | IBU | SRM | Est. OG | Est. FG | ABV |
|---|---|---|---|---|---|---|
| 5.5 gal | 30 min | 52.7 IBUs | 4.7 SRM | 1.058 | 1.012 | 6.0 % |
| Actuals | 1.058 | 1.012 | 6.0 % | |||
Fermentables
| Name | Amount | % |
|---|---|---|
| Pale Malt (2 Row), Rahr | 9 lbs | 66.67 |
| Oats, Flaked (Briess) | 3 lbs | 22.22 |
| Munich I (Weyermann) | 1.5 lbs | 11.11 |
Hops
| Name | Amount | Time | Use | Form | Alpha % |
|---|---|---|---|---|---|
| Simcoe | 40 g | 15 min | Boil | Pellet | 13.1 |
| Citra | 30 g | 2 min | Boil | Pellet | 13.8 |
| Galaxy | 30 g | 2 min | Boil | Pellet | 18.1 |
| Simcoe | 30 g | 2 min | Boil | Pellet | 13.1 |
| Galaxy | 60 g | 5 days | Dry Hop | Pellet | 18.1 |
| Citra | 30 g | 5 days | Dry Hop | Pellet | 13.8 |
| Simcoe | 30 g | 5 days | Dry Hop | Pellet | 13.1 |
| Galaxy | 60 g | 1 day | Dry Hop | Pellet | 18.1 |
| Citra | 30 g | 1 day | Dry Hop | Pellet | 13.8 |
| Simcoe | 30 g | 1 day | Dry Hop | Pellet | 13.1 |
Yeast
| Name | Lab | Attenuation | Temp. |
|---|---|---|---|
| Juice (A38) | Imperial Organic | 74% | 62°F – 70°F |
Notes
| Water Profile: Ca 131 | Mg 1 | Na 10 | SO4 62 | Cl 186 |
Download
| Download this recipe’s BeerXML file |
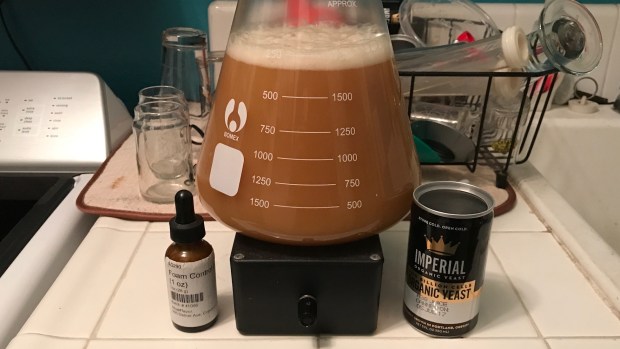
I prepared a starter of Imperial Organic Yeast A38 Juice 2 days ahead of time.
The day before brewing, I weighed out and milled the grains.

Since this would be a 10 gallon batch with a relatively hefty grain bill, I went with the batch sparge method and collected the strike water in my mash tun while the sparge water was placed in my kettle. After adjusting all of the water to my desired profile, I dropped my heatstick into the strike water, placed the cover on the mash tun, then set a timer for it to turn on 1.5 hours before I planned to wake up and brew. I awoke the next morning to required only 5 additional minutes to reach my target strike temperature.

I proceeded to mash in and was quickly reminded of how much thicker the mash is when using the batch sparge method.

A check of the mash temperature showed I was right at my intended 149°F/65°C.

I stole a sample of sweet wort from the mash about 15 minutes in to check how close I was to hitting my 5.4 pH target.

After a 60 minute mash rest, I collected the first runnings of sweet wort and poured it into my boil kettle.

Following a quick batch sparge, the wort was brought to a rolling boil and hops were added as stated in the recipe.

At the completion of the 30 minute boil, I quickly chilled the wort to slightly warmer than my groundwater temperature.

A refractometer reading showed the wort was sitting at my target OG.

1.058 OG
Equal amounts of wort were racked to identical fermentors.

I placed the fermentors in my chamber and gave them a few hours to finish chilling to my desired fermentation temperature of 66°F/19°C before evenly splitting the yeast between them. As I’ve come to expect when using Imperial Organic Yeast, I noticed crazy airlock activity later that day but gave them a full 24 hours before hitting them with a biotransformation dry hop.

I let the beers ferment slightly longer than usual because I wanted to give the low oxygen beer enough time to fully attenuate, as I wouldn’t be taking a FG sample in order to keep oxygen ingress at a minimum. At 8 days post-pitch, I took a hydrometer measurement of the beer going into the non-purged keg that showed FG was hit.

It was time to add the second dry hop charge, which was easy enough for the standard oxygen batch. For the low oxygen beer, I very quickly poured the hops through a small crack between the lid and the fermentor, flushed the headspace with CO2, replaced the lid, then put the fermentor under 1.5 psi of CO2 using something I rigged together specifically for this xBmt.

Side note: I do not recommend others do this unless their fermentor is rated to hold pressure. The Brew Buckets are not but I was okay taking the risk for this xBmt, which also resulted in quite a bit of CO2 loss due to leakage between the lid and fermentor.
I immediately began cold crashing the beers and let them sit for 36 hours, the entire time hearing the faintest hiss of CO2 coming from the lip of the low oxygen Brew Bucket. When it came time to keg, I shut the plastic valve between the gas and the fermentor off to maintain positive pressure before disconnecting the quick-disconnect from the CO2 regulator; no hiss indicated my plan was working. I then connected another line via quick disconnect to the regulator that had a gas pin-lock disconnect attached to the other end. This got connected to a the gas post of a keg I’d previously filled to the brim with Star San sanitizer solution, which I pushed out of the keg using roughly 3 psi of CO2, the sanitizer leaving the liquid post and going into the non-purged keg.

It only took a few minutes, all of which I spent gritting my teeth at what I believed was a waste of gas. I was curious how much sanitizer would be left in the keg using this method and was surprised to discover it wasn’t even enough to slosh around, likely because my diptubes aren’t cut. With the keg fully purged, I swapped the lines from the CO2 tank again, set the pressure to 1.5 psi, drained off enough beer to ensure it wasn’t trub laden, attached a sanitized tube with liquid disconnect to the keg, then opened the ball valve on the Brew Bucket to start the flow of beer into the purged keg; once the beer was flowing, I attached a pin lock gas poppet depressor to the gas post to relieve pressure and allow for consistent flow.

The standard oxygen batch was kegged using my normal non-purging routine that required quite a bit less preparation. I always presumed filling from the bottom of the keg pushed any oxygen up and out of the depressed gas post, hence my belief purging with CO2 was unnecessary.

The filled kegs were both placed in my cool keezer and bust carbonated with 30 psi of CO2 for 24 hours before I reduced the gas to serving pressure. I stole samples 5 days after kegging just to see how things were coming along and noticed what seemed to be a slight difference in appearance.

Left: low O2 / Right: standard O2
While NEIPA is known for being best consumed fresh, the crew thought it would best to let these beers age for a bit before collecting data to amplify any oxidative effects. I began collecting data 3 weeks after kegging, at which point the beers were evenly carbonated, nearly opaque, and noticeably dissimilar in color.

Left: low O2 / Right: standard O2
Just to make sure what I was observing wasn’t due to lighting or poor vision, I took pictures of each beer individually in the same general position, the difference in appearance becoming even more dramatic.

Left: low O2 / Right: standard O2
Results
A total of 22 people of varying levels of experience participated in this xBmt. Each participant was served 2 samples of the oxidized beer and 1 sample of the non-oxidized beer in opaque colored cups then asked to identify the sample that was unique. Given the sample size, 13 tasters (p<0.05) would have had to select the unique sample to reach statistical significance. Ultimately, 14 people (p=0.003) correctly identified the odd-beer-out, suggesting participants were able to reliably distinguish a NEIPA treated in a way to reduce cold-side oxidation from the same beer treated with less concern for oxidation.
The participants who correctly selected the unique sample in the triangle test were instructed to complete a brief set of additional questions comparing only the two different beers, still blind to the nature of the xBmt. Of the 14 correct tasters, 9 chose the reduced oxygen beer as their most preferred, 4 endorsed the standard oxygen as their most preferred, and 1 person reported perceiving no difference between the beers.
My Impressions: With the amount of very expensive trendy hops I threw into this beer, I have to admit I was pretty anxious how it would turn out. Similar to my first attempt at this style, I was rather pleased with the results… of the reduced oxygen half. Given my skepticism about this variable, I performed 10 semi-blind triangles out of which I was able to identify the odd-beer-out 8 times; I blame my 2 incorrect attempts on my kids who had Bruno Mars’ Chunky playing loudly in the background– cuttin’ a rug during evaluation and all. To me, the reduced oxygen beer smelled like a glass of tropical fruit juice, which also came through in the flavor. It was crisp yet soft and maintained a very fresh character even after a month in the keg. The standard oxygen beer wasn’t bad, but compared to the reduced oxygen beer, it fell flat, just like so many of the commercial and homebrew versions of NEIPA I’ve tried that took on that darker appearance. While the hop character was still very strong, it was paired with a distinct candy-like sweetness that I’d rather not be in my beer.
Discussion
Go browse any popular beer or brewing forum and you’re bound to see pics of people showing off a glass of murky NEIPA that looks more like adulterated coffee than fruit juice, which is usually what they’ll claim it tastes like. Given the typically simple grists used by brewers of this style, I’ve trouble accepting the color is a function of grains, meaning something else is the culprit. While I was skeptical oxidation was the answer based on prior experiences with other styles, just the objectively observable results of this xBmt alone have forced me to reconsider my conviction. What’s more is the fact tasters were able to reliably distinguish the reduced oxygen beer from the one treated with less care, indicating a relationship between color and flavor change.
It’d be easy to point the finger at oxygen and move along our merry way, but what really gets me is the fact NEIPA seems so much more susceptible to this type of oxidation than other styles, like there’s some sort of interaction between oxygen and some unique aspect of NEIPA. Personally, my eyes are on the high amount of flaked oats typically used when making this style, a variable we definitely plan to continue exploring.
It seems pretty clear that failing to take measures to reduce oxygen on the cold-side increases the risk of hastened shelf-life with NEIPA, but we can’t say for sure where this exposure matters most– is it suck-back during cold crashing, transferring the finished beer to a non-purged keg, or both? While I may not make this style often, based on these results as well as my anecdotal experiences, I absolutely plan to keep cold-side oxygen exposure to a minimum when I do from now on.
For those concerned about oxygen exposure that may not have all the gear I do, we came up with some methods that, in theory, ought to help (we plan to test them out at some point):
- Keg the beer before it’s completely done fermenting to not only give the yeast a chance to scrub the keg of oxygen, but eliminate the risk of suck-back during cold crashing.
- Ferment in a keg and use hop filters to avoid diptube clogs.
- Rack fermented beer into a recently kicked keg that’s already full of CO2; probably best that the prior beer be of similar style and not contaminated.
I recently discovered a neat device from NorCal Brewing Solutions designed to eliminate the suck-back issue when cold crashing called the CO2 Harvester Kit. We’ve got a couple on the way and will be sharing our thoughts on it soon.
The post The Impact of Cold-Side Oxidation on New England IPA appeared first on American Homebrewers Association.
![]()