- Mash grains at 150°F (66°C) for 90 minutes.
- Primary Fermentation: 7 days at 68°F (20°C) in glass.
- Secondary Fermentation: 7 days at 65°F (18°C) in glass.
The post Joe Gillian’s Red appeared first on American Homebrewers Association.
![]()
The post Joe Gillian’s Red appeared first on American Homebrewers Association.
![]()
The American Homebrewers Association (AHA) Governing Committee is soliciting nominations for 5 opening seats in 2018. Governing Committee positions are held for three-year terms.
The AHA Governing Committee is an advisory committee to the AHA staff and Brewers Association Board of Directors.
The members of the Governing Committee are elected by the members of the AHA and charged with shaping the association’s policy and activities on their behalf. The Governing Committee also appoints two members as designates to the Brewers Association Board of Directors.
If elected, the Governing Committee member is expected to:
All nominations for the Governing Committee must be submitted via the nomination form by November 30, 2017. You will get a confirmation that the submission has been received. Roxanne Westendorf will contact all candidates in mid-December to confirm their candidacy.
Please contact any of the current Governing Committee members if you have questions about the Governing Committee, the elections, and our work.
The post AHA Governing Committee Call for Nominations appeared first on American Homebrewers Association.
![]()
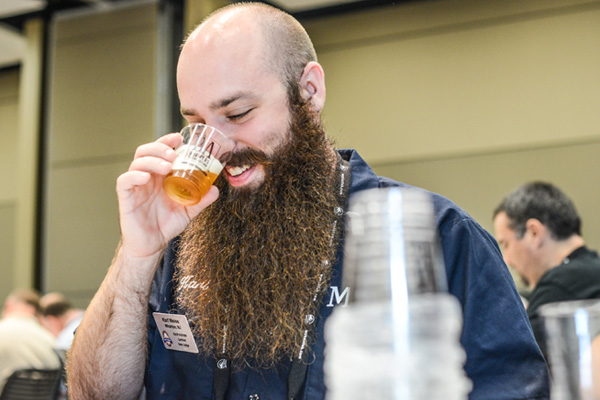
Before White Labs opened in 1995, founder and owner Chris White started making yeast for homebrewers as a side project while pursuing his graduate thesis. Today, White Labs has grown into one of the leading innovators and suppliers of liquid brewer’s yeast.
We caught up with Erik Fowler, Education & Engagement Curator at White Labs, who shared five interesting facts you might not have known about the beer ingredient that brings wort to life: yeast!
Yeast contribute more than 600 flavor and aroma compounds which add complexity and nuance to beer. Beer can build upon, showcase or even diminish malt and hop flavors. One yeast strain might leave a residual malty sweetness while another might dry the beer out leaving a punching perceivable bitterness. The hazy IPA’s we’ve all come to enjoy wouldn’t be the same without a fruity ester producing yeast strain to complement the hops.
Join or renew your AHA membership in October and we’ll mail you a coupon for a free packet of White Labs yeast when you use offer code WHITELABS.
Redeem the coupon at your local homebrew retailer and get your brew on with one of White Labs’ Core Strains or try a speciality strain from one of the Vault Seasonal Releases.
Emil Christian Hansen was the first to isolate a pure culture of yeast in 1883 which was named Saccharomyces carlsbergensis, now known as Saccharomyces pastorianus or lager yeast. It can be argued that lagers popularity to this day is still due to the fact that the first “clean” single culture beer brewed was a lager from Hansen’s isolation.
Our understanding of fermentation is fairly recent. In 1866 with the aid of a microscope, Louis Pasteur was able to understand that yeast was responsible for beer fermentation. Before this point, fermentation was believed to be a spontaneous chemical reaction.
Reinheitsgebot, also known as the German purity law, was introduced in 1516 which dictated beer must contain only barley, hops and water. Yeast was not known as being the cause of fermentation for more than 300 years when it was then added as an acceptable ingredient.
Yeast domestication has been 500 years in the making and until recently were unknowingly selected for their positive properties. Most yeast is not alcohol tolerant, nor does it produce the positive flavors and aromas we’ve come to know in brewers yeast.
The post 5 Facts on Brewer’s Yeast from White Labs appeared first on American Homebrewers Association.
![]()
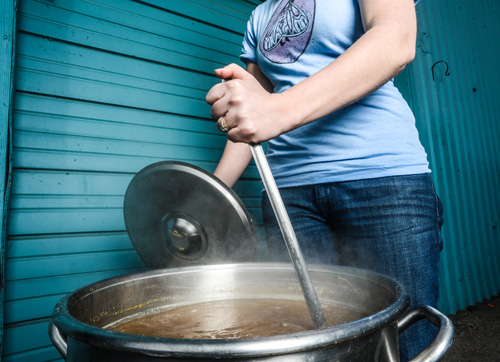
Whirpooling is an easy process to include in your brew day that can greatly impact your beers. If you have a spoon, you can whirlpool!
Quicker Chilling: The time it takes to chill wort to yeast pitching temperatures is greatly decreased when whirlpooling. Because the wort is circulating, the cool and warm wort will constantly be churning and combining to promote quick chilling. Also, whirlpooling with a wort chiller can offer increased control of hitting an exact pitching temperature.
Clearer Wort: A whirlpool promotes clearer wort by collecting the cold break solids in the center of the brew kettle. The chilled wort can then either be siphoned from the side of the kettle or through the kettle valve to avoid transferring any particulate.
Improved Hop Flavor & Aroma: Because whirlpooling cools wort faster, post-boil hop additions instill more flavor and aroma without too much of the bitterness. Hops will continue to isomerize—the process which attaches alpha acids to water molecules creating bitterness—above 180°F (82°C). Being able to drop below this temperature will prevent isomerization in hop additions that are intended to instill just flavors and aromas.
Reduced DMS: The heat from the boil converts s-methyl methionine (SMM) in malt to dimethyl sulfide (DMS), which appears in beer as an unfavorable cooked or cream corn flavor. A longer, vigours boil—especially when using Pilsner malt, which contains eight times more SMM then typical base malts—can drive off DMS. When the boil is over, the heat continues to convert SMM to DMS until temperature drops below about 140°F (60 °C). Whirlpooling cools wort quickly, reducing the amount of DMS occurring in the post-boil.
Whirlpooling involves creating a circular current in the brew kettle, and this can be done using various techniques and equipment.
Spoon
 The simplest way, whether using an ice bath, an immersion chiller or no formal chilling method, is to stir the contents of the kettle with a spoon rapidly until a circular current is achieved. Stir along the walls of the kettle for a few minutes, taking care not to splash to prevent any chances of hot side aeration, until a strong, lasting whirlpool forms. Depending on what your goals are (e.g., clarification, hop flavor/aroma), allow the whirlpool to stand for 10-30 minutes before racking.
Pump or Counterflow Chiller
If a pump is available, or you are using a counterflow chiller, a whirlpool can be created by angling the pump-out hose along the side of the kettle a few inches below the surface of the wort. This flow will cause the wort to spin in a circular current. Be careful when creating a whirlpool with a pump as it can cause hot wort to splash out of the kettle.
One of the most effective means of whirlpooling and chilling is highlighted by Jamil Zainasheff in “A New Spin on an Old Chiller” in the January/February 2007 Zymurgy (AHA members can access this issue instantly on eZymurgy or with the Zymurgy mobile apps). Zainasheff offers an upgrade to the typical immersion chiller that makes for effecting whirlpooling and chilling.
 It may seem logical that a whirlpool would send the solid material to the outside of the kettle because of our child hood experiments with swinging a bucket of water around in circle without any falling on our heads. However, because the contents of the boil kettle are light enough, they will collect in the center due to something called the “tea leaf paradox.”
Basically, stirring the wort into a whirlpool is creating centripetal force, but because of friction caused by the liquid’s contact with the bottom and sides of the kettle, the liquid towards the bottom slows, creating a pressure gradient. This pressure gradient is lower than the upper portion of the liquid, so the solid materials in the kettle are pulled towards the center of the bottom (things move from higher to lower pressures). Isn’t physics phun?
Class dismissed!
The post Whirlpooling Makes a World of Difference appeared first on American Homebrewers Association.
Single infusion mash at 149° F (65° C).
Conduct a 90 minute boil, following the hop addition schedule as listed in the ingredients.
The post Überbrew White Noise American Wheat Ale appeared first on American Homebrewers Association.
![]()
John Palmer, author of the quintessential homebrewing guide How to Brew: Everything You Need to Know to Brew Great Beer Every Time, is bringing his passion for making beer at home to Nebraska! For more information, visit PatriotHomebrewSupply.com.
The post Palmer on the Plains appeared first on American Homebrewers Association.
![]()
Update: See part 2 for 5 more common off-flavors and how to fix them.
Having the ability to critique your beer and identify homebrew off-flavors is an invaluable skill when pursuing the highest quality beer.
Let’s take a look at the basics of off-flavors and some of the more common ones that plague homebrews.
Off-flavors are perceived flaws in flavor, aroma and/or sensation (otherwise known as mouth feel) of beer that are typically caused by some aspect of the brewing, fermentation or packaging process. These are not to be confused with “faults” when analyzing a beer based on specific style parameters.
Keeping careful notes during your brew day will make diagnosing the cause of off-flavors a much more precise experience, rather than simply guessing and hoping for the best. If you know the cause off an off-flavor is either from a botched-mash or mismanaged fermentation temperatures, yet your brew log shows your mash went perfectly, then you can logically assume fermentation was the issue and start to make alterations.
As you will find out below, off-flavors can be caused by many variables, so it often takes some detective work to make intelligent changes that will improve the quality of your next beer. Some flaws will subside by simply allowing the beer to age, while others are irreversible and can only act as a learning experience to improve your next brew day.
Skunky and rubbery flavors or aromas in homebrew can be signs of “light-struck” homebrew. This quality is typically never desired in any style of beer. Beer becomes light-struck when the isohumulone bittering compounds in hops come into contact and react with specific wavelengths of light. Skunky aroma can also be caused by using Cluster hops for late boil additions.
To prevent light-stricken beer in the future, use brown bottles when packaging and store bottles out of the light. In some instances, it only takes a matter of seconds for the reaction to occur and start instilling the undesirable skunk off-flavor.
Also described as “hot” or high in fusel alcohol qualities, solvent-y brew is often characterized by an unpleasant heat from alcohol, and in some cases a burning sensation on the palate. It can be perceived in flavor, aroma and mouth feel. In some stronger beer styles, perceivable alcohol is expected at certain levels. “Hot” beer can be caused by fermenting too warm, not using enough healthy yeast or simply the beer being young.
To address solvent-y beers, first try simply setting the flawed beer aside and giving it time. Sometimes beers need longer aging periods to round out flavors and aromas. If time does not fix this issue, you can take measures to prevent this from happening next time you brew the recipe. Depending on what your brew day notes dictate, consider cooler fermentation temperatures, more viable yeast cells or even a different yeast strain altogether.

Green apple or cider-like characteristics can be tricky. To the untrained palate you may think this is just an interesting fermentation by-product that gives your beer a little fruity zing, especially in the aroma, but the reality is it is rarely an intended characteristic in beer. This off-flavor is caused by acetaldehyde, which is a compound formed during fermentation as precursor to alcohol. It typically increases in amount during fermentation and then decreases as beer conditions and ages.
Acetaldehyde is a key signifier of young (also known as “green”) beer, so often times the issue is remedied by simply allowing the beer to condition longer. Krausening, a traditional German technique, can also help clean up acetaldehyde in beer. If additional conditioning time or krausening does not work, in your next homebrew ensure the appropriate amount of viable yeast is pitched, the wort is adequately oxygenated and the fermenting wort is left on the yeast longer.
Astringency is usually identified as a harsh bitterness sensation to the palate, which can be accompanied by some grainy, husk-like flavor. This off-flavor can be misinterpreted as hop bitterness, though with some practice it becomes easier to discern the difference between the two. Typically astringency is caused by tannins derived from brewing ingredients, particularly grains. Control the amount of tannin extraction, and you can reduce the chances of astringency.
To prevent astringency in your next homebrew, a few measures can be taken when using certain ingredients. Astringency is often derived from the mash, hence the grainy, husk-like flavors that sometimes appear with the harshness. Check your crush and ensure you are not pulverizing your grains too much, and keep the mash pH under 6. High amounts of dark-roasted specialty grains, whole-leaf hops and certain raw spices can also increase astringency levels.
Beer that has been oxidized can instill aromas and flavors reminiscent of cardboard, wet paper or just a general “stale” characteristic. While oxidation can sometimes take the form of sweet and sherry-like qualities, adding depth to some styles like barley wine or old ale, it is rarely a desired trait in beer. Unfortunately, once oxidation occurs it is unable to be fixed, but steps can be taken to prevent if from happening in your next homebrew.
The key to preventing oxidized beer is avoiding the introduction of oxygen after fermentation. In fact, in most cases you should avoid aerating wort after the oxygenation at the time of pitching the yeast. Oxygen is initially important to yeast because it consumes it to aid in growth and preparation for the fermentation ahead. Once the yeast gets to work, their consumption of oxygen decreases, which is why it’s important to avoid aeration. To do this, ensure the wort is not splashed or agitated after fermentation, especially when racking. Keep airlocks full. Ensure fermenters, kegs and bottles are all sealed airtight. And if possible, purge kegs, bottles and fermenters with CO2 before racking fermented wort into them.
Duncan Bryant is the Web Coordinator for the American Homebrewers Association.
Sources: Brewing Better Beer by Gordon Strong; Tasting Beer by Randy Mosher; The Beer Judge Certification Program Beer Fault List
The post 5 Common Homebrew Off-Flavors and How to Fix Them appeared first on American Homebrewers Association.
Have an idea for a homebrew gadget that should be included in the 10th Annual Gadget issue? Tell us below and it might be featured in the January/February 2018 Zymurgy magazine.
The deadline for submission is October 21, 2017.
var s1diom7m1n8zypl;(function(d, t) {
var s = d.createElement(t), options = { ‘userName’ : ‘brewersassociation’, ‘formHash’ : ‘s1diom7m1n8zypl’, ‘autoResize’ : true, ‘height’ : ‘1015’, ‘async’ : true, ‘header’ : ‘hide’, ‘host’ : ‘wufoo.com’, ‘entSource’ : ‘wordpress’, ‘defaultValues’ : ” ,’ssl’ : true };
s.src = (‘https:’ == d.location.protocol ? ‘https://’ : ‘http://’) + ‘wufoo.com/scripts/embed/form.js’;
s.onload = s.onreadystatechange = function() {
var rs = this.readyState; if (rs) if (rs != ‘complete’) if (rs != ‘loaded’) return;
try { s1diom7m1n8zypl = new WufooForm();s1diom7m1n8zypl.initialize(options);s1diom7m1n8zypl.display(); } catch (e) {}}
var scr = d.getElementsByTagName(t)[0], par = scr.parentNode; par.insertBefore(s, scr);
})(document, ‘script’); Fill out my Wufoo form!
The post Submit your Homebrew Gadgets to Zymurgy appeared first on American Homebrewers Association.
![]()
A step infusion mash is employed to mash the grains. Add 11 quarts (10.5 L) of 140°F (60°C) water to the crushed grain, stir, stabilize, and hold the temperature at 132°F (53°C) for 30 minutes. Add 5.5 quarts (5.2 L) of boiling water, add heat to bring temperature up to 155°F (68°C), and hold for about 30 minutes. Raise temperature to 167°F (75°C), lauter, and sparge with 3.5 gallons (13.5 L) of 170°F (77°C) water; Collect about 6 gallons (23 L) of runoff. Add 60-minute hops and bring to a full and vigorous boil.
The total boil time will be 60 minutes. When 10 minutes remain, add the 10-minute hops and Irish moss. After a total wort boil of 60 minutes, turn off the heat and place the pot (with cover on) in a running cold-water bath for 30 minutes. Continue to chill in the immersion or use other methods to chill your wort. Strain and sparge the wort into a sanitized fermenter. Bring the total volume to 6 gallons (23 L) with additional cold water if necessary. Aerate the wort very well.
Pitch the yeast when temperature of wort is about 70°F (21°C). Ferment at about 70°F (21°C) for about one week or until fermentation shows signs of calm and stopping. Rack from your primary to secondary and add the hop pellets for dry hopping. If you have the capability, “cellar” the beer at about 55°F (12.5°C) for about one week.
The post Danado de Bom Oatmeal Stout (Damn Good Oatmeal Stout) appeared first on American Homebrewers Association.
![]()
Test yourself on beer color in this week’s Tuesday Beer Trivia.
As we all know, beers can come in quite the array of colors. Several factors affect the color of your finished product, and there are several ways to measure it. Learn some history on estimating beer color in this week’s quiz.
After you take the Beer Trivia quiz below, scroll down to “Beer Trivia Answer Explanations” section to learn more about beer color.
<!]]>
Take Our Survey
The following explanations were taken from “What Color is Your Beer?” by Tom Schmidlin in the May/June 2007 issue of Zymurgy and “Beer Color” written by Brand Smith on the BeerSmith Homebrewing Blog.
Question 1: Standard Reference Method. For example, a sample of beer is placed in a 0.5-inch square container called a cuvette, and the absorbance of the beer is measured with a light beam of 430 nanometers’ wavelength, which is in the violet region of the spectrum. The absorbance is then multiplied by 10 to get the SRM.
Question 2: For decades, beer was compared to colored glass standards to determine the Lovibond color, and we still use the term “degrees Lovibond” extensively today to describe the color of grains.
Question 3: A spectrophotometer is a device for measuring the intensity of light in part of the spectrum.
Question 4: The European Brewing Convention (EBC) is measured at the same wavelength but in a smaller 1-centimeter cuvette. In practice, the EBC color is approximately 1.97 times the SRM color. (EBC = 1.97 × SRM)
Question 5: False. MCU stands for Malt Color Units. A good formula for estimating beer color is: MCU = (weight of grain in pounds) × (color of grain in degrees Lovibond) ÷ (volume in gallons)
The post Tuesday Beer Trivia: Beer Color appeared first on American Homebrewers Association.
![]()