Posted on

The Effect of Post-Boil/Whirlpool Hop Additions on Bitterness in Beer

There is no doubt that the explosion in popularity of IPA has changed the landscape for craft beer producers and consumers, as well as homebrewers.  Between the evolution of the style to fit the wants of the drinking public, the many stylistic offshoots of IPA that have become commonly available, and the increasing quality of flavor and aromatics that many brewers seem to be achieving, it is no wonder that exploration of ingredients and techniques for brewing IPA is at an all-time high.

Many of the best IPAs are made with generous additions of hops both late in the boil and post-boil, or in the whirlpool.  There is even a technique that has spawned off of this thinking called hop bursting, where massive additions of flavor and aroma hops are used to obtain bitterness, in addition to huge amounts of hop character in both flavor and aromatics.

Mitch Steele, formerly of Stone Brewing Company, has been one of the foremost experts on this technique, and has discussed it in numerous forums, including his book, IPA: Brewing Techniques, Recipes and the Evolution of India Pale Ale, presentations at the National Homebrewers Conference and in an article in the November/December 2013 edition of Zymurgy magazine.  In that article, in reference to whirlpool hop additions, Steele stated, “Many brewers neglect to consider the bitterness obtained from this addition, but it can be substantial, depending on the volume of hops added.”1

When reviewing the means in which many homebrewers measure the bitterness in their beers, the bitterness obtained from a post-boil/whirlpool hop addition is often not considered, in part due to the available means for calculating estimated IBUs.  While there are multiple ways to estimate the IBUs in a finished beer, the Tinseth and Rager formulas are the most widely used.  The Rager formula, which was introduced in Zymurgy magazine in 1990, does give a 5% utilization yield to hops added post-boil.  The Tinseth formula on the other hand, gives no IBU contribution for a post-boil hop addition.2

After trying to brew a beer where I only added whirlpool hops and getting an ample amount of bitterness from that addition, I began to ask the question, “just how much utilization is obtained from post-boil additions, and how does the amount of time at certain temperatures affect that?”  There are many real world examples of IPAs that use a whirlpool addition to obtain most of their bitterness.  Adam Mills, the head brewer at Crankers Brewery in Big Rapids, MI detailed in a presentation at the 2014 National Homebrewers Conference how he obtains essentially all of the 65 IBUs in their Professor IPA from whirlpool additions3, and beers such as Stone’s Enjoy By Double IPAs are documented as relying significantly on a whirlpool addition for bitterness

Experiment Overview

Based on the questions posed above, the conducted experiment aimed to measure the effect of different post-boil hopping techniques and their effect on calculated and perceived bitterness, as well as hop aroma and flavor.

The experiment began with a series of 10 different batches with the same wort being made in roughly 1 gallon quantities, using carefully measured and consistent ingredients, each utilizing a different post-boil hopping technique, with variances on time and temperature being the only intended independent  variables.  The finished beers were fermented in the same size containers, using the same yeast, and in the same location.  After fermentation was complete and the beers were bottled, they were sent to the Bell’s Brewery analytical lab, where they were tested for measured IBUs.  In addition, the beers were served to a tasting panel made up of a group of “super tasters” from Bell’s Brewery, and included a collection of BJCP judges, certified Cicerones, and others with significant levels of sensory training and tasting experience.  These tasters took a sample of the beers which were made, and rated them on the basis of hop bitterness, aroma and flavor.

As mentioned, the ingredients were chosen primarily to ensure the beers were as consistent as possible, not necessarily because they would make the best beer for drinking.  The base chosen included the following ingredients:

  • Water – Distilled Water was used as a base with both 0.3g of gypsum and calcium chloride added to give the beer an appropriate level of calcium content. Exactly 1 gallon of water was used for each batch.
  • Malt – With consistency in mind, a wort with 95% Briess Pilsen DME, and 5% dextrose sugar was decided upon. The use of malt extract allowed for the ability to ensure each batch had the same wort composition, and made the project feasible from a time standpoint.  The starting OG of each wort was 1.057 (14 Plato).
  • Hops – Exactly 1 ounce of hop pellets (measured with a precision gram scale) were added to each batch in a single addition. The desire was to use a high-alpha dual-purpose hop was that would provide an ample amount of bitterness, but also lend a profile one would expect from a hoppy Pale Ale or IPA.  In this experiment, the choice was to use El Dorado hops packed in 1 ounce bags from BSG.  The hops had a listed Alpha Acid content of 14.9%.
  • Yeast –Safale US-05 dry yeast was used for fermentation. While there is a great deal of evidence that rehydration of dry yeast is best practice, exactly 3 grams of yeast was pitched directly into each fermenter to ensure each beer got the same amount of yeast.

As noted, the goal of consistency was not just limited to ingredients, but the process was intended to ensure this as well.  The process of brewing and fermenting the beers was as follows:

  • Boil – The DME was boiled for 15 minutes, on a stovetop. To ensure an even boil off rate, the exact same heat intensity from the burner was used in each beer.
  • Hop additions – Hops were added during different intervals based on which batch was being brewed. Hop pellets were added loose into the wort.  As noted earlier, 1oz of hops were added to a batch that was approximately 1 gallon in size.  Scaled up, this translates to an addition of approximately 1.9–2.0lbs/bbl.
  • Hop Stand – This was one of the variables that changed in each batch. Further discussion will follow on how the hop stand for each batch was treated.
  • Chilling – Chilling was conducted using a 20’ piece of ¼” ID copper coil fabricated into an immersion chiller. Groundwater from a kitchen faucet, with a temperature of 64° F, was used for chilling.
  • Wort Transfer – The wort was transferred into the 1 gallon glass fermenters by dumping the wort in using a funnel. Since each batch was left to settle out for roughly 30 minutes following cooling, the majority of the trub was left in the kettle.  This left total yield of roughly 0.8 gallons for each batch.
  • Yeast Pitching – As noted, 3 grams of yeast was pitched dry into each fermenter. The amount being pitch was weighed by setting the packet of yeast on a gram scale (after thorough sanitizing using Star-San), and slowly added in steps until 3 grams were pitched.
  • Aeration – The wort in each fermenter was aerated by vigorous shaking for 1 minute.
  • Fermentation – Each batch was fermented concurrently in a basement, in Michigan, during August 2015. Due to a heat wave late in the month that saw outside temperatures reach over 90° F, the fermentation area was warmer than normal, and actual wort temperatures during the bulk of fermentation (as measured by a temperature controller, with the probe taped to the side of one of the glass carboys under insulation) was conducted between 69°–72.5° F, which is on the warmer end of the recommended temperature range for the strain.
  • Bottling – Following a 3 week fermentation, the batches were racked into a bottling bucket using a mini-auto siphon. 17 grams of dextrose was added, mixed in with the beer, and bottled for natural carbonation.  The bottles were conditioned at room temperature, around 68°–72° F.

Because of the small batch nature of the experiment, equipment had to be customized to fit the process and ingredients being used.  Primary pieces of equipment used were:

  • Boil Kettle – A pair of 6 quart stainless steel kettles were used for brewing the 10 small batches.
  • Burner – A natural gas stovetop burner was used for boiling the wort.
  • Hop stand heat source – A small stove top burner (smaller than used to boil) on its lowest setting was used to hold temperature during the hop stand portion of the batches in the experiment in Set 1, as detailed below.
  • Range Supermechanical thermometer – The Range Supermechanical Thermometer, a smart thermometer that connects with iOS devices and includes the ability to export temperature data, was a key piece of this experiment, and allowed the temperatures in the kettle to be measured while the wort was in contact with the hops. Following each of the 10 batches, the data recorded was exported for further analysis.
  • Funnel – Used to aid in the wort transfer.
  • Fermenter – Fermentation was conducted in a 1 gallon glass carboy with a plastic screw-on lid with a hole designed for an airlock.
  • Bottling – Standard 12oz bottles were used for the finished beer, bottled using a standard 6 gallon bottling bucket.

Specific Analytical Measurements

The primary information measured in the experiment were the variables of temperature and bitterness, measured in International Bittering Units (IBUs).  Along with IBUs, other data was used to calculate an estimated utilization for each batch.  The method for measuring each of these variables is as follows:

  • Temperature – The temperature was measured using a Range Supermechanical smart thermometer, which works with any iOS device. The thermometer is capable of measuring to a tenth of a degree Fahrenheit, and can log temperature data up to one reading per second.  This data, which was recorded for each batch, was used to determine average actual temperature of each hop stand.
  • International Bittering Units (IBUs) – The IBU measurements were made with the assistance of the lab at Bell’s Brewery in Comstock, MI. Bell’s used the ASBC Beer-23A method of measuring IBUs, which is a test where the beer is chilled and centrifuged, then dosed with isooctane, a compound which absorbs bittering compounds, including, but not limited to, isohumulones, hulupones and humulinones.  This solution is then tested for the amount of light that is absorbed at 275nm, with the amount of absorption determining the level of bitterness in the sample.4
  • Utilization – The utilization estimate was calculated using the equation below, as published in Zymurgy’s special edition, “The Classic Guide to Hops.”2 Since the IBUs were known via testing, the utilization percentage was calculated using the other known variables.

equation-REF Project

The other variables used to solve the equation included:

  • Woz = 1
  • A% = 14.9%
  • Vgal = 1.0

The results of these measurements are included in the below charts summarizing the collected data.

Sensory Approach

For the sensory portion of the experiment, a panel of eight tasters from Bell’s Brewery tasted beers in two sets, which included two beers from Set 1, and three beers from Set 2.  For each set, the tasters were asked to rate which beer had the most and least aroma, flavor and bitterness.  The results are discussed in further detail below.

Comparison of Batches

The experiment was conducted with batches split into two sets.  The goal of the first set was to test the effect of temperature on bitterness, with the goal of the second set being to test the effect of contact time on bitterness.

Set 1 – Effect of temperature on bitterness of post-boil hop additions

In Set 1, which included four batches, the effect of the temperature of the wort was tested to determine what, if any, effect it had on the bitterness imparted in the beer.  For this set, a 30 minute hop stand was conducted at temperatures ranging from 180°–210° F.  After 30 minutes the batches were immediately cooled using an immersion chiller.  The temperatures were maintained by using direct heat to the kettle, in the form of a small burner on a gas stovetop, using the lowest setting.  The temperature was monitored manually based on the reading from the Range Thermometer, which was submerged in the center of the kettle.  When the temperature dropped a degree below the target temperature, heat was applied until it reached the target temperature.  The results of the lab analysis completed on each of these batches is listed below.

Batch Description Avg. Temp. during hop stand Lab Tested IBUs Estimated Utilization (%)
#1 30 Minute Hop stand held @ 210° F 210.0° F 48.6 4.36
#2 30 Minute Hop stand held @ 200° F 199.6° F 57.2 5.13
#3 30 Minute Hop stand held @ 190° F 189.7° F 50.7 4.54
#4 30 Minute Hop stand held @ 180° F 179.9° F 44.2 3.96

The most notable observation from the temperature data is the fact that it doesn’t follow a downward trajectory in a linear or exponential fashion.  Based on what we know about the isomerization of alpha acids, heat does play a factor, and isomerization does increase with temperature.  The anticipated result was that the IBUs in the finished beer would decrease as the temperature decreased, however, to what extent they would decrease was unknown.

What the results suggest, in which the IBUs actually increased in the 200° F and 190° F batches compared to the 210F batch, is that a variable in the equation created inconsistent results that do render this set of data somewhat inconclusive.  While it’s impossible to pinpoint the exact reason for the variances, the one variable that certainly was different batch to batch was the level of heat applied to the kettle to maintain temperature.  Because the wort was not moving except for a short manual whirlpool after the hops were added, and potentially because of the small batch size, it is possible that the temperature in the kettle may have varied from the center, where the temperature probe was measuring, to the sides of the pot, and especially near the bottom, where the kettle may have been materially hotter due to the direct heat being applied.  This merits a reevaluation of technique, which is discussed in greater detail in the conclusion.

Set 1 – Sensory Results

For Set 1, the two beers which had the highest temperature and lowest temperature hop stand were chosen for evaluation.  Despite the 30° F difference in temperature, the sensory evaluation was highly inconclusive.  This could be partly due to the fact that the bitterness levels were so similar, and doesn’t answer the question whether aroma and flavor compounds are retained more effectively at higher temperatures.

Batch Most Aroma Least Aroma   Most Flavor Least Flavor   Most Bitterness Least Bitterness
The numbers above represent how the eight tasters voted on specific elements of the beers that were ranked.
#1 4 4 4 4 5 3
#4 4 4 4 4 3 5

Set 2 – Effect of time on bitterness of post-boil hop additions

In Set 2, the focus shifted from testing the temperature of a hop stand, to testing how the amount of time would affect the level of bitterness imparted into the beer.  For this set, 6 beers were brewed, with varying lengths conducted for the hop stand.  One of the beers got no hop stand, but instead had an addition that was boiled for 10 minutes, to form a baseline to compare against for the beers which had hops added post-boil.

For this set, no heat was applied to the kettle during the hop stand.  However, to limit the thermal loss of the small 6 quart kettle being used, the pot was placed into a larger, 5 gallon pot filled with near boiling water immediately following the boil, and allowed to rest untouched until the immersion chiller was used to cool (for batches 7 – 10).

Batch Description Avg. Temp. during hop stand Lab Tested IBUs Utilization (%)
*Although Batch #6 did not receive a hop stand, the hops were still in contact with hot wort for a short period of time.  The temperature of the wort exceeded 200° F for 38 seconds, exceeded 180° F for an additional 24 seconds (62 seconds total), and dropped to 160° F 30 seconds later (92 seconds total)
#5 Hops Boiled for 10 Minutes N/A 48.1 4.31
#6 Flameout addition, immediate chill N/A* 28.9 2.59
#7 Flameout addition, 10 min. hop stand 205.5° F 39.9 3.58
#8 Flameout addition, 20 min. hop stand 204.6° F 44.1 3.95
#9 Flameout addition, 30 min. hop stand 201.7° F 50.0 4.48
#10 Flameout addition, 60 min. hop stand 193.7° F 56.4 5.05

Unlike Set 1, Set 2 did display a pattern that seems in line with the direction that would be expected for IBU levels between the different batches.  The 10 minute boil still produced a significant amount of IBUs, and while the 10 and 20 minute hop stands were lower in measured bitterness, the IBU contribution was still significant.  By 30 minutes, IBUs had increased over the 10 minute boil batch, and in the batch which received a 60 minute hop stand, IBUs rose even higher.

As the hop stands got longer, it does appear that there were diminishing returns on bitterness extraction, especially past the 10 minute mark.  With an increase of 4 IBUs from the 10 to 20 minute batch, 6 more from 20 to 30 and another 6 from 30 to 60 minutes, some combination of reduced temperature and the availability of alpha acids that were still available to be isomerized may have been factors that created a leveling off in the amount of bittering that could be generated over time.  This is reminiscent of the same effect when hops are boiled for longer periods of time, such as comparing IBUs in a 60 minute boil versus a 90 minute boil.

One interesting takeaway was the level of IBUs that were generated in Batch #6, which had hops added but then was chilled immediately with the immersion chiller.  While there was no hop stand on this batch, the hops were still in contact with hot wort for a short period of time, though the temperature was below 160° F within 92 second of the hops being added.  Despite this short contact time with hot wort, 29 IBUs were still created, which suggests that maybe isomerization of the alpha acids occurs very quickly.  The other possibility is that compounds other than iso-alpha acids are creating bitterness.  This possibility is discussed further in the conclusion.  In either scenario, more investigation would be needed to come to any conclusions.

With some assumptions, a theoretical utilization curve can be created using the data from Set 2 (See Figure 1).  It is important to note however this curve does make some assumptions about each hop stand batch and that the temperature was constant over time for each.  While not perfect, the average temperature data shown in the Addendum to this report does show consistency over 10 minute intervals within no more than 1-2 degrees difference in average temperature over similar time periods.  It is also important to understand this chart is a visual representation of the data collected in the experiment, and should not be relied upon as a predictable indicator of hop utilization for post-boil additions.  When the data is visualized, it does imply that bitterness is imparted very quickly, and levels off quickly as well, but still increases all the way to the 60 minute mark.  This is an interesting observation, however more testing would be needed to validate and explore the speed of isomerization, or the extraction of other bittering compounds, in regards to very short versus long hop stand rests.  An additional question this raises is if a brewer wants to obtain some bitterness at flameout, is it possible to get the quick hit of bitterness as seen in Batch #6, then very quickly chill to retain the volatile essential oils from the hops?  There are certainly multiple schools of thought on this.  For instance, award-winning homebrewer turned award-winning craft brewer Jamil Zainasheff writes on his webpage Mrmalty.com that “Sitting at near boiling will continue to isomerize the hop acids and drive off the volatile oils that good hop aroma and flavor depend upon.” 5 If significant amounts of bittering are generated very quickly, would this technique be favored?  Again, more research would be needed to draw any conclusions.

hop-chart

Figure 1 – Utilization % by time of hop stand (in minutes)

Set 2 – Sensory Results

For Set 2, three beers were chosen for evaluation.  With a larger sample, there were a few more differences noted.  Batch 7, which saw a 10 minute hop stand, was ranked as having the most aroma, most flavor, and least bitterness.  This aligns with the IBU testing conducted, but does it tell us that more aroma and flavor compound are retained by doing a shorter rest? It’s certainly possible, but outside the scope of this experiment.

Batch 5, which was boiled for 10 minutes with no hop stand, was ranked as having the least aroma, least flavor, and most bitterness.  Batch 9 was ranked a close second in bitterness, and had measured IBUs nearly the same as Batch 5, but did rank better in terms of aroma and flavor.

Batch Most Aroma Least Aroma   Most Flavor Least Flavor   Most Bitterness Least Bitterness
The numbers above represent how the eight tasters voted on specific elements of the beers that were ranked.
#5 1 4 2 5 4 3
#7 5 2 4 3 1 4
#9 2 2 2 0 3 1

Conclusion

The results of the experiment ranged from some level of inconclusiveness, to validating and providing perspective on some of what we already knew about the effect on bitterness for post-boil hop additions.

Evaluation of Results

The validating piece of the experiment was that post-boil hop additions do indeed generate significant amounts of bitterness, especially when compared to an aroma addition that is boiled for a short period of time.  The level of bittering does seem to accelerate quickly after the hops are added, leveling off over time despite still creating additional bitterness.  However, the experiment raised many questions that would require further research to answer.

  • Longer hop stands certainly lead to more bittering, but does aroma suffer because of it? The sensory results seem to imply that could be the case, but more intensive testing would be needed to validate that thought.
  • Recent research conducted in the Fermentation Science program at Oregon State University has found that bitterness can be caused by more than just iso-alpha acids. Specifically, bitterness can be caused by the existence of hulupones and humulinones in hops being extracted into the wort.6  Are these compounds a significant contributor to bitterness and IBU measurement when hops are added post-boil?  Could it be possible to extract bitterness from hops by adding them below the alpha acid isomerization range?  Furthermore, would doing so have benefits in retention of aroma and flavor compounds?

Evaluation of Methods

The methods chosen for the experiment were designed to allow for as many batches as possible, while aiming for consistency over them.  For the most part, I believe this was achieved, and the consistency of ingredients and methods from batch to batch was sound.  However, the direct heating of the kettle in Set 1 did seem to cause a variance in results, and did yield the data inconclusive.  Any future testing would be better suited with a different method for maintaining the temperature of the wort.

While the small batch method did allow many batches to be completed in a timely and cost effective manner, further testing would likely be better suited with a lesser number of batches brewed to larger volumes.  Because of the very small volume of each batch, any difference in variables was magnified, as was on display in the method of heating used in Set 1.  Even an increase in batch size to 3 – 5 gallons would certainly help create consistency in results.  By limiting the number of batches tested to five or less, and limiting the volume of each batch to 3–5 gallons, the beers could utilize a base, all-grain mashed wort that could be customized for the experiment.

Lastly, one area that did not receive primary focus was yeast and fermentation.  A simple method of pitching dry yeast directly into the fermenter and conducting fermentation at the ambient temperature of the room was used.  However, this resulted in a warmer than ideal fermentation temperature, and some yeast off-flavors were noted by a few members of the sensory panel.  Ideally, reducing the number of batches, and increasing their size slightly, would allow for a more controlled fermentation environment, including the use of a high viability liquid yeast culture with pitching rates designed specifically for the experiment.

Future Work

As noted, the experiment certainly provided some very useful data on the effect of post-boil hop additions on the bitterness of a beer.  However, there were certainly some interesting results that yielded some additional questions.  In part because of what was learned from the methods used in the experiment, and in part because of the data collected, a follow up experiment on the effect of bittering over a wider temperature range would likely yield useful data, and help answer some of the questions raised in this experiment.  To successfully complete such a follow up experiment, the equipment would likely need to be capable of keeping a highly consistent temperature over a period of 15–30 minutes, and ensure that the temperature was consistent throughout the kettle.  An electric brewing system consisting of an electric element for heating, a PID or temperature controller to maintain a consistent wort temperature, a pump for recirculation, and a whirlpool outlet to ensure the wort remained moving, allowing for even temperature distribution, would likely work well for such an experiment.  The goal of the follow up work would be to answer the questions posed earlier; what is the effect of a post-boil/whirlpool hop addition on the bitterness of the beer, even below alpha acid isomerization temperatures, and how does this affect hop aroma and flavor?

Acknowledgements

Many people volunteered their time and efforts in helping me complete this project and report.  Foremost, David Curtis of Bell’s Brewery played a pivotal role in procuring the resources within Bell’s to help with IBU testing, and in organizing a sensory panel.  David’s excellent presentation at the 2014 National Homebrewers Conference entitled “Putting Some Numbers on First Wort and Mash Hop additions” was in part what inspired me to propose this experiment to the AHA.  For his efforts in this project, I’m sincerely grateful.

I’d also like to thank Luke Chadwick and the rest of the team at the Bell’s Brewery lab for performing the IBU testing, and answering any follow up questions I had.  To the members of the sensory panel from Bell’s who participated in the experiment, many thanks for offering up your time and enthusiasm for that portion of the project.

Stan Hieronymus was also very gracious with his time and willingness to provide advice and resources all the way from when I was writing the proposal for this project through the completion of this report.  Stan is one of the most knowledgeable and genuinely nice people in the brewing world today, and I can’t thank him enough for the help he provided.

Last but not least, I’d like to thank Jeff Rankert of the Ann Arbor Brewers Guild, Ryan Hamilton of Pilot Malt House, and Phil Pierce of the Brewsquitos Homebrew Club for reading the initial version of this report and providing invaluable feedback.  All are great technical brewing minds, and Phil in particular has repeatedly helped me refine beer writing I’ve done in the past.

Works Cited

  1. Steele, Mitch. “Hop Bursting: Maximizing Hop Flavor and Aroma.” Zymurgy Magazine, November/December 2013: pages 20 – 26.
  2. Hall, Michael L., Ph.D. “What’s Your IBU?” Zymurgy Magazine, Special Edition, The Classic Guide to Hops, 1997: pages 54 – 67.
  3. Mills, Adam. “From Five Gallons to Fifteen Barrels” [PDF document]. Retrieved from American Homebrewers Association Web site: http://www.homebrewersassociation.org/how-to-brew/resources/conference-seminars/
  4. ASBC Methods of Analysis, Beer-23, Beer Bitterness. Retrieved from http://methods.asbcnet.org/summaries/beer-23.aspx
  5. J Zainasheff. “Whirlpool/Immersion Chiller”. Retrieved from http://www.mrmalty.com/chiller.php
  6. Algazzali, Victor A. (2015). The bitterness intensity of oxidized hop acids : humulinones and hulupones (Master’s Thesis). Retrieved from: http://www.worldcat.org/title/bitterness-intensity-of-oxidized-hop-acids-humulinones-and-hulupones/oclc/893912673

* * *

Nick Rodammer, member of the Brewsquitos Homebrewing Club, is a homebrewer and AHA member from Michigan.

The post The Effect of Post-Boil/Whirlpool Hop Additions on Bitterness in Beer appeared first on American Homebrewers Association.

Posted on

Access Your Digital AHA Member Card with Brew Guru App

Don’t be like George Costanza! Give your wallet a break and access your American Homebrewers Association (AHA) membership card from your phone.

That’s right, Android and iOS smartphone users have instant access to their member card with the Brew Guru app. Now you’ll never miss out on an AHA Member Deal because you forgot your card.

Here’s how to access your digital membership card:

  1. Download the Brew Guru app from the Google Play or Apple App stores. (note: the app is currently only available to residents of the USA. International accessibility will be available soon)
  2. Login with your HomebrewersAssociation.org username and password, or start a Free Trial if you are new to the AHA.
  3. After logging in, click the menu icon at the bottom left of the dashboard (figure 1).
  4. Select the profile icon at on the bottom right of the menu (figure 2).
  5. Scroll down and click the VIEW MEMBERSHIP CARD button (figure 3). Click on the magnifying class for a full-screen membership card.

brew_guru_digital_card_1

Figure 1: Access the menu by clicking the ‘Menu Icon’ on the bottom left of your dashboard. Figure 2: From the dashboard, access your profile information by clicking the ‘Profile Icon’ on the bottom right of your screen.

brew_guru_digital_card_2

Figure 3: From your profile, click ‘VIEW MEMBERSHIP CARD’. Figure 4: Show your digital membership card to redeem AHA Member Deals!

The post Access Your Digital AHA Member Card with Brew Guru App appeared first on American Homebrewers Association.

Posted on

The Impact of Flaked Oats on New England IPA

This homebrew experiment was originally published on Brulosophy.com.

* * *

Flaked oats are an unmalted grain that have had their starches gelatinized by pressure and heat during the flaking process, meaning they can be used without a cereal mash, which can’t be said for non-flaked grains like steel cut oats. The creaminess flaked oats purportedly imparts in a beer stems from the high beta glucan content, a gum produced during the malting process by the breakdown of hemicellulosic cell walls. Traditionally, brewers using grists consisting of high amounts of such adjuncts would employ a beta glucan mash rest at 104°F/40°C, during which beta glucanese enzymes work to dissolve the beta glucans thereby making for an easier lauter.

Up until a couple years ago, if I’d been asked what styles of beer benefit from flaked oats, my response would have been limited to Stouts and Porters, in which oats might make up 10% of the girst. That’s certainly not the case these days, as utilizing relatively high amounts of flaked oats has become a popular way to add a soft, elegant mouthfeel to New England style Pale Ales and IPAs, an inclusion also said to contribute to this style’s notably hazy appearance and sought after “juicy” character.

As a lover of clear beer, I’d avoided brewing one of these NE-style abominations due my belief their haze was a function of yeast in suspension or otherwise shoddy brewing process. However, a couple experiences during Homebrew Con 2016 forced me to question these opinions, the first one being our collaborative xBmt with Ed Coffey from Ales Of The Riverwards. His HopWards Pale Ale was delicious, and the fact the gelatin fined sample retained a similar level of haze as the non-fined sample seemed to indicate yeast wasn’t the culprit. And then, during club night, a reader of Brülosophy was kind enough to share many popular commercial examples of NEIPA, none of which had what I typically expect from a beer with yeast in suspension. My focus then shifted to the other novel aspects of the style, such as the heavy use of flaked oats. Is it really a necessary component, or does the character it is presumed to impart come from something else?

Purpose

To evaluate the differences between a NE-Style IPA made with flaked oats and the same beer made without flaked oats but an otherwise similar recipe.

Methods

Since this was my first time brewing this style and I wanted to avoid as much bullsh*t criticism as possible, I relied on Ed’s HopWards recipe as the main inspiration for my recipe, making some changes in the hops based on what I had available at the time. BeerSmith calculations showed that swapping 18% of the Maris Otter grist with flaked oats had no impact on OG, which meant each batch would be of similar weight despite differing constitution.

Hazy Daze NE-Style IPA Recipe

Recipe Details

Batch Size Boil Time IBU SRM Est. OG Est. FG ABV
5.5 gal 60 min 60.1 IBUs 4.2 SRM 1.057 1.013 5.8 %

Fermentables

Name Amount %
Pale Malt, Maris Otter 10.125 lbs 81.82
Oats, Flaked 2.25 lbs 18.18

Hops

Name Amount Time Use Form Alpha %
Columbus/Tomahawk/Zeus (CTZ) 11 g 60 min Boil Pellet 13.1
Centennial 30 g 15 min Boil Pellet 9.9
Centennial 30 g 5 min Boil Pellet 9.9
Citra 30 g 5 min Boil Pellet 13.4
Galaxy 30 g 5 min Boil Pellet 15
Citra 60 g 3 days Dry Hop Pellet 13.4
Centennial 30 g 3 days Dry Hop Pellet 9.9
Galaxy 30 g 3 days Dry Hop Pellet 15

Yeast

Name Lab Attenuation Temperature
London Ale III (1318) Wyeast Labs 73% 64°F – 74°F

Notes

Water Profile: Ca 135 | Mg 1 | Na 10 | SO4 71 | Cl 186

In keeping with popular approaches to brewing this style, I chose to use a yeast strain that many have come to identify as quintessential, Wyeast 1318 London Ale III, and built a single large starter using 2 packs the morning prior to brewing.

Later that day, after the sun had set, my assistant accompanied me to the garage to help prepare for the following morning’s brew day, starting with measuring out and milling the slightly different amounts of Maris Otter.

brulosophy-new-england-ipa

I then weighed out the flaked oats and tossed them on top of the milled grain.

Left: Oats. Right: NOats

Left: Oats. Right: NOats

Since these would both be 5 gallon batches, I opted to use the no sparge method and collected the full volume of brewing liquor for each into separate kettles. The chemistry of the water used to make “proper” examples of NEIPA is often said to be far richer in chloride than sulfate, and so using Bru’n Water, I adjusted each batch to a sulfate to chloride ratio of about 0.38 (71:186). Around noon the next day, I began heating the strike water for the oats batch first then, 20 minutes later, doing the same for the batch with no oats, lamely referred to as “NOats” henceforth.

When the temperature of the water was slightly higher than suggested, it was transferred to a mash tun and allowed to preheat for a few minutes before I incorporated the grains, both batches ultimately settling at my target mash temperature.

Both batches were mashed for 60 minutes and stirred briefly every 20 minutes throughout. I took the time to measure out hop additions as the mashes rested.

06_oatsVSnoats_oatsMASHnoats

Once the mashes were complete, I performed a vorlauf then began collecting the sweet wort, noticing what seemed to be a subtle and unsurprising difference in color.

08_oatsVSnoats_oatsRUNOFFnoats

Left: Oats | Right: NOats

Hops were added at the listed times during separate 60 minute boils.

Replacing hop stands with later kettle kettle additions meant the wort was chilled immediately at flameout, quickly dropping to about 72°F/22°C.

10_oatsVSnoats_chilling

A hydrometer measurement at this point revealed a slight difference in OG, with the Oats wort clocking in a little lower than the NOats wort.

11_oatsVSnoats_oatsOGnoats

Left: Oats 1.056 OG | Right: NOats 1.058 OG

Separate 6 gallon PET carboys were filled with equal amounts of wort from either batch then placed in a temperature regulated chamber to finish chilling. While waiting, I stole some yeast from the starter to reserve for future use then split the rest evenly between two smaller flasks in preparation to be pitched. It took about 4 hours for the carboys of wort to stabilize at my target fermentation temperature of 67°F/19°C, at which point the yeast was pitched. Both beers had developed healthy kräusens and were bubbling like mad 18 hours later.

12_oatsVSnoats_ferm1day

18 hours post-pitch

Yet another unique aspect of brewing NEIPA is adding dry hop additions during active fermentation, a step purported by some to be the cause of the so-called “juicy” hop character due to a process referred to as biotransformation. Because of this, I added the dry hop charges 2 days after pitching yeast, when it seemed the kräusen had peaked, about 4 days sooner than I would have for a West Coast IPA.

13_oatsVSnoats_biotransDHday2

Dry hop additions added 2 days post-pitch

As fermentation finished up over the following few days, I was met with a glorious aroma every time I opened the chamber, which while nice, left me wondering if any would remain in the finished beer. Activity was all but absent a week post-pitch so I took an initial hydrometer measurement that I compared to a second measurement 3 days later, the lack of change confirming fermentation was indeed complete.

14_oatsVSnoats_oatsFGnoats

Left: Oats 1.010 FG | Right: NOats 1.010 FG

I dropped the temperature on the chamber to 32°F/0°C and let the beers cold crash overnight, forgoing my standard gelatin fining in order to preserve whatever it is some fear is lost by fining. I returned the following evening to keg the cold beers.

15_oatsVSnoats_kegging

While I’d originally planned to add a charge hops in the keg as well and actually did suspend them in the kegged beer, I quickly learned the fishing line I used disallowed the o-ring on the keg to seal when pressure was applied. Dammit! After removing and tossing over 8 oz/227 g of sopping Galaxy, Citra, and Centennial, I burst carbonated the beers by applying 45 psi of CO2 to each keg. After 18 hours, I reduced the gas to 14 psi where it remained for 3 days until I began serving it to participants. Perfectly carbonated, nice white head with fantastic retention, and hazy as hell. Whatever I did right felt so wrong.

16_oatsVSnoats_oatsGLASSESnoats

Left: Pats | Right: NOats

Results

A total of 19 people of varying levels of experience participated in this xBmt. Each participant was served 1 sample of the Oats IPA and 2 samples of the NOats IPA then asked to identify the sample that was unique. Given the sample size, 11 tasters (p<0.05) would have had to correctly identify the Oats beer as being different in order to reach statistical significance. A total of 6 tasters (p=0.65) accurately identified the unique sample, indicating participants in this xBmt were unable to reliably distinguish a NE-style IPA made with 18% flaked oats in the grist from one made without any flaked oats but an otherwise similar recipe.

This xBmt was discussed live on The Brewing Network’s 11/21/2016 episode of The Session. Adding the data of the 4 blind co-hosts who evaluated the beers, only 1 of which correctly identified the Oats sample as being unique, brings the total number of participants to 23 with 12 (p<0.05) expected correct responses in order to reach statistical significance and 7  (p=0.69) actual correct responses. Ultimately, the performance of this set of participants roughly approximates the larger dataset’s inability to reliably distinguish between the Oats and NOats beers.

My Impressions: Despite all the sh*t I’ve talked on hazy IPA over the last few years, I was pretty excited to brew one for myself and especially curious about the impact of flaked oats. As far as my ability to distinguish between these beers goes, I could reliably tell them apart based on appearance alone, as the Oats batch had a lighter color that, to me, made it look more juice-like and less murky than the NOats beer. Other than that, I couldn’t do it. I didn’t necessarily expect them to taste and smell different, which they didn’t, but what really got me is how remarkably similar they were in terms of mouthfeel, both possessing what I could see being described as soft or even creamy with a luscious body that I always presumed came from flaked oats.

I feel I owe it to my hazy IPA loving friends to share that this was probably the best IPA I’ve ever made. Yeah, I know, it almost hurts to say it. I enjoyed it so much that I started drinking pints before data collection and worried I might not have enough if I didn’t practice some moderation. Citrus and tropical fruit stole the show with whispers of earthy dankness I believe came from the Galaxy. So, so good. At least for the first 10 days after kegging. At the time of writing this, the beers had been on tap for exactly 4 weeks and were certainly showing their age, though not to the point of being undrinkable.

Discussion

Hazy New England/Northeastern IPA has permeated the craft beer world and, ugly as it may be to some, is almost certainly here to stay. In addition to its unconventional appearance, NEIPA is lauded for its soft mouthfeel and creamy texture, which many believe to be a function of the high percentage of flaked oats in the grist. However, participants’ inability to reliably distinguish a version of NEIPA made with 18% flaked oats from one made without flaked oats sort of throws a wrench in this theory. I’ve used varying amounts of flaked oats numerous times in the past in styles ranging from American Amber to Imperial Stout and I’ve never had an issue with clarity. Since both beers in this xBmt were similarly hazy and neither dropped clearer than the other over time, I’m beginning to question whether flaked oats really does contribute to haze as much as I’ve been led to believe.

So, what is the cause of haze in NEIPA? And what about the creamy, “juicy” character so quintessential to this style? While yeast in suspension is certainly a possibility, I’m doubtful because, for one, I’ve tasted yeasty beers many times and don’t enjoy them, plus I’ve yet to have gastrointestinal issues after drinking multiple pints of my xBmt beers. Since all we’re left with is speculation at this point, I find myself leaning toward a couple other explanations. Water chemistry being as imporant as it is, it seems pretty obvious the proportionately high chloride levels used to produce NEIPA is responsible for some of the uniqueness, though it may not be a main cause of haze. What I’m most interested in exploring further, a topic that has received little focus up until recently, is the impact of biotransformation that occurs from the interaction of yeast with hops added during active fermentation.

One thing I’m convinced of is that flaked oats and perhaps other similar grains do have an impact on the appearance of the finished beer, just not necessarily the haziness. To me, the NOats IPA’s darker color gave it a murky appearance reminiscent of dirty dish water, while the version made with oats had more of an orange hue that I found much more appealing. It’s because of this that I will continue to use flaked oats in future batches of NEIPA.

As is often the case, these results have left me with more questions than answers, a good thing for the curious like me. In addition to its impact on NEIPA, I can’t help but wonder what effect flaked oats actually has on styles where it more traditionally makes up a portion of the grist. Could it be that our perception of Oatmeal Stout as possessing a silky mouthfeel and creamy texture is driven more by expectation than reality? I don’t know, but I look forward to trying to figure it out!

If you have experience brewing with flaked oats in NEIPA or any other style, we’d love to hear from you! Please feel free to share your thoughts in the comments section below.

The post The Impact of Flaked Oats on New England IPA appeared first on American Homebrewers Association.
Posted on

The Home Brew Chef’s Stout-Cured Corned Beef and Cabbage Recipe

This stout-cured corned beef and cabbage recipe comes from Sean Paxton (aka The Home Brew Chef) and originally appeared on his website HomeBrewChef.com.

The brine incorporates a few pints of your favorite stout beer, which is a great way to work some of your homebrew into a St. Patrick’s Day dish. If you don’t have any homebrewed stout on hand, get planning for next year (check out our selection of homebrew stout recipes) and use one of your favorite commercial beers instead. The Home Brew Chef shares some of his favorite stouts at the end of the recipe.

Visit Paxton’s website for more Irish menu ideas.

Servings Prep Time Cook Time Passive Time
1 large corned beef 20 minutes 2.5 hours 5–8 days

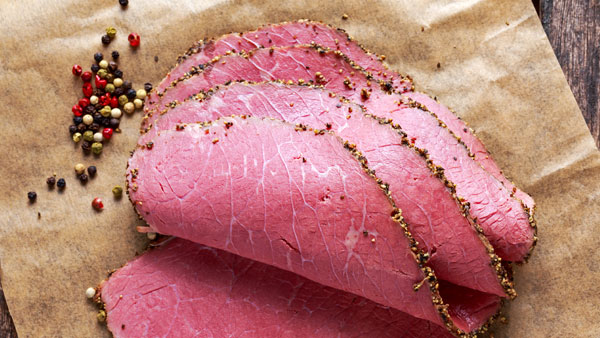
corned-beef

Ingredients

Stout Cure/Brine Ingredients

  • 1.5 quarts water, filtered
  • 2 pints stout beer
  • 2 cups salt, kosher
  • 1/4 cup sugar, organic
  • 1/4 cup sugar, light brown
  • 1 ounce pink salt (sodium nitrate) from Savory Spice Shop
  • 1 teaspoon black peppercorns, whole
  • 1 teaspoon coriander seeds, whole
  • 1 teaspoon cloves, whole
  • 1 teaspoon black or yellow mustard seed, whole
  • 1 teaspoon grains of paradise, whole
  • 1 teaspoon allspice berries, whole
  • 1 teaspoon green or black cardamom pods (optional)
  • 1 teaspoon star anise, whole (optional)
  • 1 teaspoon caraway seeds, whole (optional)
  • 1 teaspoon orange zest (optional)
  • 1 teaspoon red pepper flakes
  • 7 bay leaves (preferably fresh), bruised
  • 3 garlic cloves, peeled
  • 2 cinnamon sticks
  • 2 quarts (4 pounds) ice
  • beef brisket, whole, about 5 pounds

Cooking Ingredients:

  • 2 pints stout beer
  • water, enough to cover the meat by 2 inches
  • 1 teaspoon black peppercorns, whole
  • 1 teaspoon coriander seeds, whole
  • 1 teaspoon cloves, whole
  • 1 teaspoon black or yellow mustard seed
  • 1 teaspoon grains of paradise, whole
  • 2 green cabbage heads, quartered
  • 5 carrots, large, peeled and quartered
  • 6–8 red bliss or Yukon gold potatoes, washed and peeled
  • 1 yellow onion, peeled and sliced
  • 5 garlic cloves, peeled and sliced

Serving Sauces Ingredients:

  • 1 cup butter, clarified (optional)
  • Home Brew Chef’s Mustard Ale Sauce (recipe)
  • Home Brew Chef’s Horseradish Ale Sauce (recipe)

Instructions

Stout Cure/Brine Directions

  1. Rinse off the beef brisket to remove any of the juices and small pieces of fat.
  2. In a large stock pot or 12-quart Dutch oven, add the water, stout beer, salt, sugars, and pink salt (if using), and turn heat to medium.
  3. In a sauté pan over medium heat, add peppercorns, coriander, cloves, mustard seed, grains of paradise, allspice berries, and (if using) cardamom pods, star anise, and caraway seeds.
  4. Mix with a wooded spoon until the spices start to pop and release their essential oils (you should smell all the spices).
  5. Remove from the heat and add to the water/beer mixture. Add the orange zest, red pepper flakes, bay leaves, garlic cloves, and cinnamon sticks to the water/beer mixture. Alternatively, you can purchase store-bought pickling spices or create your own mix and use about 3 tablespoons. I like to create my own mix, which is what I just described.
  6. Bring the brine to a boil for about 5 minutes. This dissolves the salts and sugars while infusing all the flavors like a tea. Turn off the heat and add the ice to chill the mixture.
  7. Check the temperature of this mixture to make sure that it is below 38° F | 3° C, or chill in the refrigerator until that temperature is reached. Transfer the stout brine to a Cambro 8 qt. Polypropylene Food Storage Container or zip-top bag and add the brisket.
  8. If using a container, add a small plate to the top of the brisket to make sure the beef is completely submerged. Seal the container with its red lid.
  9. Place in the refrigerator or kegerator for 5–8 days to fully cure the brisket. A larger brisket will take longer to cure. The long the brisket cures in the stout brine, the more flavor it will pick up.
  10. Remove the brisket from the brine and rinse well to remove any of the whole spices. Notice how the color changes, not only from the dark stout, but also from the brine. The corned beef should feel firmer than when it was just raw meat.

Option 1: Slow Cooker Cooking Directions

  1. Remove the now-corned beef and place it in your slow cooker. Add the stout beer and enough water to just cover the corned beef.
  2. In a sauté pan over medium heat, add peppercorns, coriander, cloves, mustard seed, and grains of paradise. Stir the spices until they start to pop and become very aromatic (about 3 minutes). Add the toasted spices to the brisket and cover with a lid.
  3. Most slow cookers have two temperature settings. If you use the low setting, set the timer for 8–9 hours. The low temperature, which varies depending on the brand and manufacturer, can range from 190–200° F | 88–93° C. This is very similar to the temperature at which you would sous-vide cook a brisket. During the last 45 minutes of cooking, add the potatoes, carrots, onion, and garlic. In the last 20 minutes add the cabbage. For the high temperature setting, 290–315° F | 143–157° C, the corned beef will take around 3.5–4.5 hours to be tender and fully cooked. Add the potatoes, carrots, onion, garlic, and cabbage during the last 30 minutes of cooking.

Option 2: Sous Vide Cooking Directions

  1. In a sauté pan over medium heat, add peppercorns, coriander, cloves, mustard seed, and grains of paradise. Stir the spices until they start to pop and become very aromatic, about 3 minutes. Add the toasted spices to a bowl to cool.
  2. Place the corned beef into a large bag, or split the corned beef into pieces that will fit in the bags you have (even individual serving sizes). If you have a chamber-style vacuum sealer, add enough stout beer to barely cover the meat, then add the spices, dividing among the number of bags. Seal on high.
  3. If you have a Seal-a-Meal®, FoodSaver®, or similar style vacuum sealer, first freeze the stout beer in ice cube trays overnight. Then add the ice cubes with the cured meat and divided amount of spices and seal. This will keep the beer in the bag so that it is not sucked out and into the machine when sealing.
  4. Set the water bath temperature to 180° F | 82.2° C. Place the sealed corned beef into the water bath and set the time for 8 hours. I have experimented with other temperatures and cooking times in trying to achieve the most tender corned beef. I tried 136° F | 57.7° C and cooked for 72 hours (3 days). This yielded a pretty tender, medium-rare corned beef that didn’t fall apart. It sliced well, and was more tender the thinner the meat was sliced.
  5. For the vegetables: Vacuum seal the potatoes and carrots separately, adding a few tablespoons of butter and seasoning with a sprinkle of salt and pepper. Add the bags of potatoes and carrots after the meat has cooked for 7 hours. The potatoes and carrots will take about an hour to fully cook. For the cabbage, first sauté the sliced onions in butter over medium heat until they turn transparent, about 5 minutes. Add the sliced garlic and cook another minute. Then add the cabbage (slice for this version, removing the core), stir to coat the cabbage in butter, and sauté until the cabbage turns a bright green color, about 4–5 minutes. Season with salt and pepper, and it’s ready to serve.

Serving Directions:

  1. When ready to serve, remove the corned beef from the cooking pot and transfer it to a large cutting board. Slice the meat across (perpendicular to) the grain to make the corned beef more tender. If you cut the corned beef with the grain, it will be noticeably tougher. Place the sliced meat on a serving platter and add/arrange the strained vegetables. Use a few tablespoons of the cooking liquid to moisten the meat for presentation.
  2. To enhance this classic feast, serve with clarified butter infused with a clove or two of peeled garlic, Mustard Ale Sauce, and/or Horseradish Ale Sauce.

stout

Recipe Notes

Beer Suggestions: A stout seems so fitting for this feast. A few classic brews that work extremely well for this recipe are Samuel Smith’s Oatmeal Stout, Guinness Stout, Anderson Valley Brewing Co. Barney Flats Oatmeal Stout, or a homebrewed dry Irish-style stout. Make sure you have enough to serve with the meal as well.

Pink salt or sodium nitrate will help preserve and cure the meat. It is what keeps the brisket pink and prevents it from turning a muddy grayish color when boiled. Pink salt can be found at Savory Spice Shop. It is also used to make bacon, pancetta, hams, some sausage styles, and other cured products. If you have issues with nitrates, you can omit the pink salt from the recipe.

The post The Home Brew Chef’s Stout-Cured Corned Beef and Cabbage Recipe appeared first on American Homebrewers Association.

Posted on

5 Tips for Hosting a Big Brew Event

By Matt Bolling, AHA Events & Membership Coordinator

The growing number of Big Brew sites registered with the AHA every May demonstrates that National Homebrew Day truly is a special day for homebrewers in the US and abroad. With more than 480 registered Big Brew celebrations last year, it’s clear that no event is the same. Some sites report attendance in the hundreds for their Big Brew days, while many others simply consist of one homebrewer, one kettle, and one canine or feline brewer-companion.

No matter the size, all Big Brew events offer an opportunity to share the passion for homebrewing. So, we took the time to speak to a few Big Brew site organizers from around the country about what makes their events special. Here are five tips from these homebrewers on how you can make your Big Brew day truly remarkable.

1) Make your Big Brew day about more than just beer

The PumpHouse Homebrew Shop in Struthers, Ohio has been partnering with The Purple Cat Farm for several years. “The Purple Cat is an organization in our area that employs, houses, and helps adults with disabilities. So, when we host the event at the farm, we ask for a donation for those purchasing public tickets. The Purple Cat receives 100 percent of that money,” said Gregg Wormley, manager of The PumpHouse. “We also do other things that day to entertain attendees, like show the Kentucky Derby, host a brew club basket raffle, hold a homebrew competition, and organize a Big Brew breakfast. Many people also bring fishing poles, and we line up a few food trucks later that afternoon. We also allow overnight camping to the brew club members and have a campfire music jam if the weather cooperates.”

2) Know all of the resources that are available to you

Your biggest resource will be your club members or shop customers banging the drums so that everyone is aware,” said Chris Frey, who hosted an annual Big Brew event in Ann Arbor, Mich. in the early 2000s that drew more than 100 attendees annually. “But that can only get you so far. You need to be aware of the resources the AHA has available to you, and utilize all of them. Actively promoting your event on social media (download) and inviting the press to cover your Big Brew day will go a long way when trying to recruit new, loyal customers to your shop—or new members of your club.”

3) Use your local star power

Using the official Big Brew Editable Press Release will hopefully get your local news anchor to attend your Big Brew event, but why stop there? Bert Lightle of ZZ Hops Homebrew Club in Kansas City, Mo. contacted local culinary celebrity and James Beard Award-Winning Chef Celina Tio of JULIAN to attend their Big Brew event at Boulevard Brewing Co. in 2016. “Beer and food are tied so closely together; it was great to bring our two worlds together. There’s lots of good chefs all over the country who like beer and would be interested in partnering with your Big Brew event, guaranteed,” Bert told us. “Don’t be afraid to ask! I got in contact with Chef Tio through Twitter. She loved the event and is now a great friend of the club.”

If you aren’t fortunate enough to live in an area with an award-winning chef, there’s still plenty of people in your municipality that are worth contacting. Local city council members, congressional representatives, and other elected officials have been attendees at many Big Brew events all over the country in previous years.

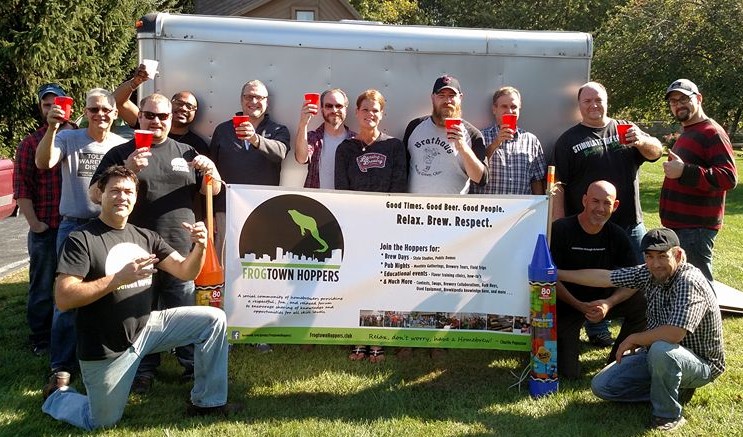
frogtown-hoppers

The Frogtown Hoppers of Toledo, Ohio celebrate Big Brew 2016.

4) Be visible

Though plans have changed for 2017, for several years Siciliano’s Market partnered with Coldbreak Brewing Equipment to host their Big Brew event in Calder Plaza, an iconic public park in downtown Grand Rapids, Mich. “It took a lot of research into pulling the correct city permits the first year, but that became easier every year we did it,” said Steve Siciliano, founder and owner. “We invited the mayor every year to offer the official toast, and then about 50 brew teams would mash in. We got a ton of exposure because the city really got behind the event and the media loved it. Since it was in a public park, we had to work closely with city officials to ensure that everything was safe and that our water treatment was up to code, but it was a great way to foster goodwill amongst our community and expose our hobby to new people.” Before planning a Big Brew event in a public arena, please be sure to check the legality of hosting such an event with your municipal and state regulatory agencies.

5) Think outside the box.

The official date of Big Brew this year is May 6, but that doesn’t mean your brewers all have to brew on that specific day to celebrate—or even be in the same place! The Frogtown Hoppers of Toledo, Ohio took their Big Brew event to new heights by hosting multiple Big Brew events on different weekends. Club founder Jerry Payton told us that they wanted to turn Big Brew day into Big Brew week. Though the Big Brew sites on both weekends were the capstone events, Jerry encouraged club members to brew throughout the week as well. To read more about The Frogtown Hoppers’ Big Brew day, check out their article Big Brew With Toledo’s Frogtown Hoppers.

To register your own Big Brew event, visit the Big Brew Event Registration page or find a Big Brew event in your area. For more tips on how to make your Big Brew event successful, check out my article, “Relax, Don’t Worry—It’s Learn to Homebrew Day,” which offers valuable suggestions you can adapt for Big Brew.

* * *

Matt Bolling is the Events & Membership Coodinator for the American Homebrewers Association.

The post 5 Tips for Hosting a Big Brew Event appeared first on American Homebrewers Association.

Posted on

5 Ways Homebrewing Will Make You a Better Beer Nerd

Do you consider yourself a craft beer nerd? Well, there is no better way to advance your understanding of all things beer than learning how to homebrew!

Here are five ways making beer at home will evolve you to a level 50 beer nerd.

1. Homebrewing gives you a better understanding of beer ingredients.

Every beer starts as a recipe with brewing ingredients in their most basic form. Homebrewing allows you to get hands-on with beer ingredients, which helps develop an understanding of how certain ingredients lend themselves to a beer recipe and are perceived in a finished beer.

As you try your hand at homebrewing different classic beer styles, you will develop the ability to pick out specific ingredients in your favorite commercial beers. Your beer nerd vocabulary will evolve from simply noting the characteristics in a beer to intelligently theorizing what ingredients created them.

Get started now by looking through some homebrew recipes of your favorite beer styles!


Homebrewing Craft Beer
2. Homebrewing teaches you the brewing processes.

It may seem all beers are made by completing the same exact process—with the ingredients making the profile difference—but variations in brewing processes and techniques can also effect the character of beer. Exploring and trying different brewing methods will make you well versed in various brewing procedures and how they can be perceived in finished beer. This will also help you to develop your beer vocabulary into something greater than just flavor descriptors.

Processes like “mashing” and “lagering” and terms like “wort” and “gravity” will become second nature when talking beer. For example, you could intelligently conjecture that the dryness of the saison you’re enjoying could either be from an addition of simple sugar or because the grains were mashed at a lower temperature making for highly fermentable wort.

Explore various homebrewing techniques in our Let’s Brew section and How To Brew posts.


3. Homebrewing increases your ability to diagnose 0ff-flavors.

Identifying off-flavors (unwanted flaws perceived in beer) is a skill many homebrewers and craft beer drinkers have mastered. However, homebrewers take it to the next level by developing the skills to not only identify flaws, but be able to figure out what caused the flaw and how to prevent it the next time the beer is brewed.

So next time you get a hint of green apple in a Belgian dubbel you can confidently say, “I am sensing aceteldehyde. This beer might be too young or was pulled off the yeast too early.”

Learn more about common off-flavors in beer.


Homebrewing Craft Beer
4. Homebrewing allows you to brew the unobtainable.

Craft beer nerds love their “white whale beers.” You know, the ones that are a thing of legend and increasingly difficult to obtain. 2014 Best Beers in America winner Pliny the Elder from Russian River is a great example. Even if Russian River distributes their double IPA in your area, it can be very difficult to get your hands on a bottle or enjoy a pour from your local taproom.

Homebrewers have the advantage of being able to brew what we call “clone recipes” of their favorite commercial beers. Sure, they don’t always come out exactly the same, but at least you can get an idea of what that elusive beer tastes like.

Check out our homebrew recipe library for some clone recipes!


 5. Homebrewing fosters respect for the craft of brewing.

It’s easy to take the thousands of craft beers available to you for granted, but it’s important to remember the blood, sweat and tears that goes into every ounce of your favorite commercial brew. Operating a brewery is more than a few pals slugging beers while standing around a boil kettle. This will become quickly apparent after brewing your first 5-gallon batch. It’s not rocket science by any means, but it takes considerable time, effort and know-how. Now magnify your small-scale homebrewing experiences to brewing a few barrels, like our craft beer brethren, and your appreciation for their skills and labor will sky rocket.

Next time you’re at your neighborhood brewery (find a brewery near you), let the brewers and staff know you appreciate the effort that goes into each pint. They’d love to hear it!

The post 5 Ways Homebrewing Will Make You a Better Beer Nerd appeared first on American Homebrewers Association.

Posted on

Big Brew With Toledo’s Frogtown Hoppers

The Frogtown Hoppers, a Toledo, Ohio–area homebrew club, conducted a multi-site AHA Big Brew Day for 2016 and a makeup day at a member’s residence the weekend after. Thirty-six brewers, seven of whom were first-time brewers, made 27 batches of beer totaling 168 gallons. Introducing newcomers to homebrewing is important to the Hoppers because one of their main focuses is education. Two coordinators secured and managed each of the two venues. Logistics such as water, shade, spent grains, and fire safety were important.

“It’s important to iron out who brings what,” said Dirk Karrenbauer, site coordinator. So, the club used an online Google signup sheet to secure ice-cold drinking water, spare equipment, sanitizer, canopies, and tables. “Face-to-face [coordination] with the site host to do a walk-through was key to success,” according to Chris McKenzie, site coordinator.

“There’s a lot that goes into this: site selection, traffic patterns, load/unload, hot chill water disposal, shelter,” he says. “Ideally, one or two people would co-brew, or not brew at all, to answer questions and talk through the process with interested visitors and bystanders. Whoever shows up will witness a variety of beers brewed on a wide range of equipment, so this makes a good opportunity to speak to the ability to tailor the hobby to any taste preference or depth of complexity that the new homebrewer wants to dive in.”

Big-Brew-Day

The Hoppers kicked off planning with a meeting in early March 2016, and press releases and posters were distributed. Social media outreach included five other local homebrew clubs. Richard Kenny, owner of one venue, Forest View Lanes, remarked, “I thought it was great! So many people there participating, and everyone was willing to help anyone that needed advice, tools, equipment, or anything. For someone that never brewed a beer, lots of knowledge in one place.” Richard is already on board with plans to host the club again in 2017.

The Hoppers partnered with local homebrew supply shop Titgemeier’s Feed & Garden Center to offer a discount on the club’s Big Brew recipe; a double IPA named “Hopper Mojo”. Titgemeier’s also ran a special 10% off on all homebrew equipment kits during the entire event, and flyers were on display at all sites. An event flyer was also created and posted at the venues and surrounding stores where craft beer is sold.

Because the Toledo area is so large and people’s schedules are very tight that time of year, the Hoppers realized early on that a multi-site event that also recognized solo batches brewed during the week of Big Brew could build a lot of involvement. The AHA was consulted on counting these batches in the 2016 Big Brew statistics, and agreed to include them.

This coming year, the Frogtown Hoppers plan to build on their success by incorporating a charitable aspect. Community outreach is valuable to us. We are looking for ways to help the people around us. We took what we learned last spring and turned it into a very successful month-long charity drive for Learn to Homebrew Day last fall. We try to use what we learn. It’s a great feeling giving back. We’re not so much goal-oriented, but huge turnout is a kick, and if we can couple that with doing something good for those around us, so much the better.

The post Big Brew With Toledo’s Frogtown Hoppers appeared first on American Homebrewers Association.

Posted on

How to Build a Wooden 6-Pack Holder

I’m William from Massachusetts. I’ve been a homebrewer for over two years and, I enjoy DIY projects.

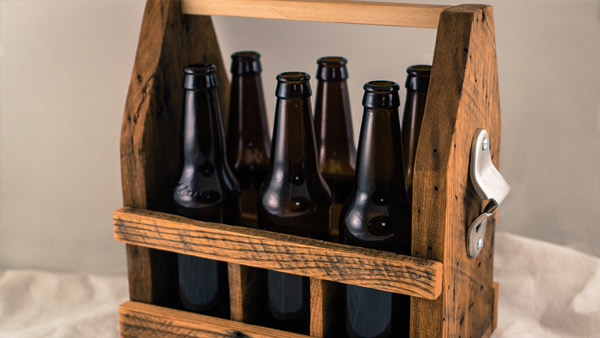
I’ve seen other people with wooden beer carriers, and I have a bunch of reclaimed wood lying around, so I figured I’d make my own. My wooden 6-pack carrier is 11″ × 7 ¼” × 11½” (length × width × height) and includes a removable divider.

Materials

Wood:

  • 2 end pieces: Wormy Chestnut cut to 11″ × 7 ¼”. Any wood will do, especially if it’s hardwood. If it’s softwood, I recommend using 1” thick.
  • 2 bottom pieces: Oak wood cut 11″ × 3 ½” with a ¼” gap. You can use one piece if you have wide enough wood. I recommend a hardwood of ½” thickness or softwood using 1″ thick.
  • 2 side pieces: Pine cut to 11″ long by whatever width you want. In my case, I used four pieces (two per side) so you could see the bottles through the sides. It can be any wood since this is for aesthetics.
  • 1 handle for the carrier: Pine cut to 9″ × 1″ inches thick. Any wood will work, including a dowel.
  • 3 pieces to make up the divider: ¼” oak wood—one piece cut to 9″ × 3 ½” and two pieces cut to 6″ × 3 ½” wide. You can use any wood here.

Other Materials & Tools:

  • Screws, nails, or both
  • Wood glue (TiteBond III)
  • Saw
  • Sandpaper (80-grit and 200-grit)
  • Wood stain (I highly recommend Danish Oil)
  • A wall-mounted bottle opener.

bottle-holder-pimp-my-system

Construction

Pre-cut all the wood before beginning the build, and sand each piece with 80-grit sandpaper and finish it with 200-grit. Once everything is sanded, thoroughly clean off all the dust and stain every piece. Sanding and staining everything after the pieces are assembled will be much more difficult.

Next, do a dry fit of the assembly to make sure all the pieces fit together. Use the materials list as a guide to determine where each piece goes.

Then, use clamps to hold everything together and pre-drill all the holes that are needed. Once the holes are pre-drilled, put a little wood glue on all the parts that are being connected and screw them together. I chose not to glue the divider in place so that it can be removed and replaced with a divider that works for four 22-ounce bottles. You can also remove the divider altogether and fit small growlers.

Last, mount the bottle opener to one of the sides.

* * *

William McEttrick is a homebrewer and AHA member from Norton, Mass.. You can follow McEttrick’s homebrewing adventures and DIY projects on his Twitter account @TotallyBrewedCo.

The post How to Build a Wooden 6-Pack Holder appeared first on American Homebrewers Association.

Posted on

4th Annual International FastRack Speed Challenge Championships!

by FastBrewing & WineMaking

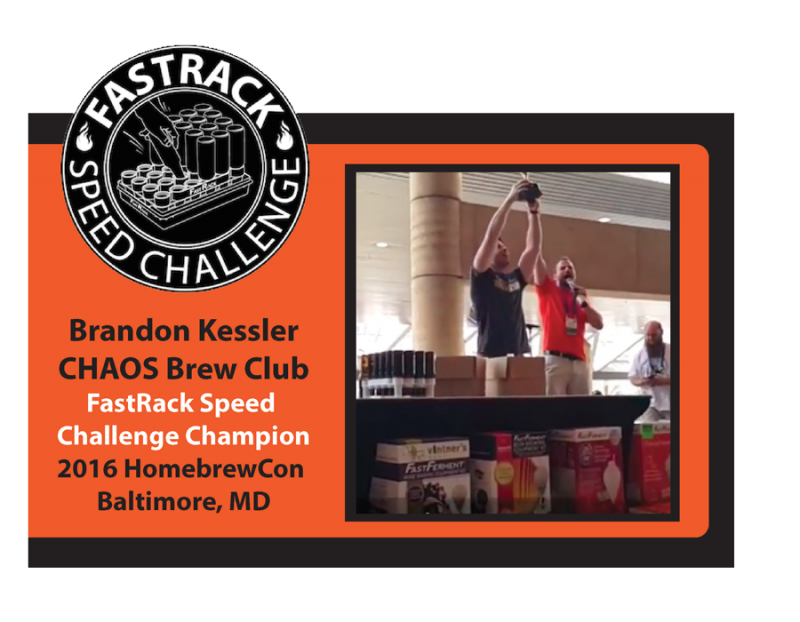
WHO WILL KNOCK Brandon off the podium this year? 3-2-1 FastRack!

Many fallen soldiers will be had as bottles be flyin’ at this years 4rd Annual International FastRack Speed Challenge Championships during Homebrew Con in Minneapolis, MN

What Can You Win?

Participants will be chosen at the HomebrewCon and we’ll be bringing back some winners from previous years. The fastest participants will win entry to FastRack Speed Challenge Championships taking place on Saturday at the HomebrewCon and a chance at a MASSIVE FastBrewing & WineMaking prize pack consisting of:

How Can you Get in on the Action?

Anyone can participate!

It’s the 4th year of the competition and homebrew enthusiasts are gearing up to find the World’s “Fastest Hands”! This challenge is open to any homebrew club, retail store or event that hosts a Speed Challenge. Following the event, you must submit the three fastest times to FastBrewing as entry into the international competition. This past year we expanded the chance at the World’s “Fastest Hands” overseas.

Speed Challenges bring an exciting element to your event with some friendly competition. Also, with the chance to win many valuable products and entry to Homebrew Con, you will undoubtedly draw a crowd.

The Champ

Brandon Kessler is the reigning champ for the 2nd year in a row and is looking for some challengers. He’ll be at the Homebrew Con and we hope you will too!

fastrack-brewing

The post 4th Annual International FastRack Speed Challenge Championships! appeared first on American Homebrewers Association.

Posted on

Queen of the Turtle Derby and Other Southern Phenomena

Queen of the Turtle Derby0An excerpt from Queen of the Turtle Derby and Other Southern Phenomena by Julia Reed

On Soggy Ground

In 1960, when I was born, Mississippi had then been dry for fifty-two years. This, to me, remains an astonishing fact, particularly since I didn’t learn it until 1972, six years after Prohibition had finally come to an end. 1 had always thought I was a pretty sophisticated kid—1 could have told you, for example, the names of Lyndon Johnson s dogs or of Richard Nixon’s entire cabinet. More to the point, I knew that a Gibson contained onions and a martini olives (or a twist) and that Johnny Mercer and Hoagy Carmichael had written “In the Cool, Cool, Cool of the Evening,” the song by which my mother invariably sang me to sleep. But, until a state law required me to take a Mississippi history course in the seventh grade, I did not know about another state law that was on the books until 1966: “No whiskey for any purpose whatsoever could be shipped into the State and no person could have, control, or possess any whiskey whatsoever.”

This seemed incredible. One of my earliest memories is of my father teaching me to make his martini, a service which I performed for years afterward and for which I was paid ten cents per drink. At five, my friend McGee began a larger enterprise when, frustrated by the slow sales at our neighborhood lemonade stand, she looked at her sister and me and asked, “Have you ever seen Mama or Daddy or any of their friends drink lemonade?” We had to agree that we had not. We had seen them drink old-fashioned and scotch sours, gin and tonics, Bloody Marys, and whole rafts full of cold beer in the summer, but we had never seen them drink much of anything else except for coffee and that was always early in the morning. McGee promptly pulled her wagon up to the vast refrigerator in her parents’ garage, unloaded the contents, and got rich selling cold Pabst Blue Ribbon for twenty cents a can to the many thirsty passersby on our country road.

No wonder I had never heard of the law, which itself was full of complications. The Mississippi state legislature, like those of several other Southern states, passed a statewide “bone dry law” in 1908, more than a decade before the federal government prohibited alcohol in the form of the Eighteenth Amendment to the Constitution on January 16, 1919. Mississippi was the first state in the union to ratify the amendment, an act which moved the governor to give a speech about the good results of the law that Mississippi had already enjoyed. “The civil, economic, and moral life of our people has been greatly benefited by this law,” he said, adding that “sentiment is growing in favor of prohibition. It is true that we have a number of people who are breaking the law, either making or using liquor, but this does not meet the approval of the highest class of our citizens. . . . Our people practically unanimously will vote to make the whole world dry.”

He was right about the voting part at least. After the passage of the Twenty-first Amendment, which repealed the Eighteenth Amendment and officially ended federal prohibition on December 5, 1933, every other Southern state abandoned statewide prohibition except Mississippi, prompting the humorist Will Rogers to comment that Mississippians will continue to “vote dry as long as they can stagger to the polls.” (To this day the legislature has not formally ratified the Twenty-first Amendment.) However, by 1944, the number of people willing to risk the disapproval of “the highest class of citizens” by “making or using liquor” had grown sufficiently that the state decided to tax the sale of alcohol even though it was still illegal. This new law did not ever actually mention the word “liquor.” Rather, it called for a 10 percent sales tax on “tangible personal property, the sale of which is prohibited by law”—a bit of obfuscation that added up to $4-25 per case of whiskey, gin, etc., and seventy-five cents per gallon of wine.

By 1950, Mississippi had more retail liquor dealers, otherwise known as bootleggers, than any of the twenty-two legally wet states at the time, and more than twice the number in the two adjacent states of Tennessee and Arkansas combined. Furthermore, because booze was cheaper and more plentiful in Mississippi, the residents of Alabama and Georgia (both legally wet) drove over to buy their whiskey from us. In this free-flowing environment, law enforcement officers were generally well paid to look the other way, keeping up only halfhearted appearances for the sake of those few zealots among us. In 1952, for example, when my father’s friend J.B. came to visit him from Memphis, he thoughtfully brought along a case of gin as a house present. After a long night of drinking at a popular local “tonk” owned by Mr. Paul E. “Mink” Maucelli, one of our more prominent bootleggers, J.B. got lost trying to follow’ my father home and was arrested—not for driving drunk, though he was, but because a cop mistook him for a robber in the neighborhood. J.B. was released but the gin was not, a breach of hospitality that caused considerable local outrage. When my father confronted the police chief about it at the station the next day, the chief, with some sadness, explained that he had no choice: “It wasn’t just a bottle or two, Clarke, it was a whole case. A case. Why’d he have to drive around with a whole case in his car?” (At the cotton brokerage office next door, interest centered on the brand of the confiscated gin. “What kind was it?” asked one of the local characters, licking his lips. “Gordon’s or Gilbey’s?”)

In 1965, state records show’ that more than 450,000 cases of whiskey and 150,000 cases of wine were taxed, figures that don’t take into account the locally produced moonshine that constituted about 50 percent of the liquor market all through Prohibition. (It should be noted that the entire population of Mississippi is only two million.) Clearly, the people had found a way to live with the dry laws. As The Wall Street Journal noted six months before Prohibition was repealed, “Mississippi has arrived at a convenient and profitable arrangement with its conscience. The drys have their law, the wets have their liquor and the state has its taxes. Everybody’s happy.” During the annual liquor-bill debate in the state legislature in 1952, Representative N. S. “Soggy” Sweat crystallized his colleagues’ courageous stand on the issue in his famous “Whiskey Speech”: “You ask me how 1 feel about liquor. Here’s where I stand on this burning question. If when you say whiskey you mean the devil’s brew, the poison scourge that defiles innocence, dethrones reason, destroys the home, creates misery and poverty, yea literally takes the bread from the mouths of little children; if you mean that evil concoction that topples the Christian man and woman from the pinnacles of gracious living down into the bottomless pit of degradation and despair, then certainly I am against it. But… if when you say whiskey you mean the oil of conversation, the philosophic wine, the ale that is consumed when good fellows get together, that puts a song in their hearts and laughter on their lips, and the warm glow of contentment in their eyes; if you mean Christmas cheer; if you mean the drink that enables a man to magnify his joy and his happiness, and to forget, if only for a little while, life’s great tragedies, and heartaches, and sorrows; if you mean that drink which pours into our treasuries untold millions of dollars, which are used to provide tender care for our little crippled children, our blind, our deaf, our dumb, our pitiful aged and infirm; to build highways and hospitals and schools, then certainly I am for it. This is my stand. I will not retreat from it. I will not compromise.”

For a region that lives and dies by its time-honored, if tawdry, traditions and is known for its colorful, if not controversial, characters, the South has some explaining to do for its excessive eccentricities. And there is no one more capable than Reed, a Mississippi native and part-time resident of New Orleans and New York whose foot in both Dixie and Yankee camps gives her a unique, biregional vantage point from which to observe her homeland. Taking on such sacrosanct southern staples as cuisine, couture, and crime, Reed blends the factual with the fanciful to examine the ways in which southerners differ from their neighbors to the north. Going beyond the biscuits-versus-bagels bread brouhaha, Reed explores southern standards of beauty and exposes southern double standards of justice. She recounts the South’s penchant for pageants and fondness for football, shares its secret recipes, and skewers its salacious stereotypes in a playful collection of essays that humorously and humbly celebrates the quirkiness that lies deep in the heart of Dixie. Carol Haggas – Booklist