by Amahl Turczyn
Making authentic sake might seem intimidating for those who have never tried it before, but the process is really no more complex than brewing all-grain beer. The hardest part is timing, planning, and doing everything in the proper order. If you are handy with scheduling, it should not be a problem; my preference is to write out the whole process on a calendar, detailing amounts, times, and temperatures during the entire five-week process.
Google Calendar is great for this purpose; you can add an entry for each step (e.g. Day 6: 6am—stir shubo mash; 6pm—prepare for hatsuzoe) with detailed instructions to follow within each entry. Each stage involves measuring and then chilling or freezing a portion of water; measuring and soaking a portion of koji; and finally, washing, soaking, steaming, chilling, and adding a portion of rice. At each stage, you add progressively larger additions of these three primary ingredients: water, koji, and steamed rice. We’ll look at process specifics later, but for now, let’s take a look at each ingredient in turn.
Ingredients
Water
Water for sake has a fairly specific profile, which is best built from a distilled or reverse-osmosis (RO) filtered base. Some of the key nutrients for the yeast include those found in ordinary wine yeast nutrient, but others are a little more difficult to track down. Magnesium sulfate is one of these; it’s rarely used in brewing beer, but it’s very important in sake. Fortunately it’s easy to find, and is better known as Epsom salt. Only a pinch is needed. Another necessary salt is potassium chloride. This is a little harder to find, but it’s one of the ingredients in a specific brand of salt substitute: Morton’s. Again, very little is required, but its presence in sake brewing water is necessary for yeast fermentation.
Yeast
Speaking of yeast, one of the most commonly used sake yeasts in the world is fortunately available from Wyeast. It’s called Sake #9, but the Wyeast designation is WY4134. Add a note to your calendar plan to give yourself enough time for the smack pack to inflate—usually two or three days, depending upon the freshness of the pack. You want it almost fully inflated when you add it to your “seed mash” or shubo.
Koji
Sake Ingredients (for 5–6 gal)
- Wyeast 4134 Sake yeast
- 30 lb. (13.6 kg) polished sake rice or short grain table rice (Kokuho Rose works well)
- 7.5 lb. (3.4 kg) koji rice
- 11.5 mL 88% lactic acid (available from any good homebrew shop)
- 0.4 oz. (12 g) wine yeast nutrient
- 0.07 oz. (2 g) Epsom salt
- 0.74 oz. (21 g) Morton Salt Substitute (only this brand!)
- 6 gallons (23 L) reverse osmosis or distilled water
- Bentonite or Sparkolloid clarifying agents (optional)
- Silicone antifoam (optional)
What is koji? It’s rice that has been covered with mold. Not very appealing by the sound of it, but this is a special type of mold—Aspergillus orzyae—that contributes the enzymes necessary to turn starch into sugar. Rice doesn’t have the same naturally occurring amylase found in barley malt. That’s where koji comes in. The mold is first grown on cooked rice in a warm, humid environment. One of the best sources for koji is SakeOne in Forest Grove, Oregon. Their koji is grown on rice, which is then dried, packaged in convenient 40-ounce bags, and sold through FH Steinbart in Portland, Oregon. About the only alternative source is Cold Mountain koji, which is available through some grocery chains. When the koji is mixed with water, steamed rice, and yeast, the mold creates sugar from starches in the steamed rice, even as the yeast creates alcohol from the sugar. This “parallel fermentation” allows the yeast to metabolize sugars and produce ethanol gradually, boosting its tolerance and allowing it to reach astounding concentrations of alcohol.
Rice
Depending upon the degree of polish the rice has, sake fermentations can be as high as 22 percent ABV. Polishing the rice before it is steamed results in cleaner, smoother sake, but it is lower in alcohol, usually a maximum of 18 percent ABV. Rice used by the big sake breweries is always polished, sometimes down to 50 percent of the original, husked rice kernel. Table rice, by comparison, is rarely polished more than 10 percent. Because of the extra bran oils surrounding the core of the kernel, fermentation proceeds further, but the resulting sake has a harsher taste. It’s a bit like trub in the brewing world: a little will help your yeast, but too much will degrade the quality of the finished product.
Rice grown and polished specifically for making sake is difficult to find outside of Japan. There are a few sources for California-grown rice that has been polished specifically for sake making, including SakeOne, again sold to the public via FH Steinbart. However, you can still make very good sake with table rice. I’ve had the best luck with California short-grain rice and rice specifically grown for sushi. Kukoho Rose makes good sake, and it will ferment out to above 20% ABV. I’ve found that sourcing this rice through a big-box store like Costco can make sake-making very cost effective.
Other Ingredients
Other ingredients necessary for the recipe and method below are fairly easy to come by, though they may not all be available from your local homebrew shop. You will need 88% lactic acid (liquid), wine yeast nutrient, sanitizer, Bentonite or Sparkolloid (wine clarifying agents), and, as mentioned above, Epsom salt and Morton Salt Substitute—these last two can usually be found at the grocery store. You may also find a silicone antifoam product like Fermcap S to come in handy; shortly after the last addition of steamed rice, koji, and water, you have the full volume of fermenting sake, and it can a create prodigious amount of yeasty foam, even at a low, controlled temperature. Depending upon your fermenter setup, you may want to add the antifoam to control fobbing and overflow.
Why add acid? As with beer, a lower pH protects the ferment from competing bacteria and yeast. Japanese toji, the sake masters, realized this, and acidity has always been a part of making sake. Over time, a couple of different acidification methods have evolved. The more traditional yamahai moto method relies on lactic bacteria introduced by using your (clean, but not sanitized) hands to mix the rice. This can result in too much acidity, however, and it relies heavily on pasteurization toward the end of the process to limit the continued production of lactic acid. (Besides, there’s something kind of yeaughh about making any food product with human-sourced bugs. For example, I like the idea of chicha corn beer made with human saliva, but I’d really rather not taste it. Call me limited.)
A more modern method called sokujo moto is my preference, and the method we’ll be using. It doesn’t rely on bacteria, but rather on one initial addition of 88% lactic acid to the yeast starter. With this method, you don’t ever touch the mash with your hands, but instead stir it with utensils that can be pre-sanitized to avoid introducing bacteria. This also keeps total acidity lower, and avoids the heavy reliance on pasteurization (though pasteurization is still recommended to stabilize the finished product). It means you have to sanitize everything that comes in contact with your sake, just as you would when making beer.
Equipment
You will also need some specialized equipment. Some things you may already have on hand include
- A 3-gallon stainless steel stockpot with lid to use for your yeast mash
- A 5-gallon carboy to use as a secondary fermenter
- Glass growlers for settling the lees
- Transfer tubing
- A brew kettle for bulk pasteurization
- Ideally, a temperature-controlled chest freezer or fridge
But because the process differs from homebrewing in a few specific ways, it will be worth investing in some extra equipment just for sake making. The most important of these items is a large steamer. You will be steaming, not boiling your rice before it is added to the ferment. Why? I suspect there are a couple of reasons, but Fred Eckhardt, who quite literally wrote the book on sake-making in the U.S., was quite adamant about it. You cannot make sake with boiled rice! That means no rice cookers!
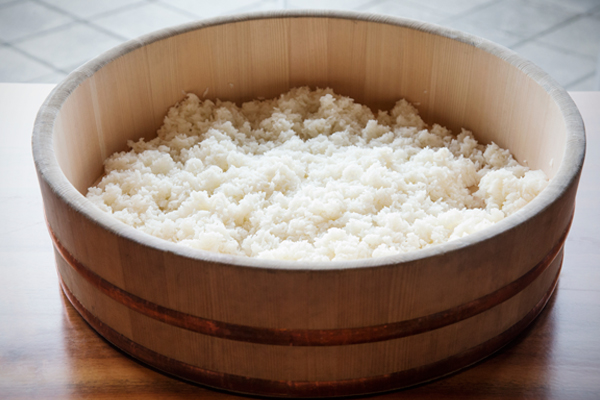
One reason is that boiling makes the rice too soft. You want to gelatinize the rice starches so that they are accessible by koji amylase, but you have to keep the parallel fermentation in balance. Too much starch too fast will throw off this balance, and you’ll get too much sugar too soon. The sugar needs to be converted from starch at roughly the same rate as the yeast can convert it to alcohol. Thus, the kernels of rice need to be cooked over, not in, boiling water. Steaming gelatinizes the rice grains, but keeps them firm and chewy, so they give up their starches slowly.
Also, boiled rice makes separation from the lees post-fermentation very difficult, as it results in a thick, gluey mass that sets up once it and any remaining yeast and koji settles after fermentation. Liquids have a very difficult time passing through this mass of solids, known as sake kasu, so separating wine from lees becomes even more difficult than it already is. The sturdier structure of steamed rice grains helps with this separation. But more on this aspect of the process later.
Steamers
Steamers are usually metal or bamboo and are most easily found in large Asian food stores. You’ll need one that will allow you to steam 15 pounds of rice in one session. You’ll also get more even steaming if you limit the number of tiers to no more than two, though it’s best to switch the tiers halfway through the one-hour steam. I use an aluminum steamer with perforations large enough to allow steam to pass through, but too small for a kernel of rice. Bamboo steamers can also work, as well as metal steamers with larger perforations, but you will need to line them with a single layer of cheesecloth.
Fermenter
You will also need a large (30-gallon) fermentation vessel. I have found that a food-grade plastic storage bin from a restaurant supply store works great for this purpose. It’s like a medium-sized plastic trash bin and is a perfect fit for a temperature-controlled chest freezer. The handles allow you to wrestle it out, partially filled with sake and kasu, when it’s time to rack to secondary. You can also sanitize it with a foaming acid sanitizer. Just make sure it’s only used for sake, and try to keep it clean and scratch-free when it’s not in use.
Miscellaneous Equipment
Useful but not necessary are food-grade plastic rectangular storage bins. These are used as intermediary vessels to mix steaming hot rice and the chilled, measured water addition before it’s added to the main fermenter.
You’ll also need a mixing spoon (stainless is my preference, so I can sanitize it easily) and a longer-handled spoon to stir the ferment. This can be a brew spoon if you are confident you can sanitize it before use. It needs to be long enough to reach to the bottom of your fermenter for thorough stirring.
Ice cube trays are a bonus, but you can freeze your water additions in stainless steel bowls; even a partial, overnight freeze will work fine. You just need to chill down your fresh-steamed rice quickly, so that it can be added to the fermenter at the correct temperature.
Finally, a sturdy nylon mesh bag, preferably one that will fit a 5-gallon bucket, is useful for straining the finished wine from the settled sediment (kasu). For this batch size, the mass of kasu is considerable, so you may need help tying it off and suspending it at the correct height; I’ve used a small aluminum ladder to hang the bag of lees in my garage for several hours, but you can also use several small bags if one large one is unmanageable.
Equipment
- Temperature-controlled chest freezer (optional but highly recommended!)
- Large steamer (big enough to steam 15 lb. of rice!)
- 23-gallon plastic hot food pan (for stirring hot rice)
- Quick-read thermometer
- Long-handled, stainless steel spoon
- 3-gallon stainless steel stockpot with lid (for yeast mash)
- Food-grade 30-gallon plastic trashcan or food storage bin with lid (fermentation vessel)
- Ice cube trays (optional) and freezer
- Accurate scale (everything is measured in metric weight units for this recipe)
- Thermometer
- 5-gallon carboy
- Transfer tubing
- Brown glass growlers
- Brew kettle for pasteurizing a carboy or keg
- 5-gallon-sized nylon mesh bag (for separation of lees)
- Clean 5-gallon bucket (for separation of lees)

Process
Once you have collected the equipment and ingredients for your batch, you can begin planning out the process and building your timeline or calendar. The first week is relatively simple. You’ll be building up and fermenting your yeast starter, as you would with brewing. You’ll mix water with nutrients, koji, and a bit of steamed rice with the yeast; that “seed mash,” called shubo, will then ferment for several days to build up the yeast. Most of the real work for you takes place during the second week. That’s when you double the volume of your starter three times; these additions of water, koji, and rice are called, in order, hatsuzoe, nakazoe, and tomezoe.
Koji always goes in the night before you process rice; for odori, you add it to the shubo yeast mash. Once the rice and water is added the next day, the whole mash is transferred to your main fermenter. At the same time koji is measured and added the night before, the water addition is measured, with part of it going into the freezer. This is so that when you finish steaming the rice the next morning, you can mix in ice water to bring the hot rice down to at 70° F (21° C) or cooler before adding it to your active yeast. With the third doubling, you’ll be processing 15 lbs (6.8 kg) of rice: washing, soaking, draining, steaming, then mixing with ice water.
Let’s take a look at each one of these. Know in advance that soaking, draining, and steaming will each take an hour, so you are looking at 4 hours of work for each rice addition.
Washing
To wash rice for the table, it’s recommended that you rinse three times in cold water, dumping the turbid, white water with each rinse. With sake, the rice needs to be cleaner: that wash water should run clear. Using a large bin for washing can be effective, and scrubbing the rice between your hands can also hasten the process. For larger amounts, I’ve found that using one of the large aluminum steamer trays and the sink sprayer also helps.
Soaking
Once the rice is clean and free of dust or talc, scrape it carefully into a large bowl and cover with a couple of inches of cold water. If you are extra cautious, or happen to have tap water with any amount of iron in it, use filtered water for soaking. Rice will absorb quite a bit of this water as it soaks, and that’s what you want: the absorbed water is what gelatinizes rice starches during steaming.
Draining
Use a colander or a cheesecloth-lined steamer tray to drain the rice. While it’s draining, you can prepare your steamer and bringthe water to a boil.
Steaming
Using no more than two trays above your boiling water, steam the rice. I start timing when I can see steam escaping from the lid over the rice. Make sure you check your steamer after 30 minutes to rotate the trays top to bottom and check on the water level below; you definitely don’t want it to run dry.
Cooling and Mixing
While the rice steams, remove your ice and water, and clean your mixing vessel, quick-read thermometer, and spoon. Large chunks of ice are best broken up into pieces. (Ice cube trays really help with this but are not strictly necessary.) Dump the hot rice directly from the steamer into the mixing bin, then add your ice water. As you stir, breaking down chunks of steamed rice and lowering/evening the temperature of the mixture, have your thermometer ready to take readings. Once past 70° F you can bring the bin out to your fermenter and add the rice mixture, though continued cooling to 60° F or lower is preferable if you can manage it. If chunks of ice remain in the mixture, don’t worry, it will melt, and should not adversely affect the main ferment. Colder is always better. Make sure you stir the main mash to integrate each addition and equalize the temperature.
Temperature Control
Sake yeast ferments well at lower temperatures, much like lager yeast, but the seed mash or shubo should ferment at 70° F (21° C) to maximize cell growth. After a week of this, lower the shubo mash temperature to 55° F (13° C). Once the doubling additions begin, your sanitized, main fermenter should be placed in a temperature-controlled chest freezer so that you can lower the temp with each addition. The first addition (hatsuzoe) will equalize around 65° F (18° C) once the yeast mash is added, and should be lowered slowly to 55° F (13° C) during fermentation. (This “primary” fermentation stage is now called the odori, or dancing ferment, and you will get some delicious bready, fruity aromatics as it bubbles away.) The middle addition (nakazoe) will equalize close to 60° F (16° C), and should be lowered to 50° F (10° C) during fermentation. The final addition (tomezoe) will equalize close to 55° F (13° C) and should be lowered to 45° F (° C) during fermentation. From there, your main ferment can proceed at 45° F (7° C). If for whatever reason this is impractical, you can conduct fermentation at a higher temperature—as high as 55° F (13° C) —but at no time should the main ferment exceed 65° F (18° C).
Stirring
As fermentation takes place, be it in the seed mash or the main ferment, stirring is critical. You will have to stir every 12 hours. As with the steamed vs. boiled rice question, the reason behind this has to do with keeping the fermentation in balance. Agitation keeps starches in contact with enzymes and the resulting sugars in contact with yeast. The rice, koji, and yeast mixture is slowly broken down from semisolid to mostly liquid during fermentation, so regular stirring is necessary, at least initially, to evacuate CO2, and hasten the breakdown of solids.
Once you are done with the three doubling additions, all the ingredients are in the fermenter, and it’s time to cool everything way down and let the yeast do their thing. This is the main ferment, or moromi, and it will last at least one week, depending upon fermentation temperature. With temperature control and a cold ferment, which is ideal, the main ferment can take up to two weeks. The final yodan stage is the adjustment stage where water is added to bring the ~20% ABV final product from full strength (genshu) sake down to an easier-drinking 15-16% ABV by diluting with water. We’ll look at each one of these in turn as we go through the process schedule.
Fermentation Schedule
The schedule will look something like this.
Day 1
Inoculate smack pack of Wyeast 4134
Day 2 (or when smack pack is almost fully inflated)
Prepare water:
- 1,860 ml reverse osmosis or distilled water
- 11.4 ml 88% lactic acid
- 12 g wine yeast nutrient
- 1.4 g Epsom salt
- 21 g Morton’s Salt Substitute
Blend water to dissolve solids. Remove 360 ml of this mixture, cover and freeze overnight. Cover the remaining 1500 ml and keep at room temperature overnight.
Day 3
Measure and prepare 1,020 g rice by washing, soaking, and draining it as above. While you are waiting for it to soak one hour and drain one hour, add the contents of the inflated yeast pack to the 1,500 ml prepared water, working with maximum sanitation. Measure and add 345 g koji to the yeast and water mixture. Cover and let stand at room temperature. Meanwhile, steam the rice, checking it partway through to make sure you have enough boiling water for the full one-hour boil. Have your mixing tray, spoon, stockpot with lid, thermometer (all sanitized), and 360 ml ice ready. As soon as the rice is done, pour it into the tray, stir in the ice, and break up any chunks; you should soon have a 70° F (21° C) or cooler mass of rice of uniform consistency. Blend the cooled rice with the yeast, water, and koji mixture in the sanitized stockpot, cover, and leave at room temperature.
Day 3.5
12 hours after blending the shubo mash, sanitize your steel spoon and stir the mash gently for about five minutes. You will need to repeat this every 12 hours (twice daily) for three more days.
Days 4, 4.5, 5, 5.5 & 6
Stir the shubo mash as above, every 12 hours. After the third day of fermentation at room temperature, you can then leave the yeast mash alone until you are ready to begin the main ferment. Depending upon your calendar, you may want to wait a full 7 days, so you can start the main ferment on a weekend; that’s fine. Assuming this is your plan, Day 6.5 will be the night before you steam rice for the first main addition.
Day 6.5: Hatsuzoe prep
The night before you start the main ferment, you’ll need to measure out 675 g koji and add it to your shubo yeast mash along with 1,065 ml RO water. Now is the time to have your temperature-controlled chest freezer empty and ready, and your sanitized, plastic main fermenter, with lid, lowered into it. Set the temperature to 59° F (15° C) and place the covered stockpot with the yeast mash in it. Now, measure out 885 ml and freeze it for the next morning’s steamed rice.
Day 7: Hatsuzoe
In the morning, measure and prepare 1,710 g rice by washing, soaking, and draining it as above. While you are waiting for it to soak one hour and drain one hour, lower the chest freezer with the main fermenter in it to 55° F (13° C). When the washed and soaked rice is fully drained, steam it, checking it mid-steam to swap trays top to bottom and to make sure you have enough boiling water for the full one-hour boil. Have your mixing tray, spoon, stockpot with lid, thermometer, (all sanitized) and 885 ml ice ready. As soon as the rice is done, pour it into the tray, stir in the ice, and break up any chunks; you should soon have a 65° F (18° C) or lower mass of rice, of uniform consistency. A lower temperature is better—try to get it to 60° F (16° C) if possible. This will put less stress on your yeast. Blend the cooled rice into the main ferment thoroughly. Cover.
Day 7.5
12 hours after you’ve added your first main rice addition; stir the contents of the fermenter thoroughly with a sanitized brew spoon. Make sure you reach all the way to the bottom of the fermenting rice mixture. Repeat at 12-hour intervals for a total of 48 hours.
Day 8
Stir the main ferment as above.
Day 8.5: Nakazoe prep
Now you will prepare for the second main rice addition. Measure out 1,020 g of koji and 3.6 L RO water and add both to the main fermenter. Stir thoroughly as you have been doing every 12 hours. Measure 2,610 ml of additional RO water and freeze it for your rice steaming tomorrow morning. At this point, your chest freezer should still be set to 55° F (13° C) and hopefully your active (“dancing,” or odori) ferment shouldn’t be much warmer than 59° F (15° C).
Day 9: Nakazoe
In the morning, measure and prepare 4.08 kg rice by washing, soaking, and draining it as above. While you are waiting for it to soak one hour and drain one hour, lower the chest freezer with the main fermenter in it to 48° F (9° C). When the washed and soaked rice is fully drained, steam it, checking it mid-steam to swap trays top to bottom and to make sure you have enough boiling water for the full one-hour boil. Have your mixing tray, spoon, stockpot with lid, thermometer, (all sanitized) and 2,610 ml ice ready. As soon as the rice is done, pour it into the tray, stir in the ice, and break up any chunks; you should soon have a 60° F (16° C) or lower mass of rice, of uniform consistency. A lower temperature is better—try to get it to 50° F (10° C) if possible. This will put less stress on your yeast. Blend the cooled rice into the main ferment thoroughly. Cover.
Day 9.5: Tomezoe prep
Now you will prepare for the third and final main rice addition. Measure out 1,362 g (or whatever is left) of koji and 12.9 L RO water, and add both to the main fermenter. Stir thoroughly as you have been doing every 12 hours. Measure 2,610 ml of additional RO water (yes, this is the same volume you froze for the previous addition) and freeze it for your rice steaming tomorrow morning. Lower your chest freezer to 50° F (10° C) and hopefully your ferment shouldn’t be much warmer than 55° F (13° C).
Day 10: Tomezoe
This is the big one. In the morning, measure and prepare 6.8 kg (yup, that’s 15 lbs) rice by washing, soaking, and draining it as above. While you are waiting for it to soak one hour and drain one hour, lower the chest freezer with the main fermenter in it to 45° F (7° C). When the washed and soaked rice is fully drained, steam it, checking it mid-steam to swap trays top to bottom and to make sure you have enough boiling water for the full one-hour boil. Check the rice to make sure it is steaming evenly; with this large a volume, you may want to stir the rice in the trays at the midway point when you swap them, just to make sure everything is cooking (gelatinizing) as it should. Have your mixing tray, spoon, stockpot with lid, thermometer (all sanitized), and 2,610 ml ice ready. As soon as the rice is done, pour it into the tray, stir in the ice, and break up any chunks; you should eventually have a 55° F (13° C) or lower mass of rice, of uniform consistency. A lower temperature is better—try to get it as close to 45° F (7° C) as possible, but don’t worry if it’s warmer than that—the large fermentation volume will bring the new addition down to the proper temperature quickly. Blend thoroughly. Take a deep breath of the delicious, estery aromas—banana, melon, black walnut—rising from your fermenter. If the fermenting volume looks as though it might foam up beyond your fermenter’s capacity, you might consider adding a small amount (3 ml) of silicone antifoam, sanitized in 10–15 ml boiling water to keep it under control. Cover.
Days 10.5, 11, 11.5
From here, your only task will be to stir the main ferment every 12 hours for the first two days (48 hours) of fermentation. Keep the temperature set to 45° F (7° C) or as near as you can manage. Make sure your sanitized brew spoon is long enough to reach all the way to the bottom of the fermenter. At the lower end of the temperature range, which may be as high as 60° F (16° C) though this is not recommended, fermentation can take up to two weeks. At higher temperatures, it can be over in a week. Begin taking gravity readings of the sake after about 6 days. Once the sake begins to approach 1.000 specific gravity (see yodan stage below) you can begin to consider racking.
Day 18 to 24: Water adjustment (yodan)
Depending on whether you used highly polished sake rice or table rice, the strength of your uncut, full-strength (genshu) sake will vary a bit. Polished rice will give you a final strength of around 18% ABV, while table rice will be around 20–22% ABV. This will also vary with how dry you’d like it. If you like sweeter sake, rack the sake sooner—at 1.003 specific gravity—which equates to -4.3 SMV (Sake Meter Value) on the sake sweetness scale, if you are familiar with authentic, high-quality bottled sake. If you prefer a drier product, wait a little longer, until the sake has attenuated to 0.995 specific gravity (+5.8 SMV). Personally, (and much to Fred’s horror) I prefer bone-dry, genshu sake of +15 SMV so I wait until it reaches 0.990 before racking and clarifying. It takes more time, as the yeast is understandably exhausted by this time, but with table rice, it is definitely capable of reaching this level of dryness.
But if you’d rather not have genshu sake, and would like to target a more conventional strength, then regardless of how sweet your finished sake is, you’ll want to add water to bring the ABV down to 15 to 18%. Be careful about adding too much water—it’s much like adding salt, in that you can’t undo it. For this batch size, an addition of 2.3 to 2.6 L of boiled, chilled water will put you in the 16.5% ABV range. Why boiled? Because at this stage you will need to be very careful about oxygen uptake. As with finished beer, your alcoholic beverage now is very susceptible to oxidation, and oxygen will add cheesy flavors and aromas to sake. It can also color it an unattractive yellow. Your sake, if made with table rice, will already have more color than most store-bought brands made with polished rice, especially if you choose to go the genshu route. But please take every precaution to keep oxygen out, and if you choose to dilute your sake, that means removing as much oxygen from the water addition as possible; so boil it a good 15 minutes, then chill it before adding.
Adding this DO (de-oxygenated) water addition prior to racking allows whatever yeast are still on duty to scavenge and metabolize any remaining traces of oxygen and hopefully leave you with a largely oxygen-free final product.
Racking and Separation of Lees
After two full weeks of primary fermentation (and if you’ve added water, wait another three days), your sake will be ready to rack. Have a brew buddy help you lift the primary fermenter up out of, and onto your chest freezer. Use a sanitized siphon hose to rack as much liquid as you can off the top of the fermenter and into a sanitized 5-gallon bucket lined with your sanitized nylon mesh bag. Again, be mindful of oxygen during this process. As an added precaution, I usually dose the receiving bucket with a blanket of CO2, and try to limit splashing the wine as much as possible. The sake will be milky white, and there may be solids suspended in it that will eventually clog your transfer hose. That is normal; your nylon mesh bag will catch the solids. Get as much liquid as you can, then use your transfer hose to rack that liquid from outside of your nylon mesh bag to a sanitized, CO2-blanketed, 5-gallon carboy.
The solids from the fermenter can now be transferred to the mesh-lined bucket. Once all the solids are in the nylon bag, it can be gathered and tied at the top, then lifted gently to allow liquid trapped in the kasu to drain into the bucket; that liquid can then be racked into the carboy. You should be able to fill the carboy to the very neck, and still have around a gallon of wine left over if you let the bag drip for several hours or overnight. Add a stopper and air lock to the carboy and place it back into the chest fridge at 45° F (7° C) to settle. It may ferment a bit more, since you will have released some starches and sugars during the racking and pressing of the lees; that’s fine, as the yeast may be able to scavenge any accidentally introduced oxygen as well.
The remaining wine that drips into the bucket can be bottled up into one or more glass growlers (brown glass if possible, as your sake is susceptible to light at this stage, as well as oxygen). Use stoppers and airlocks for all secondary containers, and try to fill them up to the neck with wine. Eventually, after a full night of your bag of kasu draining, the dripping will slow. It is possible to use a wine press at this stage to squeeze every last drop of wine from the kasu. Check the carboy and growlers in your chest fridge periodically to monitor clarity. Sparkolloid or Bentonite can be used as fining agents to speed up this process, which can take up to two weeks. Once it has reached your preferred level of clarity (and you may want to rack it off the lees into separate sanitized and blanketed carboys) the clear wine can then be pasteurized and packaged.
And don’t throw away that kasu! It’s great as a marinade for fish and chicken, it can be baked into bread dough for a super-crispy crust (and it makes an amazing pizza crust), or it can be used to make traditional Japanese pickles…the culinary uses are endless. Just do an online search for sake kasu recipes. Bagged kasu keeps just fine in the freezer or fridge.
Pasteurization and Packaging
I use the term “pasteurization” loosely—Japanese sake masters (toji) discovered long before Louis Pasteur’s time that heating their finished sake for a brief period before packaging it preserved its quality. The enzymes in the koji are deactivated, yeast metabolism is halted, and any live bacteria residing in the beverage is shut down. The process basically stabilizes the wine so that it can be kept for several months at room temperature. Of course, if you have the fridge space, you don’t have to pasteurize at all, but you’ll have to keep this unpasteurized wine at 33 to 40° F (1 to 4° C) until it is consumed. This “fresh” sake is called nama, and is often referred to as “draft sake.”
If you choose to bottle and heat-stabilize your sake, it can be pasteurized right in the bottle by using your trusty stockpot on the stove. Fill the stockpot half full with water, put in as many bottles of sake as will fit in the bath, and slowly heat the water to 140° F (60° C). Make sure the water outside comes up to the level of the wine in the bottles. Sanitize a thermometer and stick it in one of the bottles to monitor wine temperature; when the wine reaches 140° F (60° C), you may remove the bottles, cap them and allow them to cool, repeating the process with more bottles as necessary. Make sure the caps you use are boiled to sanitize them. Ordinary bottle caps are fine; oxygen-scavenging caps are better. Please don’t use real wood corks, as they will taint the delicate flavor of the sake—artificial corks should be OK.
If you like the idea of draft sake, you can rack your clear wine to a 5-gallon keg, which can then be pasteurized in bulk, if you have a large enough kettle—I use my brew kettle for this purpose. Of course, if you are kegging your sake, you can keep it as nama, as long as it remains refrigerated. For an extra (though wholly non-traditional) twist on genshu sake, you can even force-carbonate the cold wine and serve it sparkling, or bottle it from the keg using a counter-pressure filler. Most sparkling sakes that are refermented in the bottle have to be diluted to around 12% ABV for that refermentation to take place. (Fresh yeast and dextrose will need to be added at bottling if you want to try your hand at sparkling sake.) Bottling force-carbonated sake from the keg, however, circumvents that restriction. There is something beautifully Champagne-like about a chilled, highly sparkling, 20%-ABV, sediment-free, bottled genshu! It definitely adds a spritzy dryness to the beverage, but I find it quite to my taste, and you might as well.
Amahl Turczyn is Associate Editor for Zymurgy magazine.
Sources and Resources
- Most of this information comes from Fred Eckhardt’s “New Sake Recipe,” which can be found in .pdf format at http://www.designerinlight.com/eckhardt-sake.pdf.
- His original book, Sake (USA) is a bit harder to find, but outlines the yamahai moto method in glorious detail.
- Another great resource, especially if you want to try your hand at making your own koji rice, is http://www.taylor-madeak.org/.
The post How to Make Sake at Home appeared first on American Homebrewers Association.